주요 콘텐츠로 건너뛰기
수리 커뮤니티 가입 - 계정 만들기

OnePlus 3 Back Cover Replacement

필요한 것

  1. OnePlus 3 Back Cover Replacement, SIM Card Tray: 1 단계, 이미지 3개 중 1개 OnePlus 3 Back Cover Replacement, SIM Card Tray: 1 단계, 이미지 3개 중 2개 OnePlus 3 Back Cover Replacement, SIM Card Tray: 1 단계, 이미지 3개 중 3개
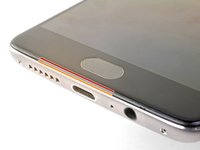
    • Insert a SIM eject tool, bit, or straightened paperclip into the hole located between the SIM card slot and the power button.

    • Press firmly to eject the SIM card tray.

    • During reinstallation, make sure that the SIM card tray is properly oriented. It fits in only one direction.

    댓글 쓰기

  2. OnePlus 3 Back Cover Replacement, Back Cover: 2 단계, 이미지 1개 중 1개
    • Remove the two 2.6 mm T2 screws from the bottom edge of the phone.

    댓글 쓰기

  3. OnePlus 3 Back Cover Replacement: 3 단계, 이미지 3개 중 1개 OnePlus 3 Back Cover Replacement: 3 단계, 이미지 3개 중 2개 OnePlus 3 Back Cover Replacement: 3 단계, 이미지 3개 중 3개
    • There is a high risk of damaging the display panel if this opening procedure is improperly followed.

    • The following three steps show how to pry the rear case from the plastic frame. Read through the steps first before attempting the procedure.

    • There are two different seams between the screen and the body of the phone:

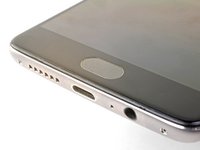
    • Display panel seam: This seam is part of the display assembly. Do not pry at this seam, or you will separate and damage the display panel.

    • Frame seam: This is where the plastic frame meets the back cover. It is recessed into the back cover. Only pry at this seam.

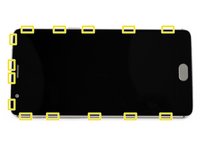
    • There are fourteen clips that hold the frame against the rear case. Be aware of their location as you pry the back cover off in the following steps.

    댓글 쓰기

  4. OnePlus 3 Back Cover Replacement: 4 단계, 이미지 3개 중 1개 OnePlus 3 Back Cover Replacement: 4 단계, 이미지 3개 중 2개 OnePlus 3 Back Cover Replacement: 4 단계, 이미지 3개 중 3개
    • As you work, try not to accidentally power on the phone. If you do, turn the phone off before resuming disassembly.

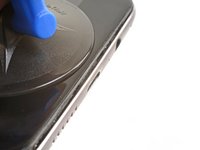
    • Place a suction cup near the bottom edge of the display.

    • Pull on the suction cup with strong steady force.

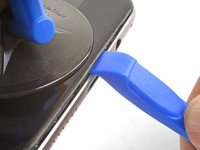
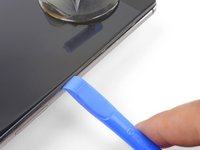
    • Press the edge of an opening tool straight into the frame seam near the suction cup until the edge wedges between the plastic frame and the back cover's lip.

    • Due to tight tolerances, this will take substantial force. Using a new opening tool with an unmarred edge will help with this step.

    • Do not use metal tools, as they will most likely crack the screen.

    댓글 쓰기

  5. OnePlus 3 Back Cover Replacement: 5 단계, 이미지 3개 중 1개 OnePlus 3 Back Cover Replacement: 5 단계, 이미지 3개 중 2개 OnePlus 3 Back Cover Replacement: 5 단계, 이미지 3개 중 3개
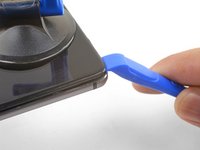
    • Once the opening tool's edge is wedged in position, carefully slide the tool along the bottom edge of the phone.

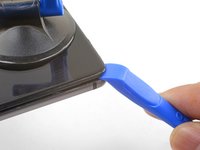
    • Carefully guide the opening tool around the left corner of the phone while keeping the tool's edge within the seam.

    댓글 쓰기

  6. OnePlus 3 Back Cover Replacement: 6 단계, 이미지 2개 중 1개 OnePlus 3 Back Cover Replacement: 6 단계, 이미지 2개 중 2개
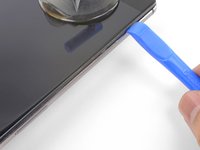
    • Continue sliding the opening tool along the long edge, releasing the clips along the way.

    • The last clip in the top-left corner near the alert switch is recessed and can be difficult to release. Take your time and use the flat end of a spudger or an opening pick to help.

    댓글 쓰기

  7. OnePlus 3 Back Cover Replacement: 7 단계, 이미지 3개 중 1개 OnePlus 3 Back Cover Replacement: 7 단계, 이미지 3개 중 2개 OnePlus 3 Back Cover Replacement: 7 단계, 이미지 3개 중 3개
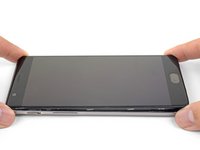
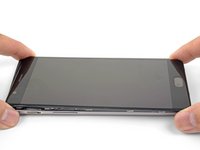
    • With the bottom and left edge of the phone freed, gently wiggle the frame to release the top and right edge clips.

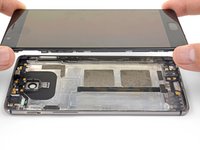
    • Lift the screen up and remove it.

    • During reassembly, pause here to test your phone's functionality before securing the back cover.

    • To reinstall the back cover:

    • Align the top edge of the frame to the back cover and ensure that the top clips slip into place.

    • Squeeze along the long edges of the phone to snap the remaining clips into place.

    댓글 쓰기

결론

To reassemble your device, follow these instructions in reverse order.

Take your e-waste to an R2 or e-Stewards certified recycler.

Repair didn’t go as planned? Check out our OnePlus 3 Answers community for troubleshooting help.

취소: 해당 안내서를 완성하지 않았습니다.

다른 5명이 해당 안내서를 완성하였습니다.

작성자

2다른 기여자 명과 함께

Arthur Shi

회원 가입일: 01/03/18

337,801 평판

안내서 851개를 작성함

0가이드 댓글

댓글 쓰기

조회 통계:

지난 24시간: 3

지난 7일: 15

지난 30일: 52

전체 시간: 23,220