소개
If your device is not charging properly or not turning on at all, it may be time to replace the battery in your device. This guide will illustrate the steps that you will need to take in order to replace the battery in your Oontz Angle 3 ULTRA. Soldering is a necessary skill to complete this guide, so please read the How to Solder and Desolder Connections Guide for more information.
필요한 것
-
이 단계에 사용된 도구:Tweezers$4.99
-
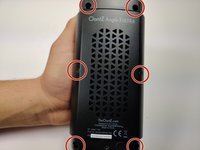
Remove the two black rubber sheaths around the edges of the speaker.
-
Under the symbol-marked sheath there is a white rubber covering for the buttons. Peel this away to reveal the panel underneath.
-
On two corners of its triangular face there is a small divot, which allows you to use your fingernails or a pair of tweezers to grip and peel away the covering.
 FixBot에 문의하기
-
-
-
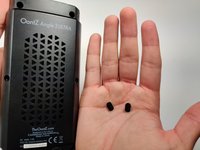
Using a pair of tweezers, pinch and pull the rubber fillings obstructing the screws.
-
-
-
-
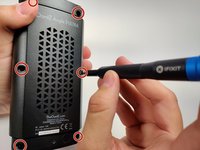
Using a JIS #0 screwdriver, remove the 6 screws holding the backplate in.
-
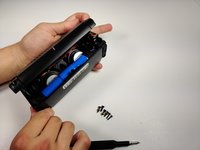
Remove the back panel off of the device.
-
-
-
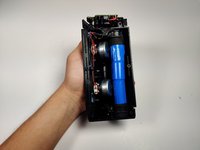
Once the motherboard is exposed after disassembly, follow the thick black and red cords from the battery pack to their attachments to the board.
-
Use the soldering iron to melt the positive and negative connections.
-
-
-
After you have disconnected the battery from the motherboard, use a box cutter or exacto knife to carefully cut the blue wrapping around the battery.
-
-
-
Once cut, it should require no more than your fingers to peel away the blue wrapping around the battery, and expose the terminal.
-
-
-
Finally, use the soldering Iron on the two terminals of the battery connection to disconnect it from the wire.
-
To reconnect the battery, solder the two terminal connections, or use the replacement battery's wires to reattach to the motherboard
-


To reassemble your device, follow these instructions in reverse order.
다른 한 분이 해당 안내서를 완성하였습니다.
팀

Embry-Riddle Aeronautical University, Team S6-G9, Rauch Spring 2020 Embry-Riddle Aeronautical University, Team S6-G9, Rauch Spring 2020 회원
ERAU-RAUCH-S20S6G9
3 회원들
안내서 6개를 작성함
2가이드 댓글
Could you please provide a source / part # for the replacement battery?
Is it just two 18650 style 3.7 Volt lithium batteries in series or parallel?
Was able to narrow down the issue to the board using a known good 18650 battery. Also have seen a couple forum posts saying it’s the board that goes bad on some of these units. Now I’m starting to wonder if it’s just a bad capacitor or something replaceable with a standard soldering iron…