주요 콘텐츠로 건너뛰기
Philips Norelco BeardTrimmer 3100 Front and Back Panels Replacement

Philips Norelco BeardTrimmer 3100 Front and Back Panels Replacement

Darren Chu

Darren Chu3 다른 기여자

최종 수정일 July 15, 2024

3 분
쉬움
단지 전제 조건
이 안내서는 다른 안내서의 선행 작업으로 사용하기 위한 것입니다. 그 자체로는 불완전합니다.

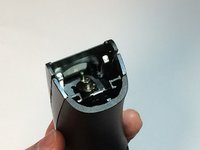
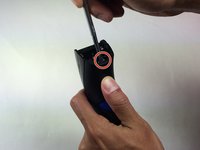
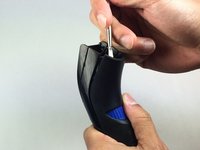
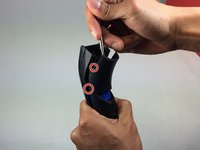
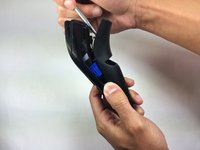
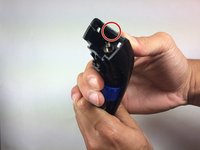
In order to access the internal components of the beardtrimmer, the front and back panels must be removed. This guide will instruct you on the process.

필요한 것

도구

  1. Philips Norelco BeardTrimmer 3100 Front and Back Panels Replacement, Front and Back Panels: 1 단계, 이미지 1개 중 1개
    • Remove the comb from the top of the trimmer.

  2. Philips Norelco BeardTrimmer 3100 Front and Back Panels Replacement: 2 단계, 이미지 2개 중 1개 Philips Norelco BeardTrimmer 3100 Front and Back Panels Replacement: 2 단계, 이미지 2개 중 2개
    • Place your thumb underneath the blade and push upward to remove it.

  3. Philips Norelco BeardTrimmer 3100 Front and Back Panels Replacement: 3 단계, 이미지 2개 중 1개 Philips Norelco BeardTrimmer 3100 Front and Back Panels Replacement: 3 단계, 이미지 2개 중 2개
    • Hold trimmer towards you as shown in the diagram.

    • Insert your prying tool/metal spudger into the marked area.

  4. Philips Norelco BeardTrimmer 3100 Front and Back Panels Replacement: 4 단계, 이미지 3개 중 1개 Philips Norelco BeardTrimmer 3100 Front and Back Panels Replacement: 4 단계, 이미지 3개 중 2개 Philips Norelco BeardTrimmer 3100 Front and Back Panels Replacement: 4 단계, 이미지 3개 중 3개
    • Apply gentle pressure and begin prying open the back panel.

    • Separate the panel one notch at a time. Listen carefully as you're prying the panel apart and notice each individual notch release.

  5. Philips Norelco BeardTrimmer 3100 Front and Back Panels Replacement: 5 단계, 이미지 3개 중 1개 Philips Norelco BeardTrimmer 3100 Front and Back Panels Replacement: 5 단계, 이미지 3개 중 2개 Philips Norelco BeardTrimmer 3100 Front and Back Panels Replacement: 5 단계, 이미지 3개 중 3개
    • Pull the trimmer apart using your hands once the panel is at least halfway apart.

    • Pull the wires attached to the battery off of the power connectors before completely removing the back panel.

  6. Philips Norelco BeardTrimmer 3100 Front and Back Panels Replacement: 6 단계, 이미지 2개 중 1개 Philips Norelco BeardTrimmer 3100 Front and Back Panels Replacement: 6 단계, 이미지 2개 중 2개
    • Hold the trimmer towards you.

    • Place the metal spudger tool in the marked area.

  7. Philips Norelco BeardTrimmer 3100 Front and Back Panels Replacement: 7 단계, 이미지 1개 중 1개
    • Apply gentle pressure and begin prying the front panel.

    • Separate the front panel one notch at a time.

  8. Philips Norelco BeardTrimmer 3100 Front and Back Panels Replacement: 8 단계, 이미지 2개 중 1개 Philips Norelco BeardTrimmer 3100 Front and Back Panels Replacement: 8 단계, 이미지 2개 중 2개
    • Pull the trimmer apart using your hands once the panel is at least halfway apart.

결론

To reassemble your device, follow these instructions in reverse order.

작성자

3다른 기여자 명과 함께

Darren Chu

회원 가입일: 09/03/15

1,617 평판

안내서 3개를 작성함

USF Tampa, Team 15-2, Blackwell Fall 2015 USF Tampa, Team 15-2, Blackwell Fall 2015 회원

USFT-BLACKWELL-F15S15G2

4 회원들

안내서 14개를 작성함

댓글 0개

댓글 쓰기

조회 통계:

지난 24시간: 0

지난 7일: 0

지난 30일: 3

전체 시간: 90