주요 콘텐츠로 건너뛰기

Philips Satinelle Tension Clip Replacement

필요한 것

  1. Philips Satinelle Tension Clip Replacement, Tension Clip Replacement: 1 단계, 이미지 1개 중 1개
    • Remove Tweezer Head by pushing to the left with thumb.

  2. Philips Satinelle Tension Clip Replacement: 2 단계, 이미지 3개 중 1개 Philips Satinelle Tension Clip Replacement: 2 단계, 이미지 3개 중 2개 Philips Satinelle Tension Clip Replacement: 2 단계, 이미지 3개 중 3개
    • Locate the Tension Clip on the removable tweezer head.

    • Begin prying from the right side of the Tension Clip.

    • Finish removal by prying the left side of the Tension Clip.

  3. Philips Satinelle Tension Clip Replacement: 3 단계, 이미지 3개 중 1개 Philips Satinelle Tension Clip Replacement: 3 단계, 이미지 3개 중 2개 Philips Satinelle Tension Clip Replacement: 3 단계, 이미지 3개 중 3개
    • Replace the Tension Clip

    • Insert left side of clip roughly half way in.

    • Insert right side of clip and push both sides down with thumbs.

  4. Philips Satinelle Tension Clip Replacement: 4 단계, 이미지 2개 중 1개 Philips Satinelle Tension Clip Replacement: 4 단계, 이미지 2개 중 2개
    • Use Opening Tool to fully depress Tension Clip in place.

결론

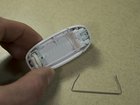
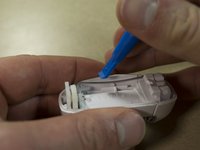
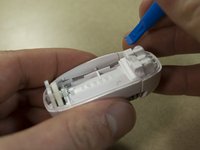
Contact the manufacturer for a replacement Tension Clip.

To reassemble your device, follow these instructions in reverse order.

작성자

4다른 기여자 명과 함께

George Tipker IV

회원 가입일: 11/11/17

148 평판

안내서 1개를 작성함

IUPUI, Team S5-G5, Wilson Fall 2017 IUPUI, Team S5-G5, Wilson Fall 2017 회원

IUPUI-WILSON-F17S5G5

3 회원들

안내서 8개를 작성함

댓글 0개

댓글 쓰기

조회 통계:

지난 24시간: 0

지난 7일: 1

지난 30일: 6

전체 시간: 982