주요 콘텐츠로 건너뛰기

Polaroid PTAB7XC USB Port Replacement

필요한 것

  1. Polaroid PTAB7XC USB Port Replacement, USB Port: 1 단계, 이미지 1/2 Polaroid PTAB7XC USB Port Replacement, USB Port: 1 단계, 이미지 2/2
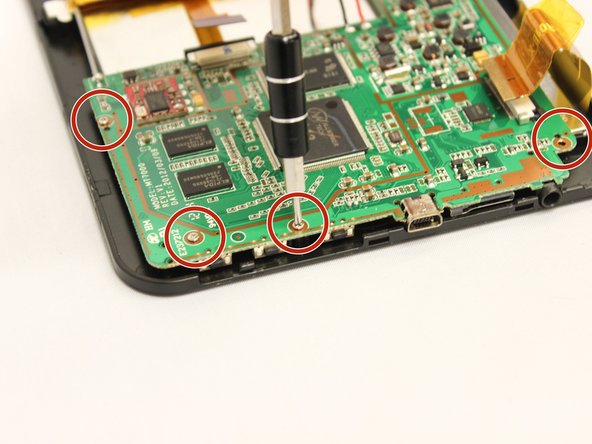
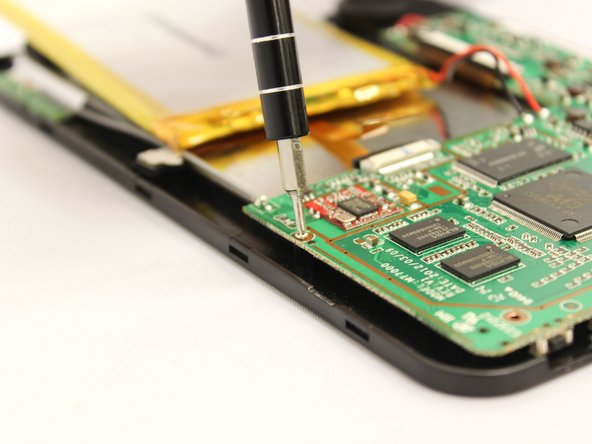
    • Remove the two 7 mm screws on the top of the device using a J00 Phillips screwdriver, turning the screws counterclockwise.

    • If the screw heads have corroded or been stripped, it may be necessary to use a larger screwdriver head, such as the J0.

  2. Polaroid PTAB7XC USB Port Replacement: 2 단계, 이미지 1/2 Polaroid PTAB7XC USB Port Replacement: 2 단계, 이미지 2/2
    • Pry the seam between the screen and the case on all four sides with a large plastic opening tool until the plastic case comes off.

    • Lift the device off of the case and flip over the device so that it sits screen side down.

    • The device is now free from the plastic casing.

    • The power and/or volume buttons may fall out at this point. There is no problem with this; however, be sure to remember to reinstall them when reassembling the device.

  3. Polaroid PTAB7XC USB Port Replacement: 3 단계, 이미지 1/3 Polaroid PTAB7XC USB Port Replacement: 3 단계, 이미지 2/3 Polaroid PTAB7XC USB Port Replacement: 3 단계, 이미지 3/3
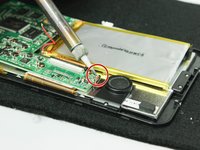
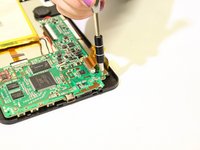
    • Desolder the following components from the motherboard.

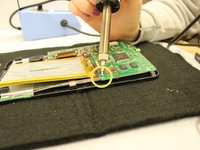
    • Desolder from the motherboard the red wire that connects to the speaker unit.

    • Desolder from the motherboard the black wire that connects to the speaker unit.

    • Desolder from the motherboard the gray wire that runs along the edge of the device.

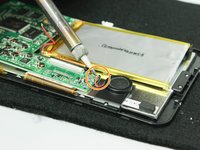
    • Desolder from the motherboard the red wire that connects to the battery unit.

    • Desolder from the motherboard the black wire that connects to the battery unit.

    • The motherboard will now be detached from any wires connecting to the device.

    • If any of the wires do not detach completely during the desoldering process, then gently pull them off using tweezers.

  4. Polaroid PTAB7XC USB Port Replacement: 4 단계, 이미지 1/3 Polaroid PTAB7XC USB Port Replacement: 4 단계, 이미지 2/3 Polaroid PTAB7XC USB Port Replacement: 4 단계, 이미지 3/3
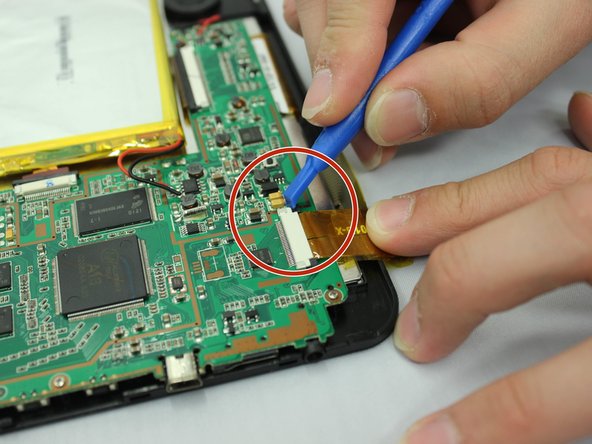
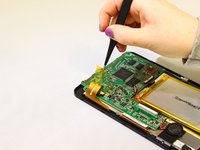
    • Use tweezers to unstick the medium width yellow ribbon cable from the motherboard.

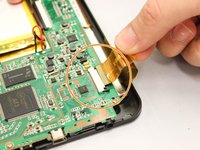
    • Use a small plastic opening tool to slide the two small black holding clips off of the white connector to which the medium width yellow ribbon cable is attached.

    • Use your fingers to gently pull the medium width yellow ribbon cable out of the white connector.

    • Repeat the last two actions to disconnect the narrower yellow ribbon cable and the wider yellow ribbon cable from the motherboard.

    • The motherboard and battery will now be detached from any ribbon cables connecting to the device.

  5. Polaroid PTAB7XC USB Port Replacement: 5 단계, 이미지 1/3 Polaroid PTAB7XC USB Port Replacement: 5 단계, 이미지 2/3 Polaroid PTAB7XC USB Port Replacement: 5 단계, 이미지 3/3
    • Use the PH000 screwdriver remove the four 5 mm screws along the bottom edge of the motherboard, turning the screws counterclockwise.

    • The motherboard is now detached from the device.

  6. Polaroid PTAB7XC USB Port Replacement: 6 단계, 이미지 1/1
    • Lift the motherboard out of the device using your hands.

    • Set the motherboard down on a heat safe surface so that the gray side of the motherboard is face up.

  7. Polaroid PTAB7XC USB Port Replacement: 7 단계, 이미지 1/1
    • Desolder each side of the USB port where it is attached to the motherboard.

    • The USB port will now be loosened from the motherboard.

  8. Polaroid PTAB7XC USB Port Replacement: 8 단계, 이미지 1/1
    • Using tweezers, pull the USB port straight out from the motherboard without wiggling it up, down, or side to side.

    • Wiggling the port may break the small connectors that remain attached to the motherboard.

    • The USB port is now replaceable.

결론

To reassemble your device, follow these instructions in reverse order.

Meg Lybbert

회원 가입일: 10/08/15

649 평판

안내서 5개 작성하였습니다

댓글 0개

댓글 쓰기

조회 통계:

24 시간 전: 0

7일 전: 0

30일 전: 3

전체 시간: 339