소개
Use this guide to reflow the solder on the chips that usually cause the Xbox 360 to have a Red Ring of Death (RROD) failure. You'll need the high temperature output of a heat gun to accomplish the reflow.
Reflowing the motherboard of your Xbox 360 allows the solder balls located beneath the CPU, GPU, RAM, and other chips to reconnect with their contacts on the motherboard. To safeguard against future failure, we strongly recommend installing our Red Ring of Death Fix Kit after completing the reflow.
필요한 것
-
-
Grasp the hard drive assembly and press the release button while lifting its front edge.
-
Remove the hard drive assembly from the top vent.
-
-
-
Insert the flat end of a spudger or the edge of an Xbox 360 opening tool into the small gap at the front edge of the bottom vent.
-
Pry the front edge of the bottom vent away from the faceplate.
-
-
-
Insert the flat edge of a spudger between the faceplate and the outer casing near the power button.
-
Run your spudger along the edge of the faceplate to release the clips securing it to the front of the console.
-
-
-
The top vent is secured to the console via clips. The first two clips are located underneath the top vent closest to the faceplate, as shown in the pictures.
-
-
-
Stand the console vertically with the top edge facing down.
-
Carefully peel the warranty sticker off the console.
-
-
-
-
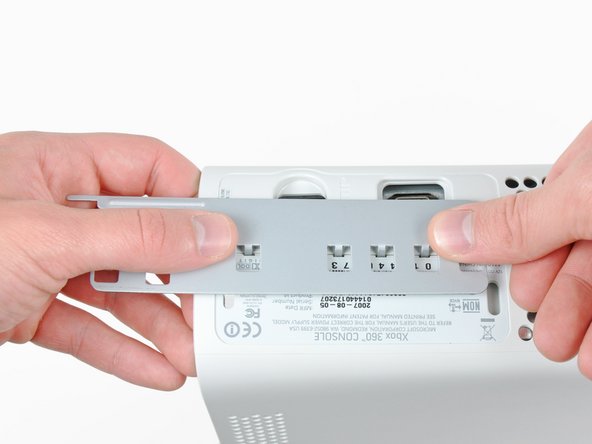
While pushing the upper and lower cases apart, use the tip of a spudger or the finger of an Xbox 360 opening tool to push the long clip highlighted in red toward the center of the 360.
-
The clip should release, leaving the clips near the power connector as the only thing holding the upper and lower cases together.
-
-
-
Use the tip of a spudger to release the clip securing the eject button to the metal casing.
-
Insert the flat end of a spudger between the eject button and the optical drive.
-
Pry the eject button off its retaining posts and remove it from the 360.
-
-
-
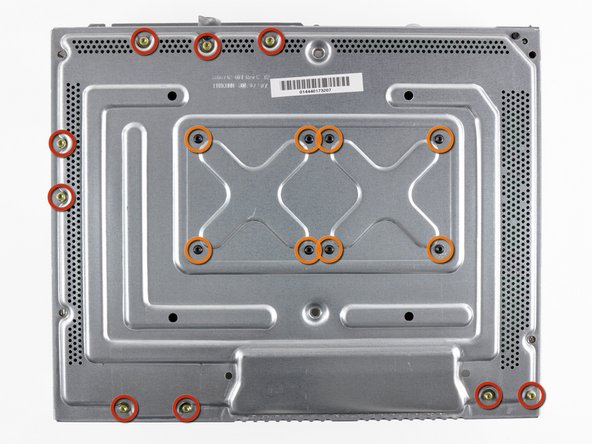
Remove the six silver 64 mm T10 Torx screws securing the upper case to the metal casing.
-
-
-
Insert the flat end of a spudger into the small rectangular opening on the top of the cooling fan duct.
-
Carefully release the fan duct retaining clip and remove the fan duct from the Xbox.
-
The clip can alternatively be released using the metal finger of an Xbox 360 opening tool.
-
-
-
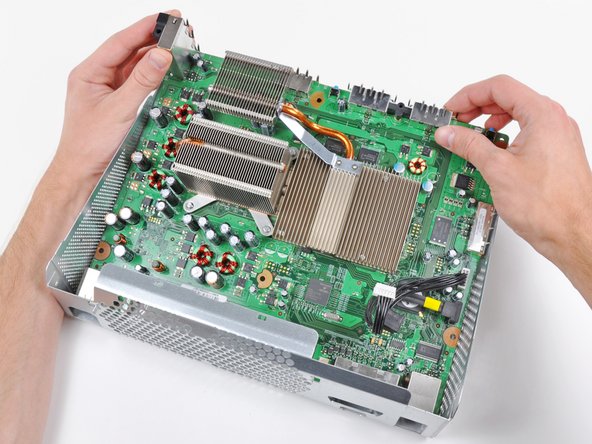
While lifting the metal chassis strip above the dual fans, pull the fans toward the center of the motherboard.
-
-
-
Use the flat end of a spudger to release the clips securing the RF module shield along the top and the left edge of the RF module.
-
Remove the RF module shield from the console.
-
-
-
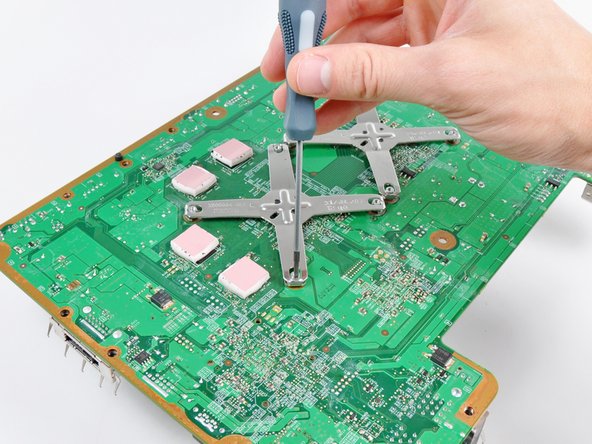
Insert the tip of a small flathead screwdriver between the X clamp and its retaining post on the heat sink.
-
Pry the X clamp away from its retaining post until it is lifted above the small groove cut into the retaining post.
-
-
-
Insert the tip of a small flathead screwdriver between the X clamp and its retaining post on the heat sink.
-
Pry the X clamp away from its retaining post until it is lifted above the small groove cut into the retaining post.
-
Remove the CPU heat sink from the motherboard. When reinstalling the CPU heat sink, be sure to apply a new layer of thermal paste.
-
-
-
Lay the motherboard with the processor side facing down on the flat metal bottom of the the bare chassis (with its open side facing down) as seen in the second picture. Allow the tall USB socket to hang over the edge of the chassis so the board sits flat.
-
Use a heat gun on the LOW setting to heat the entire back of the motherboard for one minute. Be sure to continually sweep the heat gun back and forth across the face of the motherboard to evenly heat it.
-


댓글 21개
Is there a similar guide for XBOX 360s?
Yes, there is - and It worked for me!
Dave -
What temperature ranges should I be aiming for? I have a variable temp head gun and no idea of what temperatures are best for both stages.
The heat gun they are using has a 570 F low-setting. While that doesn't give you an EXACT temperature, it should give you some idea of what they're using.