

A loose actuator screw makes the toothbrush useless as it prevents the engine to drive the actual toothbrush that is attached to the top of the device. However, repairing this failure can be achieved in just a few steps.
필요한 것

-
-
You will need two screwdrivers:
-
a 6.5mm flathead and
-
a small Phillips #1.
-
-
-
Take the flathead screwdriver.
-
Insert it into the slot located at the bottom of the handle and turn counterclockwise to release the bottom cap.
-
The second image shows the amount of turning needed to loosen the bottom cap.
-
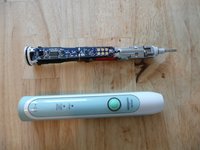
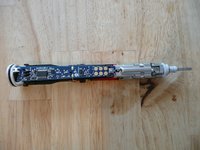
Hold the handle upside down, and push down on the shaft to release the internal components of the handle.
-
-


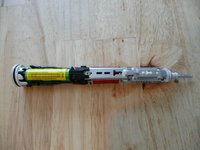

To reassemble your device, follow these instructions in reverse order. Be sure not to insert the internals of the device twisted. Close the device by using the flathead screwdriver and imposing some pressure upon it. Finally, if the internals are in the enclosure close the device by turning the bottom cap clockwise.
To reassemble your device, follow these instructions in reverse order. Be sure not to insert the internals of the device twisted. Close the device by using the flathead screwdriver and imposing some pressure upon it. Finally, if the internals are in the enclosure close the device by turning the bottom cap clockwise.
다른 13명이 해당 안내서를 완성하였습니다.

댓글 7개
thanks for that one - you rescued ours from a premature trip to the landfill :)
Excellent guide; a simple fix saves $$ and waste. Thanks!!
Thank you! It's realy help me!