주요 콘텐츠로 건너뛰기
Replacing the ball bearing in Squeaky Ceiling Fan

Replacing the ball bearing in Squeaky Ceiling Fan

SengChoy Liew

SengChoy Liew4 다른 기여자

최종 수정일 May 8, 2024

1 시간
조정
커뮤니티-기여 안내서

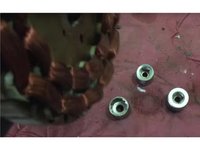
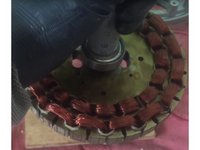
This repair guide will solve the squeaks sound of the ceiling fan after few years of operation. Youtube guide available show how-to replace the two wear out ball bearing.

동영상 개요

  1. Replacing the ball bearing in Squeaky Ceiling Fan, Remove the plastic cover: 1 단계, 이미지 2개 중 1개 Replacing the ball bearing in Squeaky Ceiling Fan, Remove the plastic cover: 1 단계, 이미지 2개 중 2개
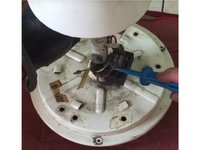
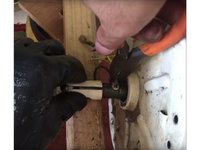
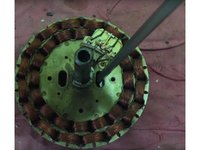
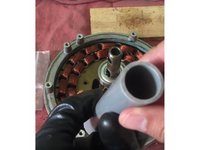
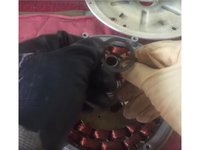
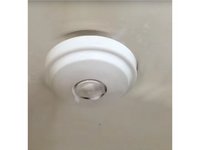
    • First, remove the mounting screws of the plastic cover located along the brim, farthest from the centre.

  2. Replacing the ball bearing in Squeaky Ceiling Fan, Removal of the Iron cage: 2 단계, 이미지 2개 중 1개 Replacing the ball bearing in Squeaky Ceiling Fan, Removal of the Iron cage: 2 단계, 이미지 2개 중 2개
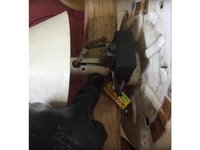
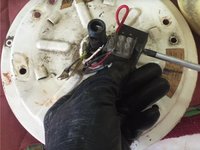
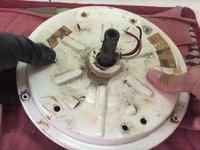
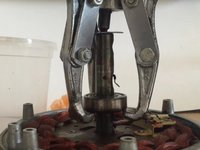
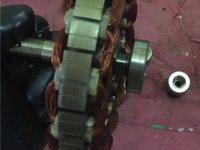
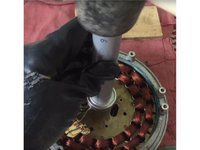
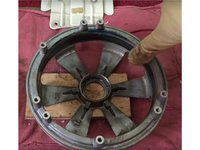
    • The iron cage is firmly secured by three screws.

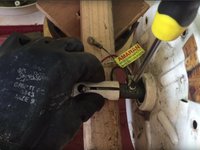
    • Out of the six mounting screws located along the inner circle, three of them will be the mounting screws for the iron cage.

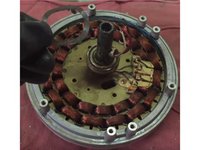
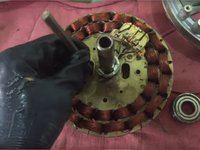
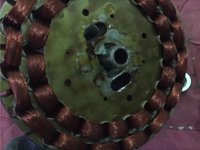
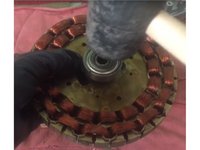
    • Remaining six screws will be the mounting screws for the fan blade.

  3. Replacing the ball bearing in Squeaky Ceiling Fan: 3 단계, 이미지 3개 중 1개 Replacing the ball bearing in Squeaky Ceiling Fan: 3 단계, 이미지 3개 중 2개 Replacing the ball bearing in Squeaky Ceiling Fan: 3 단계, 이미지 3개 중 3개
    • Remove the wiring from the terminal block and the capacitor from the bracket.

    • Unscrew the 13mm mounting bolt to remove the supporting rod.

  4. Replacing the ball bearing in Squeaky Ceiling Fan: 4 단계, 이미지 3개 중 1개 Replacing the ball bearing in Squeaky Ceiling Fan: 4 단계, 이미지 3개 중 2개 Replacing the ball bearing in Squeaky Ceiling Fan: 4 단계, 이미지 3개 중 3개
    • Remove the safety cord.

    • Use plier to loosen the holder.

    • The back plate can be removed once all the electric components are removed.

  5. Replacing the ball bearing in Squeaky Ceiling Fan: 5 단계, 이미지 2개 중 1개 Replacing the ball bearing in Squeaky Ceiling Fan: 5 단계, 이미지 2개 중 2개
    • Be sure to keep the O-ring safe.

    • Knock off the back plate by positioning it up-side down.

  6. Replacing the ball bearing in Squeaky Ceiling Fan: 6 단계, 이미지 2개 중 1개 Replacing the ball bearing in Squeaky Ceiling Fan: 6 단계, 이미지 2개 중 2개
    • Use three crawl puller, to remove the bearing.

    • Spray lubricant prior to extraction.

  7. Replacing the ball bearing in Squeaky Ceiling Fan: 7 단계, 이미지 3개 중 1개 Replacing the ball bearing in Squeaky Ceiling Fan: 7 단계, 이미지 3개 중 2개 Replacing the ball bearing in Squeaky Ceiling Fan: 7 단계, 이미지 3개 중 3개
    • Use a two crawl puller to remove the bearing located 4mm away from the tip.

    • Alternatively, it can be knocked off using a chisel from behind through the hole.

    • A long chisel becomes handy !

  8. Replacing the ball bearing in Squeaky Ceiling Fan: 8 단계, 이미지 3개 중 1개 Replacing the ball bearing in Squeaky Ceiling Fan: 8 단계, 이미지 3개 중 2개 Replacing the ball bearing in Squeaky Ceiling Fan: 8 단계, 이미지 3개 중 3개
    • Use three sockets to level the rotor core, while giving the bearing a final push.

  9. Replacing the ball bearing in Squeaky Ceiling Fan: 9 단계, 이미지 2개 중 1개 Replacing the ball bearing in Squeaky Ceiling Fan: 9 단계, 이미지 2개 중 2개
    • A 3" long PVC tube of 6/8 " inner diameter, is used to install the new bearing (6302z for this model of fan).

    • Rubber mallet is used to punch the PVC tube during installation.

  10. Replacing the ball bearing in Squeaky Ceiling Fan: 10 단계, 이미지 3개 중 1개 Replacing the ball bearing in Squeaky Ceiling Fan: 10 단계, 이미지 3개 중 2개 Replacing the ball bearing in Squeaky Ceiling Fan: 10 단계, 이미지 3개 중 3개
    • Use a rubber mallet to install the other bearing onto the shaft. Rubber mallet or wooden mallet prevents damage to the bearing.

    • The same PVC tubing can be used to give the bearing a final push.

  11. Replacing the ball bearing in Squeaky Ceiling Fan: 11 단계, 이미지 3개 중 1개 Replacing the ball bearing in Squeaky Ceiling Fan: 11 단계, 이미지 3개 중 2개 Replacing the ball bearing in Squeaky Ceiling Fan: 11 단계, 이미지 3개 중 3개
    • Apply mechanical grease around the inner wall of the iron cage.

    • Be sure to install the O-ring.

    • Installation of fan requires electrical knowledge. Certified personnel are required to install it back on the ceiling.

결론

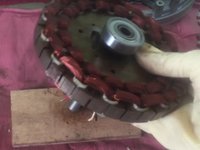
To reassemble your device, follow these instructions in reverse order.

다른 19명이 해당 안내서를 완성하였습니다.

작성자

4다른 기여자 명과 함께

SengChoy Liew

회원 가입일: 03/12/12

969 평판

안내서 3개를 작성함

댓글 5개

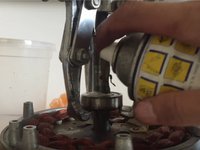
my ceiling fan would sometimes not start and making rumbling sounds (bearings) i did not want to replace or tear down so lifted plastic cover on top and liberally sprayed machine oil over exposed bearing & through slots underneath wd 40 this has cured problem perfectly just dry bearings would probably be better to use spray grease if you have --cheaper than new fan or bearings and only a few minutes work

daveorme - 답글

My fan was not working what probelm

Govardhan Yadagiri - 답글

Thanks! I took apart my fan, thank you to your precise instructions. Used lithium grease and right now, enjoying quiet fan in my bedroom

Chris murie - 답글

price of the ceiling fan bearing

tophan das - 답글

muchas gracias porel aporte , muy util y bien explicado

saludos cordiales

cuismi - 답글

댓글 쓰기

조회 통계:

지난 24시간: 8

지난 7일: 97

지난 30일: 250

전체 시간: 64,341