주요 콘텐츠로 건너뛰기

Samsung Camera LCD Replacement

  1. Samsung Camera LCD Replacement, Pin your LCD: 1 단계, 이미지 1/1
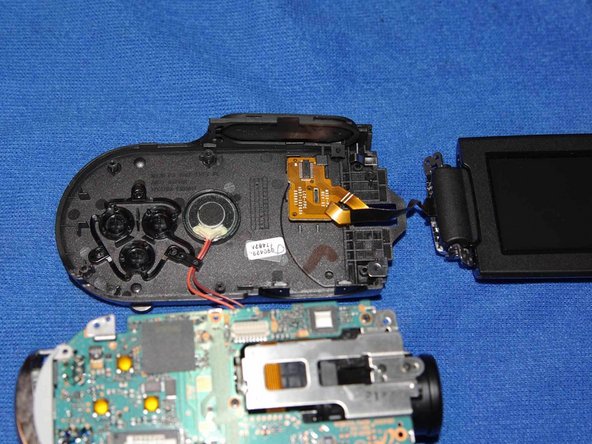
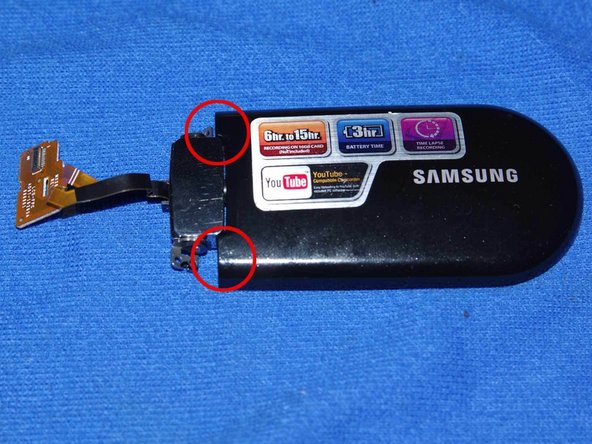
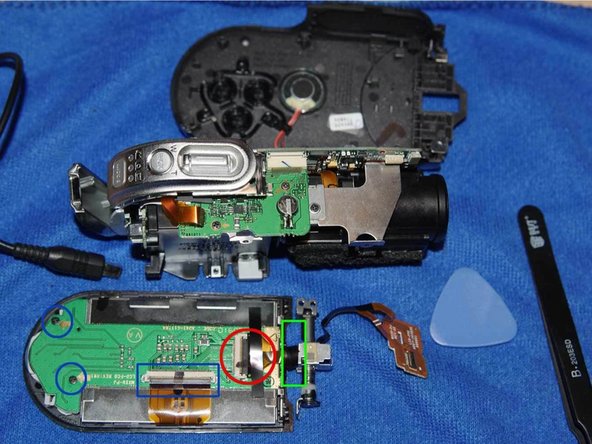
    • How to replace the LCD ribbon cable on a Samsung SMX 30F. This ribbon connects the LCD to the motherboard of the camera. For a change of LCD only the process is much simpler and only takes about ten minutes.

  2. Samsung Camera LCD Replacement: 2 단계, 이미지 1/3 Samsung Camera LCD Replacement: 2 단계, 이미지 2/3 Samsung Camera LCD Replacement: 2 단계, 이미지 3/3
    • Step 1: Remove the front block.

    • Remove all the screws on the front of the camera

  3. Samsung Camera LCD Replacement: 3 단계, 이미지 1/1
    • Then gently pull on the block, be careful it is connected to the camera by rather short cables.

  4. Samsung Camera LCD Replacement: 4 단계, 이미지 1/3 Samsung Camera LCD Replacement: 4 단계, 이미지 2/3 Samsung Camera LCD Replacement: 4 단계, 이미지 3/3
    • Remove all screws by walking around the unit. Be careful some are hidden under the handle, behind the hatches ....

  5. Samsung Camera LCD Replacement: 5 단계, 이미지 1/3 Samsung Camera LCD Replacement: 5 단계, 이미지 2/3 Samsung Camera LCD Replacement: 5 단계, 이미지 3/3
    • To finish, remove the two screws connecting the screen to the body of the camera.

    • Now you can remove the shell of the camera, it must come easily if you feel resistance is that you left a screw somewhere.

  6. Samsung Camera LCD Replacement: 6 단계, 이미지 1/3 Samsung Camera LCD Replacement: 6 단계, 이미지 2/3 Samsung Camera LCD Replacement: 6 단계, 이미지 3/3
    • Remove the case carefully, the cable disconnects easily from the very fragile connector.

    • You can now remove the screws securing the motherboard to the frame.

    • Then carefully remove the motherboard to gain access to the LCD cable.

  7. Samsung Camera LCD Replacement: 7 단계, 이미지 1/3 Samsung Camera LCD Replacement: 7 단계, 이미지 2/3 Samsung Camera LCD Replacement: 7 단계, 이미지 3/3
    • Remove the cable from the frame.

    • Unscrew the 4 screen screws. and open it delicately using a pick.

    • Now, you can change the cable . The cable wraps around the metal axis, so make sure you count the number of rounds on disassembly to facilitate reassembly.

  8. Samsung Camera LCD Replacement: 8 단계, 이미지 1/1
    • When reassembling, first position the metal clip and the small magnet in the black housing, before putting it back on the metal shaft.

결론

TO REASSEMBLE YOUR DEVICE FOLOW THESE INSTRUCTIONS IN REVERSE ORDER.

다른 2명이 해당 안내서를 완성하였습니다.

다음 번역가들에게 특별히 감사 드립니다:

fr en

100%

이 번역자 분들은 저희가 세상을 수리하는데 동참해 주시는 분입니다! 기여하시겠습니까?
번역 시작하기 ›

Hardy

회원 가입일: 12/08/15

151 평판

안내서 2개 작성하였습니다

댓글 0개

댓글 쓰기

조회 통계:

24 시간 전: 0

7일 전: 0

30일 전: 8

전체 시간: 336