이 번역은 원본 안내서의 최신 업데이트를 반영하지 않을 수 있습니다. 번역 업데이트를 돕거나 아니면 원본 안내서 보기를 참조하세요.
소개
이 안내서를 사용하여 금이 가거나 깨진 Samsung Galaxy A10 스크린을 교체하세요.
참고: 이 안내서는 원래 프레임과 마더보드는 그대로 두고 스크린만 교체하도록 지시합니다. 그러나 이 휴대폰의 어떤 교체 스크린은 새 프레임 (일명 섀시)에 사전-설치되어 제공되므로 매우 다른 절차가 필요합니다. 이 안내서를 시작하기 전에 올바른 부품인지 확인하세요.
‘’’휴대폰을 분해하기 전에 배터리를 25% 이하로 방전하세요'’’. 배터리에 실수로 구멍이 나면 불이 붙거나 폭발할 수 있지만 방전하면 그 가능성이 훨씬 낮아집니다.
이 수리를 완료하려면 ‘’’교체용 접착제’’’가 필요합니다.
필요한 것
-
-
SIM 카드 추출 도구, SIM 추출 비트 또는 펼친 종이 클립을 휴대폰 왼편 SIM 카드 트레이 작은 구멍에 넣으세요.
-
꾹 눌러서 트레이를 튀어나오게 하세요.
-
-
-
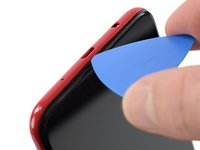
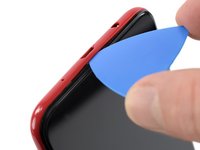
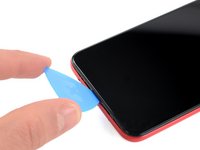
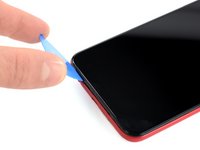
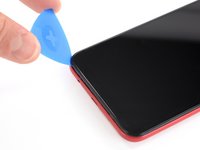
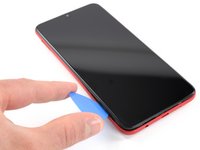
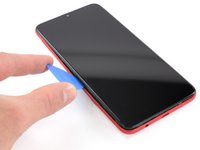
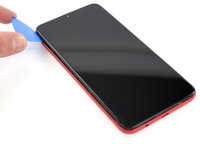
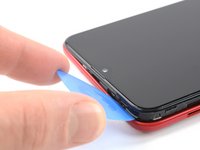
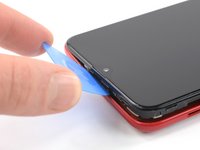
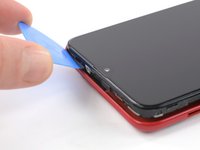
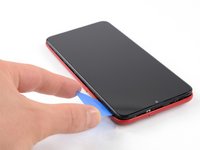
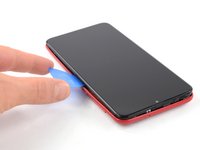
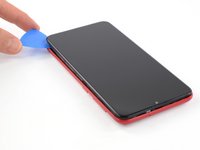
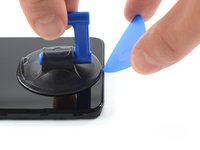
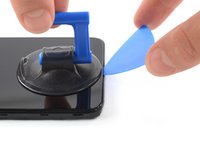
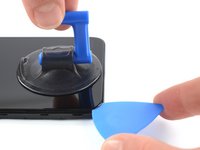
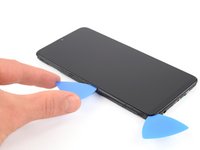
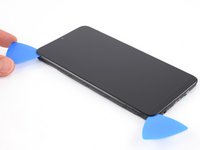
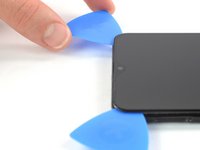
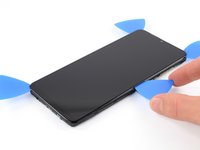
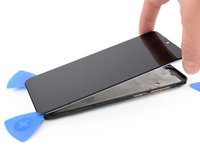
충전 포트가 위치한 휴대폰 하단 스크린과 후면 커버 사이로 여는 픽을 끼우세요.
-
-
-
-
십자/Phillips #00 나사 세 개를 풀어주세요 (3mm 길이).
On my A10E the second screw from the right on the top line of 4 screws had to be removed also
It’s easier if you remove all 4 screws across the small top panel.
-
-
-
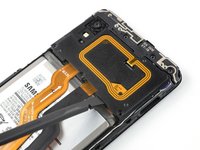
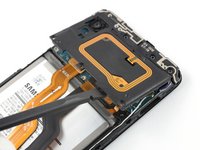
하단에서 도터보드 커버를 분리하세요.
Hola! En este punto sería muy recomendable retirar la batería, antes de calentar la pantalla, ya sea en la plancha o con una pistola de calor.
-
-
-
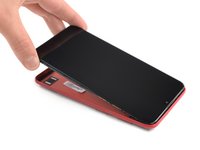
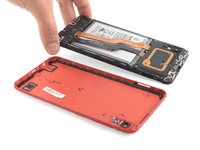
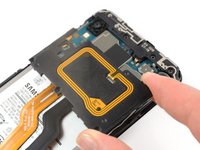
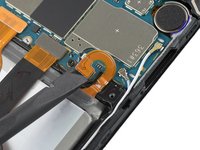
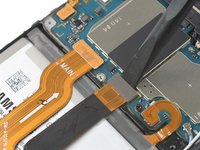
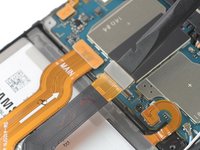
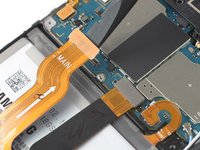
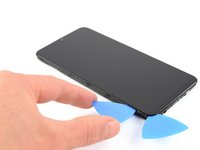
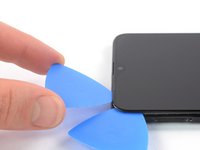
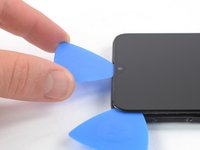
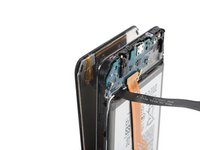
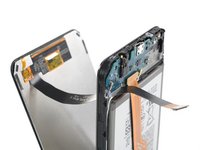
휴대폰 상단 가장자리에서 스크린을 들어 올리세요.
-
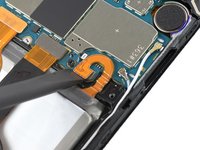
디스플레이 플렉스 케이블을 프레임의 틈사이로 통과시키고 디스플레이를 분리하세요.
-


가능하면 새 접착제를 설치하고 재봉합하기 전에 기기를 켜고 수리를 테스트하세요.
기기를 재조립하려면, 이 단계들을 역순으로 따르세요. (>90%)이소프로필 알코올로 관련 부위를 청소한 후 필요한 곳에 새 접착제를 바르세요.
전자 폐기물을 R2 또는 e-Stewards 인증 재활용 센터로 가져가세요.
수리가 계획대로 진행되지 않았습니까? 기본 문제 해결을 이용하거나 자사의 답변 커뮤니티에 도움을 요청하세요.
가능하면 새 접착제를 설치하고 재봉합하기 전에 기기를 켜고 수리를 테스트하세요.
기기를 재조립하려면, 이 단계들을 역순으로 따르세요. (>90%)이소프로필 알코올로 관련 부위를 청소한 후 필요한 곳에 새 접착제를 바르세요.
전자 폐기물을 R2 또는 e-Stewards 인증 재활용 센터로 가져가세요.
수리가 계획대로 진행되지 않았습니까? 기본 문제 해결을 이용하거나 자사의 답변 커뮤니티에 도움을 요청하세요.
다른 89명이 해당 안내서를 완성하였습니다.
다음 번역가들에게 특별히 감사 드립니다:
92%

Christian Kim님은 저희가 세상을 수리하는데 동참하신 분입니다! 기여하시겠습니까?
번역 시작하기 ›


댓글 12개
Usefully website. Thanks ifixit team.
AK FRIENDS - 답글
screen replacement for samsung galaxy a10s…or a10 screen is the same size as a10s
Useful service guide for display replacement, best website for repairs !
The Missus dropped her phone and the inevitable happened, this guide was invaluable in helping me fit a new screen, and in under thirty minutes! Extremely grateful for this guide, definitely one of the better ones out there…
gracias por las directiones
Loved this. Thanks, Ifixit, I fixed my own phone screen. The only problem I had was not having any adhesive so my screen is still loose. It would have been helpful to have this part of the Tools needed list. I will have to buy Two-way tape at some stage. But very happy to have a screen I can see properly.
Hi Teresa, thank you for sharing your experience with us. I'm glad your A10 is up and running again! You're right, I've edited the guide and added adhesive to the necessary parts.
excelente, preciso y muy didactico
I need a replacement screen for a Galaxy A10, most I see on the web have two holes at the top but mine has only one. What is the difference and will the two hole work on my phone. Thanks
I've used your help before and found it best way, very easy to use and covered everything, I'm using it again for a friend phone and recommend to everyone to use it, thank you for your help
Nicky Beal - 답글
Thank you, Nicky!
خیلی عالی است
Habe nur das Frontglas mit Werkzeug gekauft. Kann ich nur dieses von vorn ersetzen, ohne das Gerät komplett zerlegen zu müssen? Sprich defektes Glas erhitzen und nach vorn abheben etc
Hans Weschta - 답글
Hallo Hans, leider musst du dein A10 zerlegen um den Screen zu wechseln. Hier ist der Guide für deine Reparatur: Samsung Galaxy A10 스크린 교체. Viel Erfolg beim Reparieren!
Adriana Zwink -