소개
Use this guide to replace a cracked or faulty OLED display on your Samsung Galaxy S7.
Be aware that the video guide does not match the step-by-step guide below, it is an older edition of the guide.
The video guide recommends removing the battery, SIM tray, and motherboard. This is not necessary, but it does make heating the phone safer. This procedure is only recommended if you're replacing the battery and the screen at the same time.
This guide instructs you to replace only the display while leaving the original frame, logic board, and battery in place. Note: some replacement screens for this phone come pre-installed in a new frame (a.k.a. chassis), which requires you to transplant all of your phone's internals and install a new battery. Make sure you have the correct part before starting this guide.
If the frame is damaged or bent, it's important to replace it, or else the new screen may not mount correctly and can suffer damage from uneven pressure.
The process of separating the display from the frame usually destroys the display, so don't follow this guide unless you intend to replace the display.
If your screen is badly shattered, wear eye protection, and apply a screen-protector, or tape, to the display to help contain glass shards.
필요한 것
동영상 개요
-
-
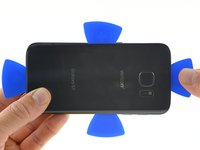
Apply a heated iOpener to a long edge of the phone for about two minutes.
 FixBot에 문의하기
-
-
-
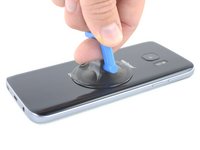
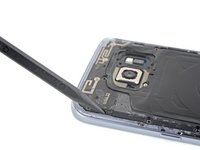
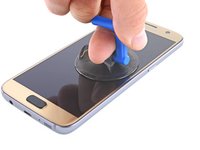
When the back panel is warm to the touch, apply a suction cup as close to the heated edge of the phone as you can while avoiding the curved edge.
-
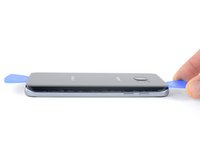
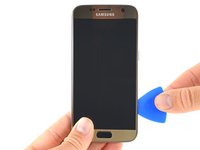
Lift on the suction cup and insert an opening pick under the rear glass.
-
-
-
Once you have the pick firmly inserted into the glass, reheat and reapply the iOpener to soften the adhesive.
-
-
-
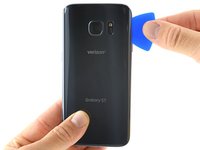
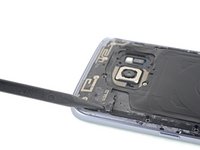
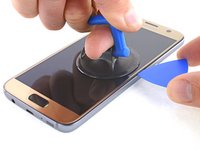
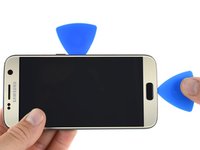
Slide the opening pick down along the side of the phone, separating the adhesive.
-
Leave the pick in place and grab a second pick as you proceed to the next step. Leaving the pick inserted can help prevent the glue you just separated from re-adhering.
-
-
-
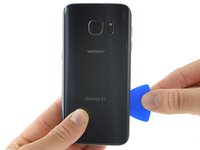
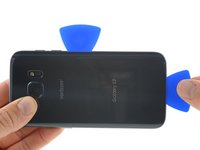
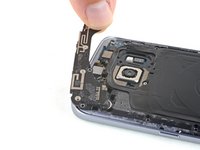
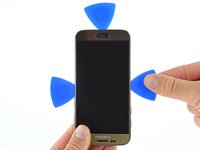
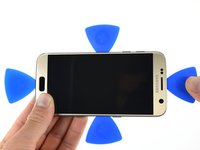
Repeat the previous heating and cutting procedure for the remaining three sides of the phone.
-
Leave an opening pick in each edge of the phone as you continue to the next to prevent the adhesive from resealing.
-
-
-
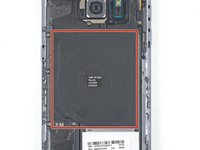
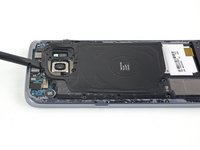
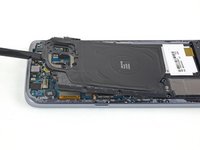
If you're cleaning the midframe surface with isopropyl alcohol, be careful not to get any alcohol on the wireless charging coil. The coil coating will break down if it contacts alcohol.
-
-
-
-
Remove the eight 3.5 mm Phillips screws securing the NFC antenna and charging coil assembly.
-
-
-
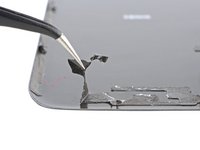
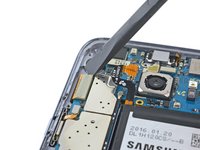
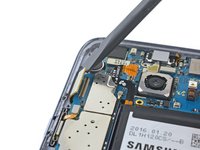
Insert the tip of a spudger into the small notch on the left side of the antenna assembly, and pry the assembly up and out of the frame.
-
Remove the antenna assembly.
-
-
-
Use the flat end of a spudger to lift the charging coil assembly out of the phone.
-
-
-
Use the flat end of a spudger to disconnect the battery connector.
-
-
-
Use the flat end of a spudger to unplug the display and digitizer connector.
-
-
-
Prepare an iOpener and apply to a long edge of the phone for about 2 minutes.
-
-
-
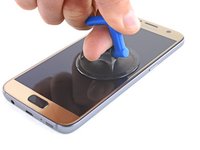
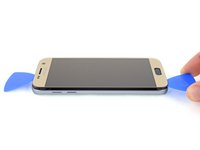
Once the screen is warm to the touch, apply a suction cup as close to the heated edge of the phone as you can.
-
Lift on the suction cup, and insert an opening pick under the display assembly.
-
-
-
Once the pick is firmly inserted underneath the display, reheat and reapply the iOpener to soften the display adhesive.
-
-
-
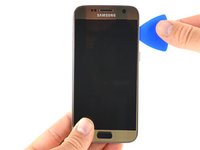
Slide the opening pick down the side of the phone, separating the adhesive.
-
Go slowly so that the tip doesn't slip out of the seam. If sliding becomes difficult, reheat and reapply the iOpener.
-
Leave the pick in place and grab a second pick as you proceed to the next step. Leaving the pick inserted can help prevent the glue you just separated from re-adhering.
-
-
-
Repeat the previous heating and cutting procedure for the remaining three sides of the phone.
-
Leave an opening pick on each side as you continue to prevent the adhesive from resealing.
-
-
-
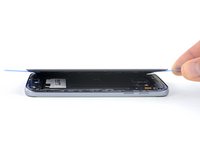
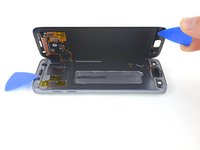
Pry up the side of the display opposite the display cable so that the cable acts like a hinge as the phone opens.
-
-
-
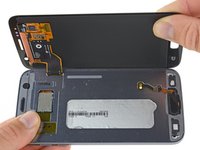
Carefully lift the display away from the mid frame, gently pulling the display connector through the hole in the mid frame.
-
Remove the display.
-
-
-
After removing all traces of glue and glass from the frame, clean the adhesion areas with 90% (or higher) isopropyl alcohol and a lint-free cloth or coffee filter. Swipe in one direction only, not back and forth.
-


To reassemble your device, apply the adhesive to the rear cover and follow these instructions in reverse order.
다른 187명이 해당 안내서를 완성하였습니다.


30가이드 댓글
The screen replacement went smooth. I just wish it included the adhesive. I didn't see the note where the adhesive needed to be ordered in addition to the screen. Otherwise everything went well.
Thanks
march11934 - 답글 공유
Samsung s7 ekran değişimi orjinal parça satın aldığınız zaman bu kadar uğraşmanıza gerek yok.
Yapıştırıcı da sadece arka kapağı yapıştırmak için gerekli oluyor
CitrusMobil - 답글 공유
For the price of the screen, I can replace it in a Samsung repair center...
I just need to replace the glass, not all of the AMOLED touch screen... :-( Sorry but this didn't help me.
How much cost u paid to service centre for original display for samsung s7
Durgaprasad - 답글 공유
You can not replace just the glass without special equipment (hot plate, laminator etc.)
Dinan Blueje - 답글 공유