소개
Use this guide to replace a worn-out or dead battery in your Samsung Galaxy Watch5.
For your safety, discharge your battery below 25% before disassembling the Samsung Galaxy Watch5. This reduces the risk of a dangerous thermal event if the battery is accidentally damaged during the repair.
If your battery looks puffy or swollen, take appropriate precautions.
필요한 것
-
-
Take your watch off the charger and power it down.
-
Remove the watch band.
-
-
-
Use a Tri-point Y000 screwdriver to remove the four 4.1 mm-long screws securing the back cover.
-
-
-
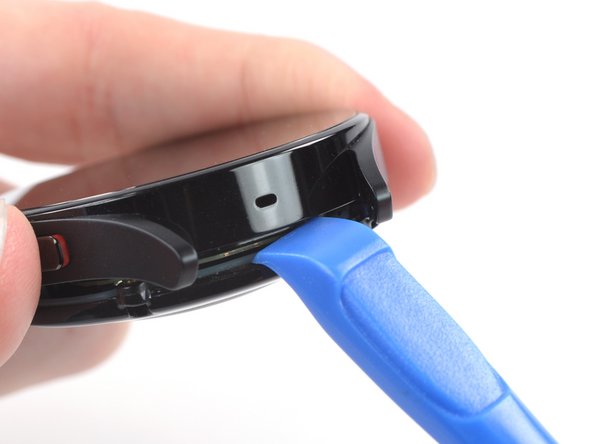
Insert an opening tool into the seam between the back cover and the metal housing.
-
Twist the opening tool to loosen the gasket and create a gap.
-
-
-
Lay the watch screen-side down.
-
Carefully swing open the back cover at the gap you just created.
-
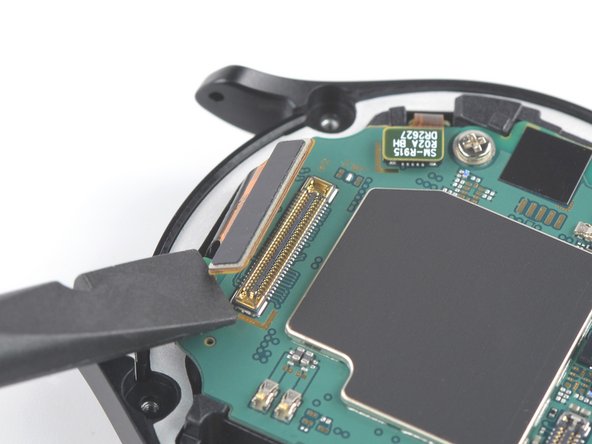
Use a spudger to disconnect the sensor flex cable from the motherboard by prying the press connector straight up from its socket.
-
-
-
-
Remove the back cover.
-
Make sure the rubber gasket (marked in red) is undamaged. If damaged, replace it with a new one to maintain water resistance.
-
-
-
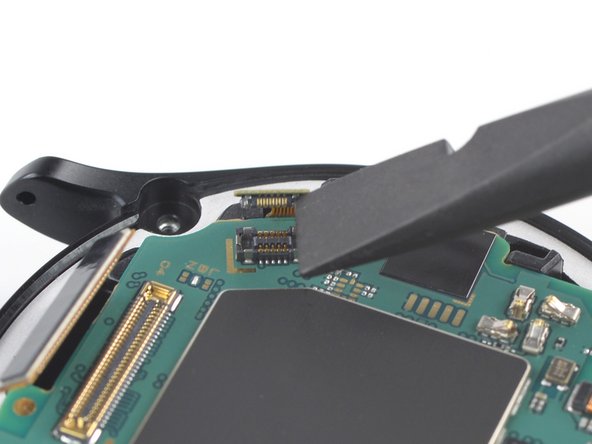
Use a spudger to disconnect the display flex cable by prying the connector straight up from its socket.
-
-
-
Use a spudger to disconnect the button flex cable by prying the connector straight up from its socket.
-
-
-
Use a Phillips screwdriver to remove the single 4.4 mm–long screw securing the motherboard.
-
-
-
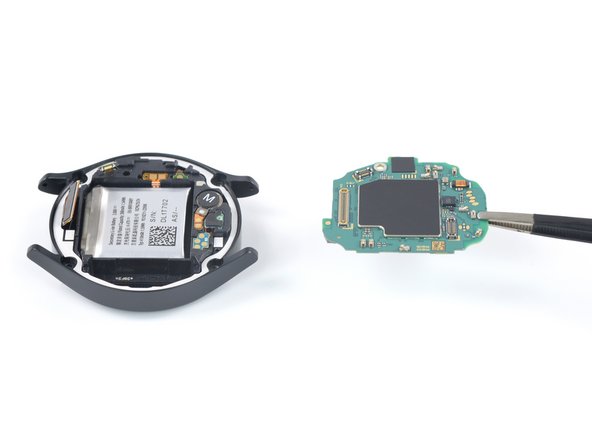
Use a pair of tweezers or your fingers to lift the motherboard out from the watch, clearing the two flex cables.
-
-
-
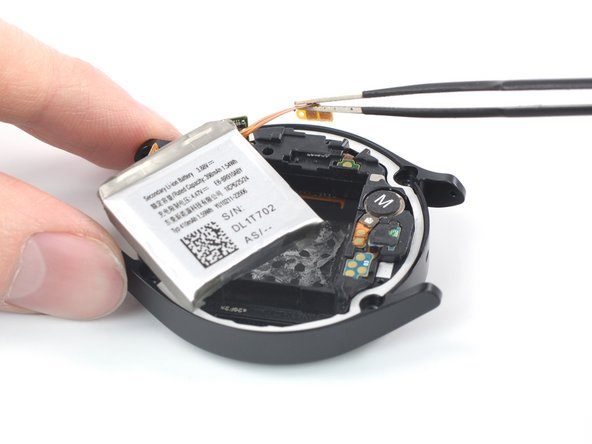
Place a spudger into the small gap between the plastic frame and the battery, opposite the display cable.
-
Carefully pry the battery up and out of its recess.
-
-
-
Lift the battery up enough to access its glued-down connector cable.
-
Use a pair of tweezers to peel the battery connector from the frame.
-
-
-
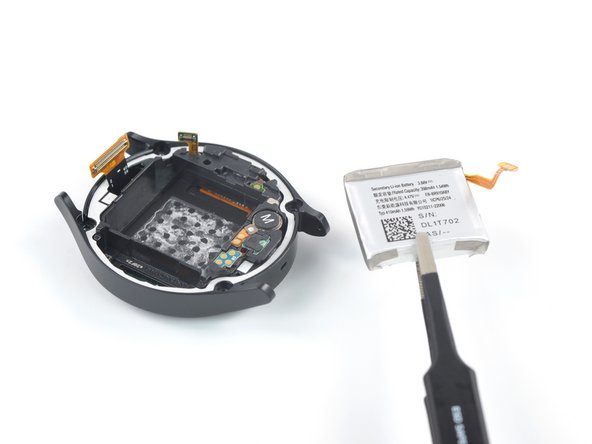
Use a pair of tweezers or your fingers to remove the battery.
-
Use tweezers or your fingers to remove the old adhesive from the frame.
-
Use high-concentration isopropyl alcohol (>90%) and a lint-free cloth to remove any remaining adhesive residue.
-
If your replacement battery isn‘t already equipped with adhesive, apply thin, double-sided tape such as Tesa Tape directly to the battery recess where the old adhesive was.
-
Lay the replacement battery in its recess and press down firmly to secure it.
-


If possible, turn on your device and test your repair before installing new adhesive and resealing.
To reassemble your device, follow these instructions in reverse order.
For optimal performance, calibrate your newly installed battery after completing this guide.
Take your e-waste to an R2 or e-Stewards certified recycler.
Repair didn’t go as planned? Try some basic troubleshooting, or ask our Answers community for help.
다른 2명이 해당 안내서를 완성하였습니다.


댓글 6개
Are there any recommended batteries to replace the OEM one with?
Hi Caleb Angell, while I can't give a specific recommendation, replacement batteries might be found using the part number: EB-BR910ABY (44 mm model) and EB-BR900ABY (40 mm model).
Is this good for the watch 5 pro too?
Hi Antonella Carletti, I think it's reasonable to assume so from a quick look at the Watch5 Pro specs and look, but I haven't handled the Watch5 Pro myself and was unable to find disassembly resources, so you should take this as more of a guess.
Thanks for your response Manuel, I'll give it a go.