주요 콘텐츠로 건너뛰기
수리 커뮤니티 가입 - 계정 만들기

Samsung NP700Z5AH Fan Replacement

필요한 것

  1. Samsung NP700Z5AH Fan Replacement, Battery: 1 단계, 이미지 1개 중 1개
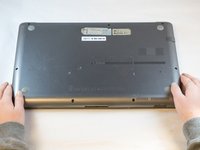
    • Remove the ten 6.6mm Philips#00 screws securing the lower case to the upper case.

  2. Samsung NP700Z5AH Fan Replacement: 2 단계, 이미지 3개 중 1개 Samsung NP700Z5AH Fan Replacement: 2 단계, 이미지 3개 중 2개 Samsung NP700Z5AH Fan Replacement: 2 단계, 이미지 3개 중 3개
    • Using your fingers, pinch the edge of the SD card and pull to remove it.

  3. Samsung NP700Z5AH Fan Replacement: 3 단계, 이미지 2개 중 1개 Samsung NP700Z5AH Fan Replacement: 3 단계, 이미지 2개 중 2개
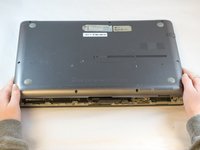
    • Wedge your fingers in between the upper case and the lower case

    • Gently pull the lower case away from the upper case to remove it

  4. Samsung NP700Z5AH Fan Replacement: 4 단계, 이미지 2개 중 1개 Samsung NP700Z5AH Fan Replacement: 4 단계, 이미지 2개 중 2개
    이 단계에 사용된 도구:
    Tweezers
    $4.99
    • Using tweezers or your fingertips, carefully pull on the battery connector to disconnect it from the motherboard.

    • Be sure to pull straight backwards, or you risk damaging the wires.

  5. Samsung NP700Z5AH Fan Replacement: 5 단계, 이미지 1개 중 1개
    • Remove the two 4.4mm Phillips#00 screws from the battery case.

  6. Samsung NP700Z5AH Fan Replacement: 6 단계, 이미지 2개 중 1개 Samsung NP700Z5AH Fan Replacement: 6 단계, 이미지 2개 중 2개
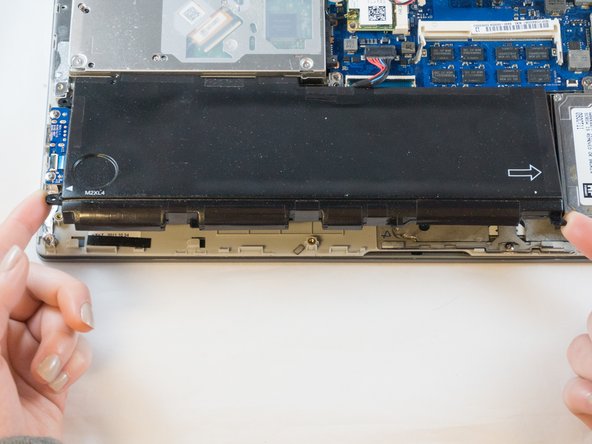
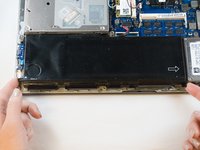
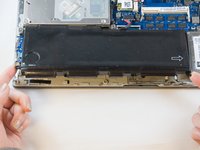
    • Place your fingers on the corner sections of the battery.

    • Lift to remove the battery.

    • If you choose to use tools to remove the battery be careful not to damage it. A damaged lithium-ion battery may leak dangerous chemicals and/or catch fire. Use only plastic pry tools.

  7. Samsung NP700Z5AH Fan Replacement, Fan: 7 단계, 이미지 2개 중 1개 Samsung NP700Z5AH Fan Replacement, Fan: 7 단계, 이미지 2개 중 2개
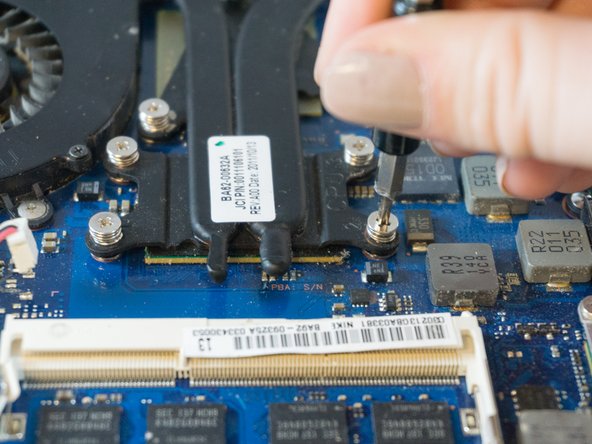
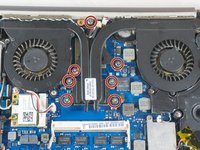
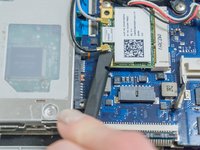
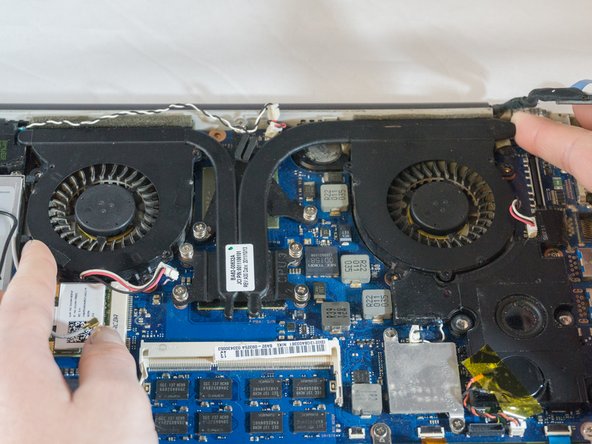
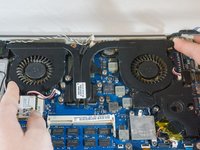
    • Loosen but don't remove the 7 silver Phillips #00 3.5mm screws securing the fan to the motherboard. They should detach from the motherboard and remain attached to the fan assembly.

  8. Samsung NP700Z5AH Fan Replacement: 8 단계, 이미지 2개 중 1개 Samsung NP700Z5AH Fan Replacement: 8 단계, 이미지 2개 중 2개
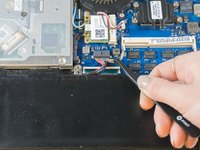
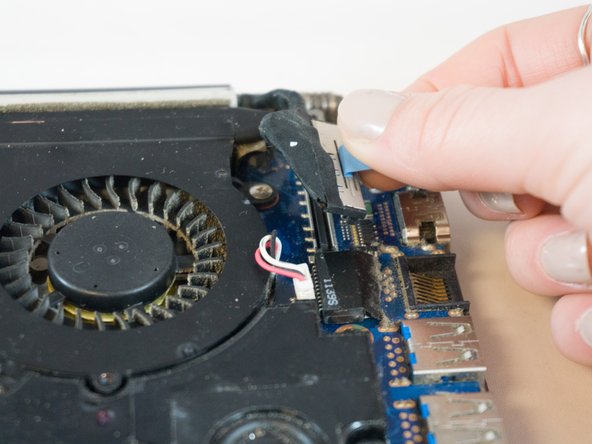
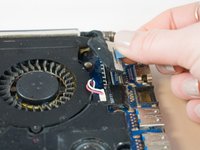
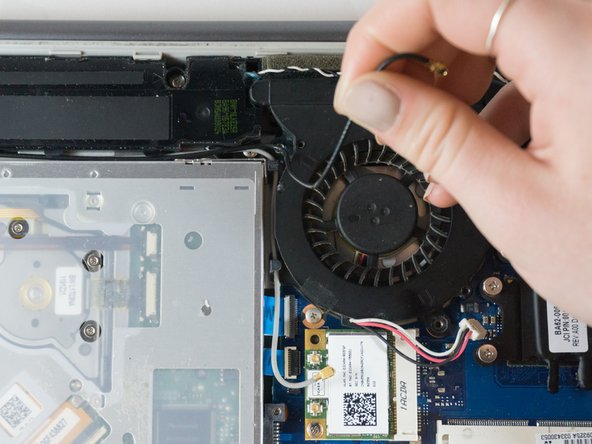
    • Using your fingers, grasp the blue ribbon on the fan connector and pull straight up to disconnect it from the motherboard.

    • To reinstall the cable, hold it near the end and push it straight into the connector, being careful not to kink the cable.

  9. Samsung NP700Z5AH Fan Replacement: 9 단계, 이미지 2개 중 1개 Samsung NP700Z5AH Fan Replacement: 9 단계, 이미지 2개 중 2개
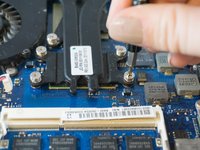
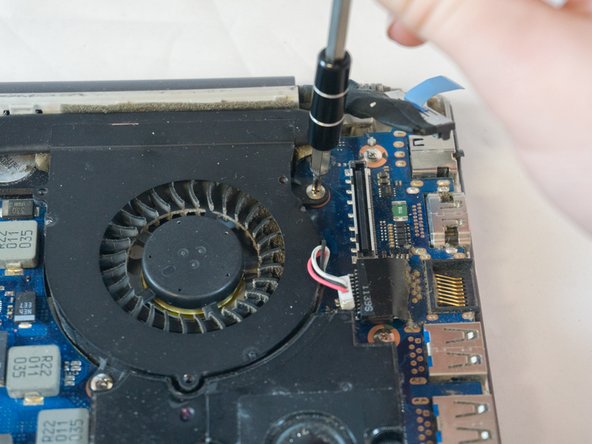
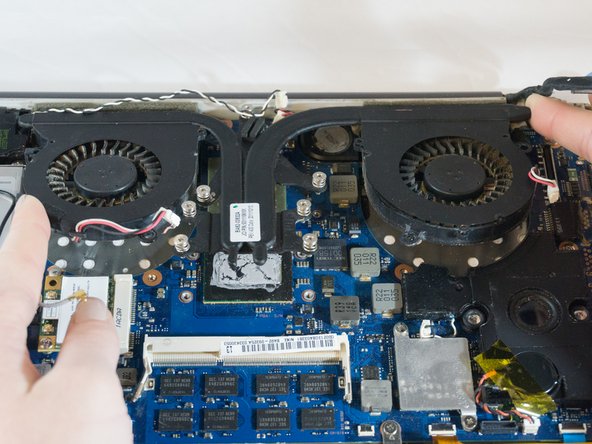
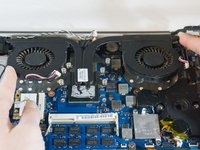
    • Using the Phillips#00 remove the four 3.5mm screws securing the fan to the motherboard.

  10. Samsung NP700Z5AH Fan Replacement: 10 단계, 이미지 2개 중 1개 Samsung NP700Z5AH Fan Replacement: 10 단계, 이미지 2개 중 2개
    이 단계에 사용된 도구:
    Tweezers
    $4.99
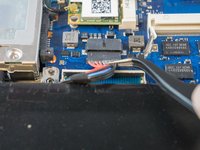
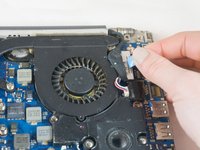
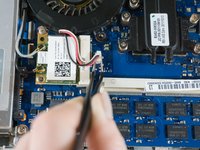
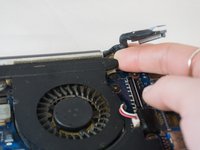
    • Using tweezers, carefully pull up on the four power cable connectors to disconnect them from the motherboard.

    • These connections were originally soldered and will need a small drop of solder to be re-attached. Use this guide to learn 연결부 납땜 및 납제거 방법

  11. Samsung NP700Z5AH Fan Replacement: 11 단계, 이미지 3개 중 1개 Samsung NP700Z5AH Fan Replacement: 11 단계, 이미지 3개 중 2개 Samsung NP700Z5AH Fan Replacement: 11 단계, 이미지 3개 중 3개
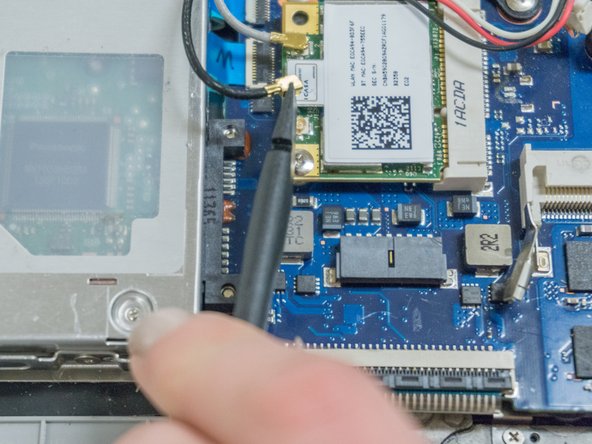
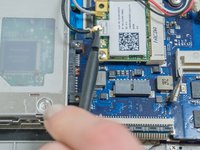
    • Place the tip of the spudger under the metal caps of the black and grey coaxial connectors and pry upwards to disconnect them.

    • After they are disconnected, un-thread them from around the fan.

    • To reinstall, hold the connectors in place and gently press them straight down. The connectors “snap” into their sockets much like the metal snaps on a jacket.

  12. Samsung NP700Z5AH Fan Replacement: 12 단계, 이미지 3개 중 1개 Samsung NP700Z5AH Fan Replacement: 12 단계, 이미지 3개 중 2개 Samsung NP700Z5AH Fan Replacement: 12 단계, 이미지 3개 중 3개
    • Wedge your fingers under opposite corners of the fan and lift to remove it.

결론

To reassemble your device, follow these instructions in reverse order.

다른 한 분이 해당 안내서를 완성하였습니다.

작성자

4다른 기여자 명과 함께

Erik

회원 가입일: 09/27/17

895 평판

안내서 6개를 작성함

0가이드 댓글

댓글 쓰기

조회 통계:

지난 24시간: 0

지난 7일: 6

지난 30일: 26

전체 시간: 1,209