주요 콘텐츠로 건너뛰기
Sony Cyber-shot DSC-H200 SD Door Replacement

Sony Cyber-shot DSC-H200 SD Door Replacement

Elizabeth Morrison

Elizabeth Morrison8 다른 기여자

최종 수정일 May 7, 2024

30 - 35 분
조정
잘게 썰기

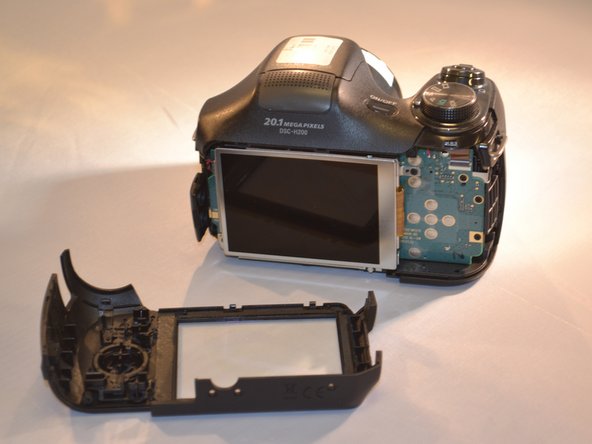
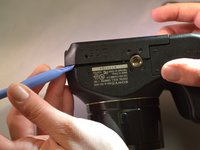
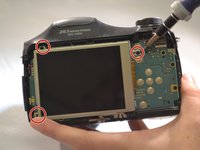
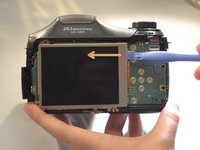
Your SD door could be stuck, loose or broken. This guide will show you how to remove and replace an SD door. In order to reach the SD door screw, you need to access the motherboard. Please refer to the LCD Screen prerequisite guide and the motherboard prerequisite guide for proper LCD Screen and Motherboard removal.

필요한 것

도구

더보기...

  1. Sony Cyber-shot DSC-H200 SD Door Replacement, SD Door: 1 단계, 이미지 2개 중 1개 Sony Cyber-shot DSC-H200 SD Door Replacement, SD Door: 1 단계, 이미지 2개 중 2개
    • Using a screwdriver, remove four 6mm screws located on the back panel.

  2. Sony Cyber-shot DSC-H200 SD Door Replacement: 2 단계, 이미지 1개 중 1개
    • Using a screwdriver, remove the two 6mm screws on the bottom.

    • Using a screwdriver, remove the four 3mm screws on the bottom.

  3. Sony Cyber-shot DSC-H200 SD Door Replacement: 3 단계, 이미지 1개 중 1개
    • Open the SD Door, unscrew and remove the single 6mm screw closest to "PUSH IN/OUT" under the SD card slot.

  4. Sony Cyber-shot DSC-H200 SD Door Replacement: 4 단계, 이미지 2개 중 1개 Sony Cyber-shot DSC-H200 SD Door Replacement: 4 단계, 이미지 2개 중 2개
    • Using the blue plastic opening tools, remove the back panel (the LCD and motherboard are exposed).

  5. Sony Cyber-shot DSC-H200 SD Door Replacement: 5 단계, 이미지 2개 중 1개 Sony Cyber-shot DSC-H200 SD Door Replacement: 5 단계, 이미지 2개 중 2개
    • Using a screwdriver, remove the three 4mm screws that attach the LCD to the camera motherboard (The LCD is contained in a holding plate, attached to the motherboard with a ribbon cable).

    • Using the blue plastic opening tool remove the LCD Screen from the motherboard.

  6. Sony Cyber-shot DSC-H200 SD Door Replacement: 6 단계, 이미지 1개 중 1개
    • Using a screwdriver, remove the single 4mm screw at the bottom of the holding plate.

  7. Sony Cyber-shot DSC-H200 SD Door Replacement: 7 단계, 이미지 1개 중 1개
    • Lift the holding plate away from the motherboard and set aside (the pin attaching the door to the body is now accessible).

  8. Sony Cyber-shot DSC-H200 SD Door Replacement: 8 단계, 이미지 2개 중 1개 Sony Cyber-shot DSC-H200 SD Door Replacement: 8 단계, 이미지 2개 중 2개
    이 단계에 사용된 도구:
    Tweezers
    $4.99
    • Using tweezers remove the pin that attaches the door to the body.

  9. Sony Cyber-shot DSC-H200 SD Door Replacement: 9 단계, 이미지 1개 중 1개
    • Remove the door.

결론

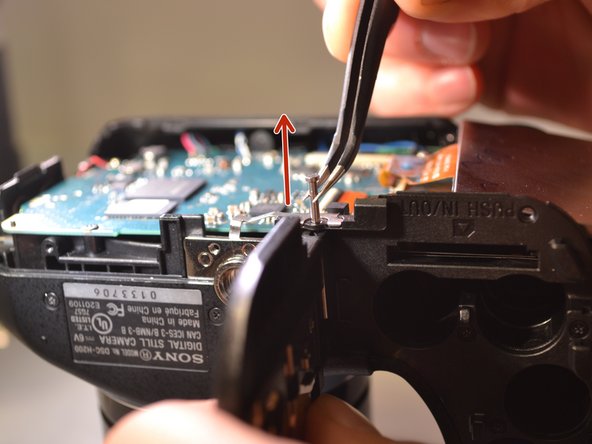
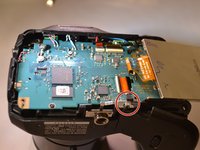
To reassemble your device, follow these instructions in reverse order.

다른 한 분이 해당 안내서를 완성하였습니다.

작성자

8다른 기여자 명과 함께

Elizabeth Morrison

회원 가입일: 04/08/15

287 평판

안내서 2개를 작성함

댓글 0개

댓글 쓰기

조회 통계:

지난 24시간: 0

지난 7일: 7

지난 30일: 19

전체 시간: 1,697