주요 콘텐츠로 건너뛰기

Sony Cyber-shot DSC-W55 Motherboard - First Half Replacement

필요한 것

  1. Sony Cyber-shot DSC-W55 Motherboard - First Half Replacement, Battery: 1 단계, 이미지 1/2 Sony Cyber-shot DSC-W55 Motherboard - First Half Replacement, Battery: 1 단계, 이미지 2/2
    • Slide the battery cover in the direction the arrow points.

    • Pull the battery cover towards you.
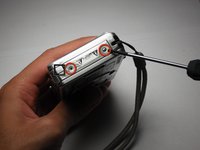
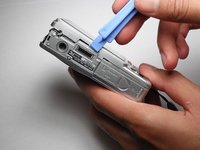
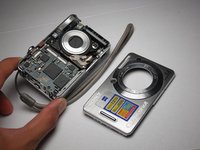
  2. Sony Cyber-shot DSC-W55 Motherboard - First Half Replacement: 2 단계, 이미지 1/2 Sony Cyber-shot DSC-W55 Motherboard - First Half Replacement: 2 단계, 이미지 2/2
    • Flick the blue switch for the battery to pop out.

    • Remove the battery from the camera.

  3. Sony Cyber-shot DSC-W55 Motherboard - First Half Replacement, Back Case: 3 단계, 이미지 1/2 Sony Cyber-shot DSC-W55 Motherboard - First Half Replacement, Back Case: 3 단계, 이미지 2/2
    • Using the Phillips #00 Screwdriver, remove the two screws from the caution panel.
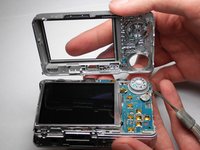
    • Remove that panel.

    • Careful for falling pieces.

  4. Sony Cyber-shot DSC-W55 Motherboard - First Half Replacement: 4 단계, 이미지 1/2 Sony Cyber-shot DSC-W55 Motherboard - First Half Replacement: 4 단계, 이미지 2/2
    • Remove the screw with a Phillips #00 screwdriver from the right side of the camera (with '3x optical zoom' engraved on the side panel).

    • Remove that panel.

  5. Sony Cyber-shot DSC-W55 Motherboard - First Half Replacement: 5 단계, 이미지 1/1
    • Remove the screw using the Phillips #00 screwdriver from the bottom of the camera, closest to the back cover.

  6. Sony Cyber-shot DSC-W55 Motherboard - First Half Replacement: 6 단계, 이미지 1/2 Sony Cyber-shot DSC-W55 Motherboard - First Half Replacement: 6 단계, 이미지 2/2
    • Gently remove the back cover.

    • It may be a bit stiff, so use some force to remove it. Proceed with caution.

  7. Sony Cyber-shot DSC-W55 Motherboard - First Half Replacement, Front Case: 7 단계, 이미지 1/1
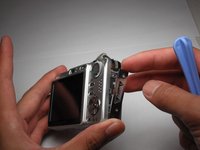
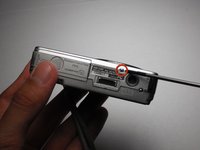
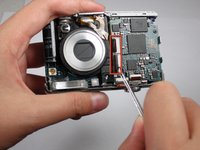
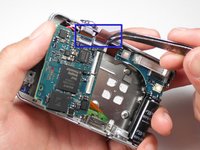
    • Remove the screw using a Phillips #00 screwdriver on the left side (where the "3x optical zoom" panel use to be).

  8. Sony Cyber-shot DSC-W55 Motherboard - First Half Replacement: 8 단계, 이미지 1/3 Sony Cyber-shot DSC-W55 Motherboard - First Half Replacement: 8 단계, 이미지 2/3 Sony Cyber-shot DSC-W55 Motherboard - First Half Replacement: 8 단계, 이미지 3/3
    • Remove the small screw using a Phillips #00 screwdriver on the bottom of the camera attached to the front cover.

    • Gently remove the front cover.

    • Put a little force to pop off the case. Proceed with caution.

  9. Sony Cyber-shot DSC-W55 Motherboard - First Half Replacement, Lens: 9 단계, 이미지 1/2 Sony Cyber-shot DSC-W55 Motherboard - First Half Replacement, Lens: 9 단계, 이미지 2/2
    • Flip the black secure locks off. Tweezers may be necessary.

    • Detach the two orange cables.

  10. Sony Cyber-shot DSC-W55 Motherboard - First Half Replacement: 10 단계, 이미지 1/2 Sony Cyber-shot DSC-W55 Motherboard - First Half Replacement: 10 단계, 이미지 2/2
    • Gently pull the lens container out of the camera.

  11. Sony Cyber-shot DSC-W55 Motherboard - First Half Replacement, Motherboard - First Half: 11 단계, 이미지 1/1
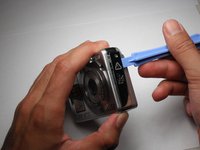
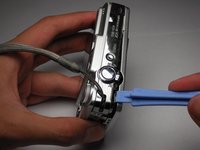
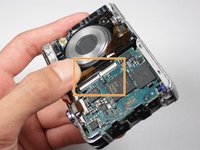
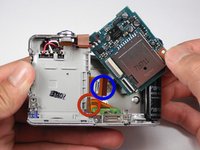
    • Remove the black screw using a Phillips #00 Screwdriver on the motherboard.

  12. Sony Cyber-shot DSC-W55 Motherboard - First Half Replacement: 12 단계, 이미지 1/2 Sony Cyber-shot DSC-W55 Motherboard - First Half Replacement: 12 단계, 이미지 2/2
    • Remove the two orange cables on the top of the motherboard with tweezers.

    • Lift the motherboard out of its slot.

  13. Sony Cyber-shot DSC-W55 Motherboard - First Half Replacement: 13 단계, 이미지 1/2 Sony Cyber-shot DSC-W55 Motherboard - First Half Replacement: 13 단계, 이미지 2/2
    • For the AV port, detach the bottom orange cable.

    • For the LCD screen, detach the top orange cable on the right side of the motherboard.

    • For the motherboard, detach all the orange cables.

    • Careful not to damage the red, white, and black wires when lifting the board.

결론

To reassemble your device, follow these instructions in reverse order.

다른 한 분이 해당 안내서를 완성하였습니다.

Christopher Wakamatsu

회원 가입일: 10/11/10

111 평판

안내서 1개 작성함

Cal Poly, Team 9-20, Regan Fall 2010 Cal Poly, Team 9-20, Regan Fall 2010 회원

CPSU-REGAN-F10S9G20

5 회원들

안내서 18개 작성하였습니다

댓글 0개

댓글 쓰기

조회 통계:

24 시간 전: 0

7일 전: 0

30일 전: 5

전체 시간: 3,429