주요 콘텐츠로 건너뛰기

TDK Life on Record A33 Battery Replacement

필요한 것

  1. TDK Life on Record A33 Battery Replacement, Battery: 1 단계, 이미지 1/2 TDK Life on Record A33 Battery Replacement, Battery: 1 단계, 이미지 2/2
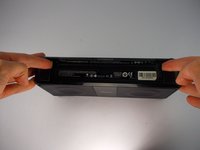
    • Remove all (6) 5mm Torx (Star) screws on the bottom panel of the device using the T4 screwdriver.

  2. TDK Life on Record A33 Battery Replacement: 2 단계, 이미지 1/1
    • Flip up the kickstand to get access to the bottom panel.

  3. TDK Life on Record A33 Battery Replacement: 3 단계, 이미지 1/3 TDK Life on Record A33 Battery Replacement: 3 단계, 이미지 2/3 TDK Life on Record A33 Battery Replacement: 3 단계, 이미지 3/3
    • Remove the bottom panel from the A33 by inserting both fingers in the gaps on the edge of the panel and lifting up until the bottom panel comes off of the device.

  4. TDK Life on Record A33 Battery Replacement: 4 단계, 이미지 1/3 TDK Life on Record A33 Battery Replacement: 4 단계, 이미지 2/3 TDK Life on Record A33 Battery Replacement: 4 단계, 이미지 3/3
    • Do not rip the wires connecting the A33 to the battery when removing the battery from the device.

    • Remove the old battery from its housing in the A33 by holding the device up and gently tapping the bottom on your hand until the battery pops out of the A33.

    • When putting the battery back in, make sure it is flat and the wires are pushed into the space along the side. This will make reinstalling the panel much easier

  5. TDK Life on Record A33 Battery Replacement: 5 단계, 이미지 1/2 TDK Life on Record A33 Battery Replacement: 5 단계, 이미지 2/2
    • Disconnect the old battery from the plug that is attached to the device by grabbing both ends of the plug and pulling them apart.

결론

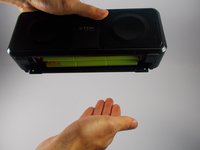
To reassemble your device, follow these instructions in reverse order.

다른 20명이 해당 안내서를 완성하였습니다.

Matthew Festa

회원 가입일: 10/16/15

808 평판

안내서 3개 작성하였습니다

UMass Dartmouth, Team 4-2, Catania Fall 2015 UMass Dartmouth, Team 4-2, Catania Fall 2015 회원

UMASSD-CATANIA-F15S4G2

4 회원들

안내서 5개 작성하였습니다

댓글 5개

This was a GREAT tutorial.

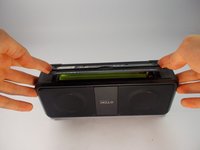
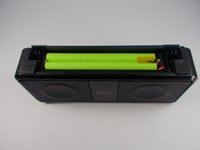
I did find on step 3 that I could not dislodge the cover with my fingernails. I had to use a jeweler's screwdriver to carefully pry it loose. I also found that it was easier to put the new battery in flat end first and then laying it down and putting the wires into the pocket.

Thanks for sharing.

Tom Scott - 답글

Beautifully done, 5 star

Don Rocklin - 답글

I can’t get the screws to come out for anything! Have tried T4 screwdriver plus other sizes, but they won’t budge. Any tips? It’s driving me crazy as I have a new battery ready to go.

rhianne - 답글

Just completed. Great directions though mine required a T5 torx bit, not T4.

Henry - 답글

댓글 쓰기

조회 통계:

24 시간 전: 3

7일 전: 18

30일 전: 95

전체 시간: 22,385