
Toshiba NB205 N330PK Webcam Replacement
30 분
조정
더 나은 소개글


-
-
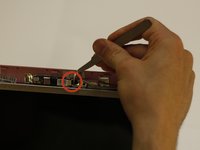
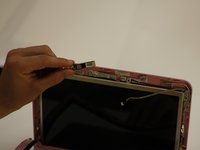
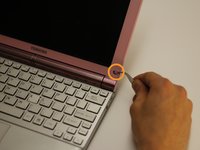
Use a spudger to remove the small rubber screw coverings above each retaining screw.
-
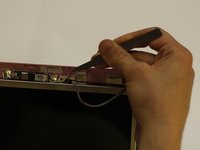
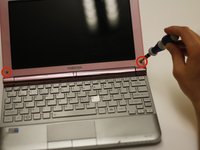
Use the bit driver with a Phillips #0 bit to remove the two 5 mm screws securing the screen bezel.
-
-


거의 끝나갑니다!
결승점
팀

Clemson, Team 14-2, Benson Fall 2013 Clemson, Team 14-2, Benson Fall 2013 회원
CLEM-BENSON-F13S14G2
3 회원들
안내서 27개를 작성함