주요 콘텐츠로 건너뛰기

Toshiba Satellite A105-S4284 Casing Replacement

필요한 것

  1. Toshiba Satellite A105-S4284 Casing Replacement, Keyboard: 1 단계, 이미지 1/1
    • Flip the laptop over so it is rightside up, and open the laptop all the way so that the screen is horizontal.

  2. Toshiba Satellite A105-S4284 Casing Replacement: 2 단계, 이미지 1/3 Toshiba Satellite A105-S4284 Casing Replacement: 2 단계, 이미지 2/3 Toshiba Satellite A105-S4284 Casing Replacement: 2 단계, 이미지 3/3
    • Using the plastic opening tool, pry off the panel above the keyboard, starting near the right front speaker.

    • Use the plastic opening tool to pop off tabs along the length of this panel.

    • This may feel like you're about to break something, but as long as you work your way down the panel and don't yank it out, the laptop will be fine.

  3. Toshiba Satellite A105-S4284 Casing Replacement: 3 단계, 이미지 1/2 Toshiba Satellite A105-S4284 Casing Replacement: 3 단계, 이미지 2/2
    • Unscrew the two 4.5 mm screws holding the keyboard on with the Phillips #1 screwdriver.

  4. Toshiba Satellite A105-S4284 Casing Replacement: 4 단계, 이미지 1/3 Toshiba Satellite A105-S4284 Casing Replacement: 4 단계, 이미지 2/3 Toshiba Satellite A105-S4284 Casing Replacement: 4 단계, 이미지 3/3
    • Lift the keyboard gently from the side closest the screen.

    • Pull out the ribbon connecting the keyboard to the laptop.

  5. Toshiba Satellite A105-S4284 Casing Replacement, Casing: 5 단계, 이미지 1/3 Toshiba Satellite A105-S4284 Casing Replacement, Casing: 5 단계, 이미지 2/3 Toshiba Satellite A105-S4284 Casing Replacement, Casing: 5 단계, 이미지 3/3
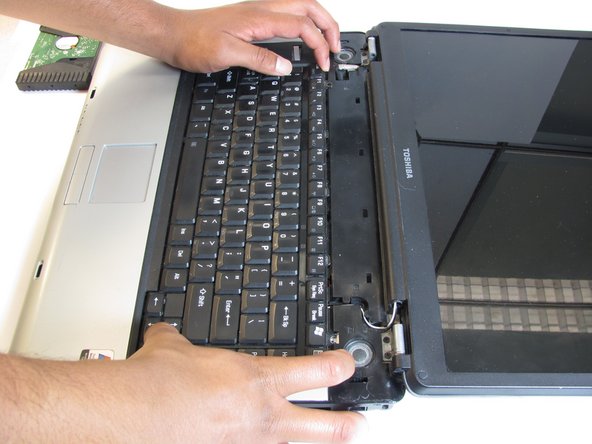
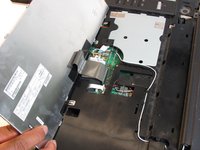
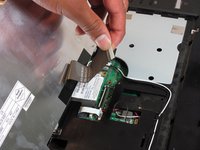
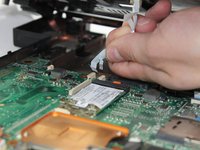
    • Disconnect wire attaching LCD to motherboard

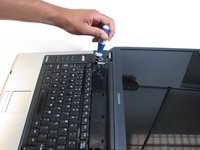
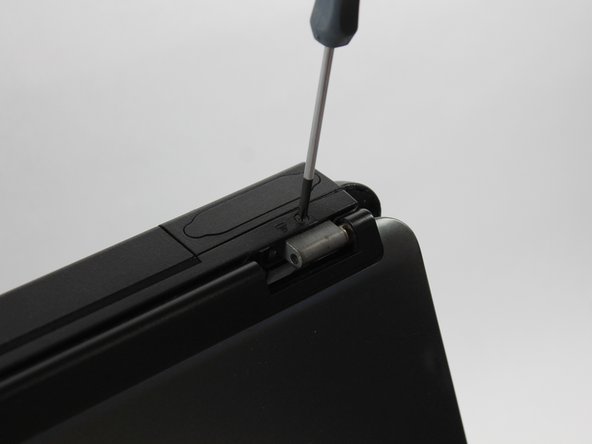
    • Using the Phillips screwdriver remove the two 4.0mm screws from each hinge above speakers

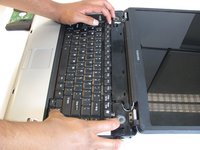
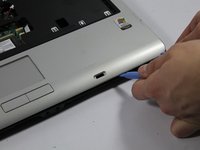
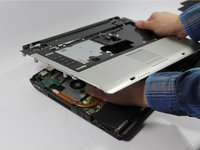
    • Partially close the lid and remove the last two 4.0mm screws from the back of the laptop.

  6. Toshiba Satellite A105-S4284 Casing Replacement: 6 단계, 이미지 1/2 Toshiba Satellite A105-S4284 Casing Replacement: 6 단계, 이미지 2/2
    • Remove the seventeen 4.5mm phillips screws on the bottom of the laptop.

    • Using the pry tool separate the two halves of the laptop base.

    • Use caution when separating the laptop halves as they are still connected by two ribbon cables.

  7. Toshiba Satellite A105-S4284 Casing Replacement: 7 단계, 이미지 1/2 Toshiba Satellite A105-S4284 Casing Replacement: 7 단계, 이미지 2/2
    • Lift the top half of the case enough to get your hand beneath it, and then remove the two ribbon cables that connect it to the motherboard.

결론

To reassemble your device, follow these instructions in reverse order.

다른 2명이 해당 안내서를 완성하였습니다.

Josh

회원 가입일: 03/12/14

685 평판

안내서 5개 작성하였습니다

UMass Dartmouth, Team 1-6, Cichon Spring 2014 UMass Dartmouth, Team 1-6, Cichon Spring 2014 회원

UMASSD-CICHON-S14S1G6

3 회원들

안내서 6개 작성하였습니다

댓글 0개

댓글 쓰기

조회 통계:

24 시간 전: 0

7일 전: 0

30일 전: 3

전체 시간: 893