주요 콘텐츠로 건너뛰기
Toshiba Satellite C50D-A Power Jack Replacement

Toshiba Satellite C50D-A Power Jack Replacement

Amber van Solingen

Amber van Solingen2 다른 기여자

최종 수정일 July 8, 2023

8 - 10 분
조정
누락된 단계

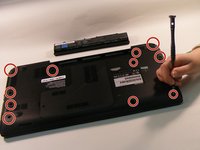
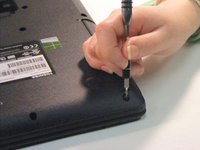
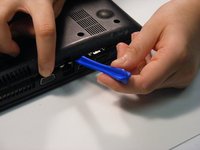
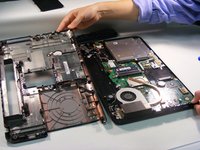
In this guide, you will use a pry tool and a Phillips screwdriver to get to the power jack in order to replace or clean it. Should your power jack be defective or damaged, you can replace it with a new one.

필요한 것

도구

  1. Toshiba Satellite C50D-A Power Jack Replacement, Battery: 1 단계, 이미지 1개 중 1개
    • Click button 1 to the unlocked position.

    • This button will have a 1 by it.

  2. Toshiba Satellite C50D-A Power Jack Replacement: 2 단계, 이미지 2개 중 1개 Toshiba Satellite C50D-A Power Jack Replacement: 2 단계, 이미지 2개 중 2개
    • Push and hold button 2 to the left.

    • As you push button 2 to the left position, simultaneously lift up the battery pack.

    • This button will have a 2 by it.

  3. Toshiba Satellite C50D-A Power Jack Replacement, Lower Case: 3 단계, 이미지 2개 중 1개 Toshiba Satellite C50D-A Power Jack Replacement, Lower Case: 3 단계, 이미지 2개 중 2개
    • Using the Phillips #1 screwdriver, remove the eleven 2.5mm screws.

  4. Toshiba Satellite C50D-A Power Jack Replacement: 4 단계, 이미지 1개 중 1개
    • Remove the one 2.5mm Phillips #1 middle plate screw.

  5. Toshiba Satellite C50D-A Power Jack Replacement: 5 단계, 이미지 1개 중 1개
    • Lift up the middle vent panel.

    • Set the panel to the side.

  6. Toshiba Satellite C50D-A Power Jack Replacement: 6 단계, 이미지 3개 중 1개 Toshiba Satellite C50D-A Power Jack Replacement: 6 단계, 이미지 3개 중 2개 Toshiba Satellite C50D-A Power Jack Replacement: 6 단계, 이미지 3개 중 3개
    • Using the plastic opening tool, remove the outer panel and set to the side.

    • Be careful not to break the back of the computer.

  7. Toshiba Satellite C50D-A Power Jack Replacement, Power Jack: 7 단계, 이미지 1개 중 1개
    • Locate the power jack at the back, right-hand side next to the USB port.

  8. Toshiba Satellite C50D-A Power Jack Replacement: 8 단계, 이미지 1개 중 1개
    • Carefully unhook it from the attachment sites.

결론

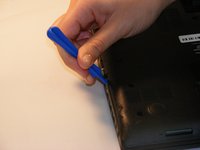
To reassemble your device, follow these instructions in reverse order.

다른 한 분이 해당 안내서를 완성하였습니다.

작성자

2다른 기여자 명과 함께

Amber van Solingen

회원 가입일: 01/29/18

710 평판

안내서 6개를 작성함

댓글 0개

댓글 쓰기

조회 통계:

지난 24시간: 2

지난 7일: 10

지난 30일: 15

전체 시간: 1,156