주요 콘텐츠로 건너뛰기

Unjamming an Adjustable 3-Hole Puncher

보관된 가이드
해당 안내서는 단지 역사적인 목적으로 보관됩니다. 최신 버전 안내서를 사용하여 수리 하십시오.

필요한 것

  1. Unjamming an Adjustable 3-Hole Puncher, Unjamming an Adjustable 3-Hole Puncher: 1 단계, 이미지 1/2 Unjamming an Adjustable 3-Hole Puncher, Unjamming an Adjustable 3-Hole Puncher: 1 단계, 이미지 2/2
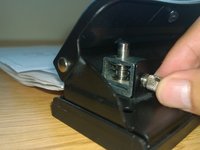
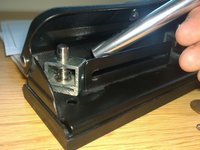
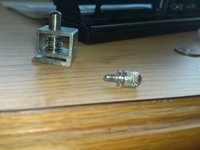
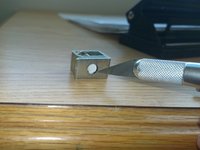
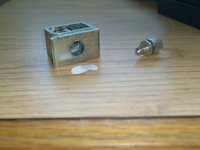
    • Place a penny, a X-ACTO knife and a 3-hole puncher on a flat surface.

  2. Unjamming an Adjustable 3-Hole Puncher: 2 단계, 이미지 1/3 Unjamming an Adjustable 3-Hole Puncher: 2 단계, 이미지 2/3 Unjamming an Adjustable 3-Hole Puncher: 2 단계, 이미지 3/3
    • Grab a penny and place it between the 'jammed' puncher and place it between the bottom of the compressed spring and the washer.

    • Grip your penny firmly and compress the washer in an upward motion until you hear a 'pop' sound.

    • Your hole puncher is now unjammed.

    • Any steps after Step 2 is optional!

  3. Unjamming an Adjustable 3-Hole Puncher: 3 단계, 이미지 1/3 Unjamming an Adjustable 3-Hole Puncher: 3 단계, 이미지 2/3 Unjamming an Adjustable 3-Hole Puncher: 3 단계, 이미지 3/3
    • Unscrew the head that keeps the puncher intact.

    • Use your index finger or a X-ACTO knife to move aside the puncher out of the 3-hole puncher.

  4. Unjamming an Adjustable 3-Hole Puncher: 4 단계, 이미지 1/3 Unjamming an Adjustable 3-Hole Puncher: 4 단계, 이미지 2/3 Unjamming an Adjustable 3-Hole Puncher: 4 단계, 이미지 3/3
    • Be very careful when using the X-ACTO knife.

    • Use a X-acto knife to scrape off any excess paper stuck in the puncher.

결론

To reassemble your device, follow these instructions in reverse order.

다른 한 분이 해당 안내서를 완성하였습니다.

Zhen Xiao

회원 가입일: 04/09/15

156 평판

안내서 1개 작성함

Cal Poly, Team 30-1, Green Spring 2015 Cal Poly, Team 30-1, Green Spring 2015 회원

CPSU-GREEN-S15S30G1

4 회원들

안내서 7개 작성하였습니다

댓글 0개

댓글 쓰기

조회 통계:

24 시간 전: 0

7일 전: 1

30일 전: 6

전체 시간: 450