
VIT P2402 Laptop Disassembly

THe charging pin of the VIT P2402 represents a serious design flaw. It can move easily toward the inside of the chasis which can stop the laptop from charging properly.
필요한 것

-
-
Place the laptop upside down, with the battery up.
-
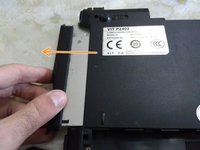
Slide the security latch to the left.
-
Slide the security latch to the right with force
-
The second security latch ejects the battery from its place. Remove it.
-
-
-
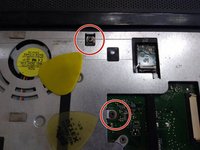
Remove the six Phillips 00 screws that hold the service panel.
-
Remove the panel and clean it with a brush. Take special care in the slits and fan area.
-
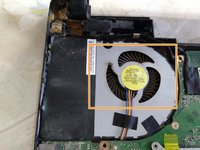
Use a blower to remove dust from the fan. You must avoid turning this with pliers. The flow should be opposite to normal the normal circulation when the laptop is turned on. Use a small brush to loosen the dust.
-
-
-
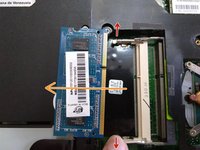
Pull both retention hooks until the memory tilts.
-
Remove the memory
-
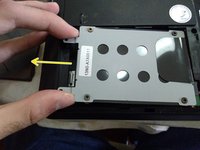
Pull the hard drive case so that you can move it to the left
-
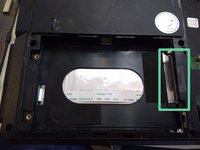
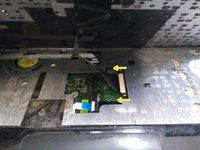
Here we can see the SATA data and power connector.
-
-
-
-
Remove the 8 Phillips 00 screws from the inside chasis
-
-
-
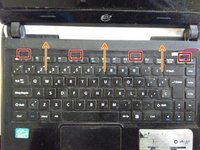
Flip the laptop right-side up and use the tabs to remove the upper part of the the keyboard
-
Pull it slightly above the keyboard, enough to free the pegs from the inner part.
-
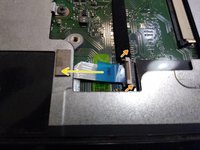
Tilt the keyboard from the inner part first. Free the ribbon cable from its two retainers.
-
-
-
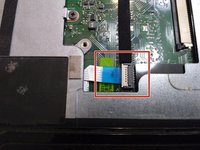
Remove the ribbon cable that connects the motherboard to the touchpad
-
Lift the plastic retainer gently
-
Remove the ribbon cable from the upper part the same way. This connects to the power button.
-
-
-
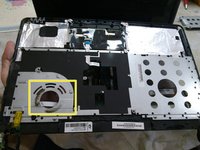
Remove the two Phillips 00 screws
-
Remove the internal DVD unit
-
Remove the upper part of the chasis. Remove the powder from the other side.
-
-
-
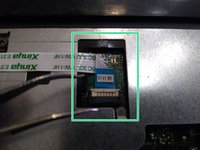
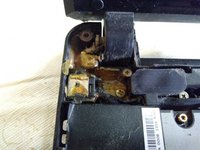
Here we see the epoxy used to fix the charging pin, it can be used to prevent any contact.
-
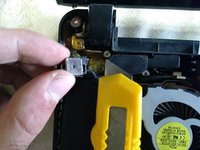
Use an exacto knife to remove the excess epoxy.
-


Para volver a montar tu aparato, siga estas instrucciones en orden inverso.
Para volver a montar tu aparato, siga estas instrucciones en orden inverso.
다른 16명이 해당 안내서를 완성하였습니다.
다음 번역가들에게 특별히 감사 드립니다:
100%

이 번역인들은 저희가 세상을 수리하는 데 도움을 주고 있어요! 기여하시겠습니까?
번역 시작하기 ›

댓글 66개
Saludos Marcos Saludos estas vit p2402 poseen en el circuito de encendido un componente SMD de numeración X315, podrias por favor ayudarme a identificar que cosa es y cual es su funcion, pues al parecer me esta presentando problemas y necesita ser reemplazado, pero eso no sale como transistor, no es un simple mosfet, no es un regulador termico, ni de carga,no es diodo, que cosa es? y sobre todo, en caso de no conseguirlo, con que se puede sustituir este componente.
Saludo Miguel.
Veo que en google no sale ese componente. Lo que hice con la laptop de la guía fue cambiar el pin de carga por otro haciendo un corte y tape negro. sin embargo, me puedes contactar si pinchas mi perfil de ifixit, verás mi redes sociales.
hola me gustaria que me orienten, mi lapto vit p2402 no prende devido a que tuvo un corto circuito y se le quemo una fuente. la pieza dañada es i225al2v. la pregunta es puedo sustituir esa pieza y lograr de alguna manera que funcione con normalidad.
Saludos. No tengo como ayudarte en eso ya que por ahora no tengo el conocimiento de electrónica y microsoldadura necesario.
Si se te ofrece otra cosa, puedes contactarme por mis RRSS que aparecen en mi perfil de ifixit.
Amigo no sabes que modelo es el pin de carga para poder reemplazarlo… Gracias