소개
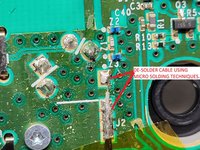
Xbox 컨트롤러가 작동하지 않는 경우 하단 마더보드를 교체해야 할 수 있습니다. 완전히 분리하려면 납땜이 필요합니다. 납땜 안내서 링크가 포함되어 있으니 도움을 받으세요. 이 안내서는 Xbox One 무선 컨트롤러 모델 1708의 하단 마더보드에 접근하는 방법을 보여줍니다.
필요한 것
-
-
-
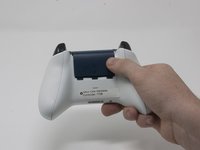
컨트롤러 상단 틈새에 플라스틱 여는 도구를 삽입하고, 여는 도구를 사용하여 컨트롤러 하단까지 부드럽게 밀어 넣으세요.
-
여는 도구를 계속 사용하여 컨트롤러에서 측면 플레이트를 부드럽게 들어 올려 분리하세요.
-
반대쪽 측면 플레이트도 동일한 과정으로 반복하세요.
-
-
-
배터리 라벨을 부드럽게 떼어내거나 배터리 함의 스티커 중앙에 구멍을 뚫어 숨겨진 나사를 확인하세요.
-
컨트롤러 뒷면에서 9mm 톡스 보안 나사 5개를 제거하세요.
-
-
-
-
-
-
-
-
-
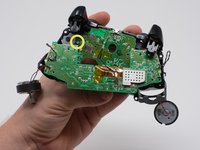
마더보드 하단 중앙에서 70mm 톡스 나사 3개를 제거하세요.
-
마더보드 하단 럼블 모터 옆에 있는 70mm 톡스 나사 2개를 제거하세요.
-
마더보드 하단 왼쪽 측면에 위치한 70mm 톡스 나사 1개를 제거하세요.
-
-
-
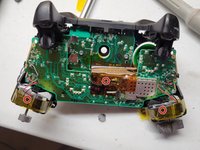
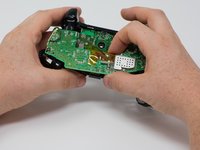
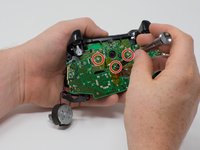
스퍼저를 사용하여 왼쪽 및 오른쪽 범퍼 양 끝의 작은 후크를 해제하세요.
-
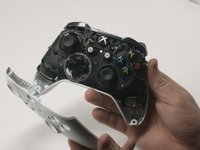
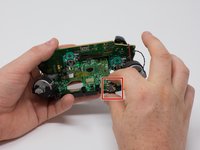
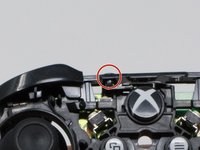
후크를 해제한 후, 페이스 플레이트를 컨트롤러 뒷면에서 분리할 때 주의하세요. 커넥트/동기화 버튼(두 번째 이미지 참조)은 이 페이스 플레이트에 고정되어 있어 이 단계를 수행하면 느슨해지게 됩니다.
-
-


기기를 재조립하려면 이 지침을 역순으로 따르세요.
다른 32명이 해당 안내서를 완성하였습니다.
다음 번역가들에게 특별히 감사 드립니다:
100%

Translation Bot님은 저희가 세상을 수리하는데 동참하신 분입니다! 기여하시겠습니까?
번역 시작하기 ›
팀

Cal Poly, Team S18-G3, Forte Fall 2017 Cal Poly, Team S18-G3, Forte Fall 2017 회원
CPSU-FORTE-F17S18G3
4 회원들
안내서 84개를 작성함
15가이드 댓글
Just to clarify you don’t need to do any soldering. If you are careful enough with the top mobo and rumble motors the wires should stay connected and you can take out the bottom mobo fairly easily. I saw some youtube videos that imply that you do need to disconnect and solder them back. Not the case!
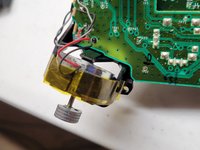
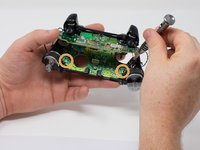
What is the wire that connects the two motherboards together with the copper adaptor for? When taking mine apart, the wire came loose from that tiny copper piece and is unrepairable. I think it's for the Bluetooth functionality. The wire used looks to have a very tiny wire inside itself surrounded with what looks to be ground wire. It's the black one in the middle.
It will clip back into place if you align it properly.its similar to the antenna clip of motherboard in a iPhone 4 you don’t need to solder it just lift and be careful when reattaching it don’t force it if it bends you are screwed. But when lined up right minimal pressure will snap back into place.
I’ve tried many different angles and pressures to get that thing back in, the pin doesn’t look bent but it just won’t go back in.
Jason Bogart - 답글 공유