소개
Use this guide to remove or replace the battery on your Xiaomi Redmi Note 10 Pro.
If your battery is swollen, take appropriate precautions.
For your safety, discharge your battery below 25% before disassembling your phone. This reduces the risk of a dangerous thermal event if the battery is accidentally damaged during the repair.
You’ll need replacement adhesive to reattach components when reassembling the device.
필요한 것
-
-
Insert a SIM card eject tool, a SIM eject bit, or a straightened paper clip into the hole on the SIM tray located at the left edge of the phone.
-
Press directly into the hole to eject the SIM card tray.
-
Remove the SIM card tray.
-
-
-
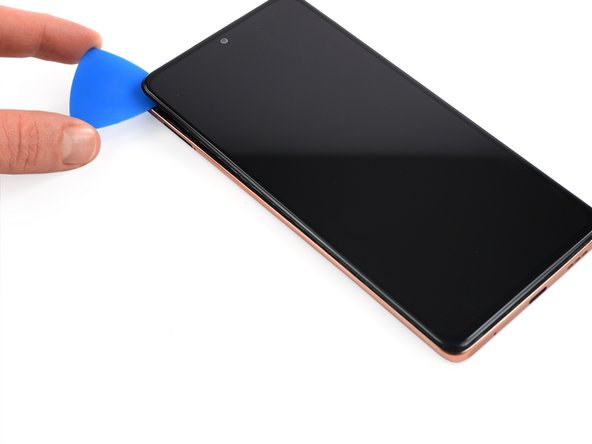
Prepare an iOpener and apply it to the rear glass for at least two minutes to loosen the adhesive underneath.
-
-
-
Secure a suction handle to the right edge of the rear glass, as close to the edge as possible.
-
-
-
Lift the rear glass with the suction handle to create a small gap between the rear glass and the frame.
-
Insert an opening pick into the gap you created.
-
-
-
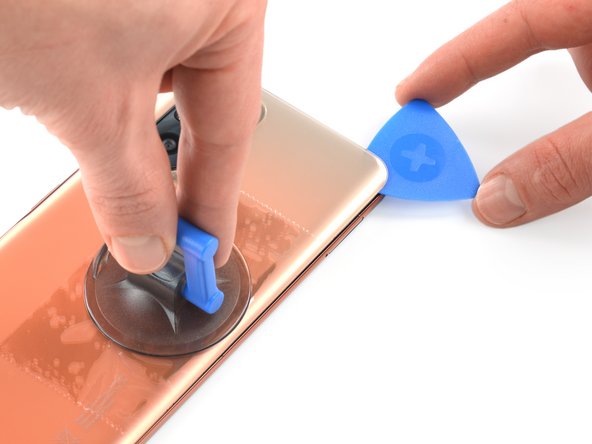
Slide the opening pick to the top right corner to slice the adhesive.
-
Leave the opening pick in place to prevent the adhesive from resealing.
-
-
-
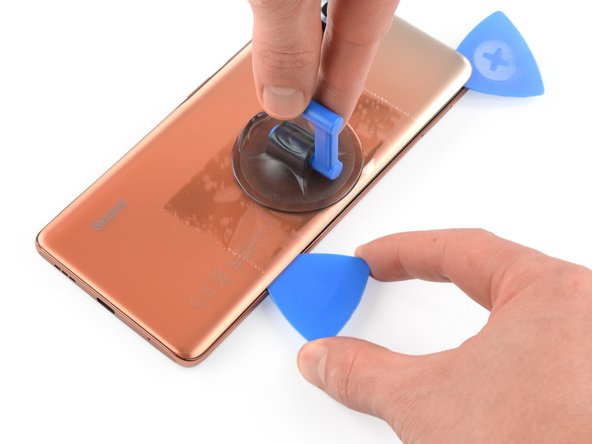
Insert a second opening pick next to the top right corner.
-
Slide the opening pick to the bottom right corner to slice the adhesive.
-
Leave the opening picks in place to prevent the adhesive from resealing.
-
-
-
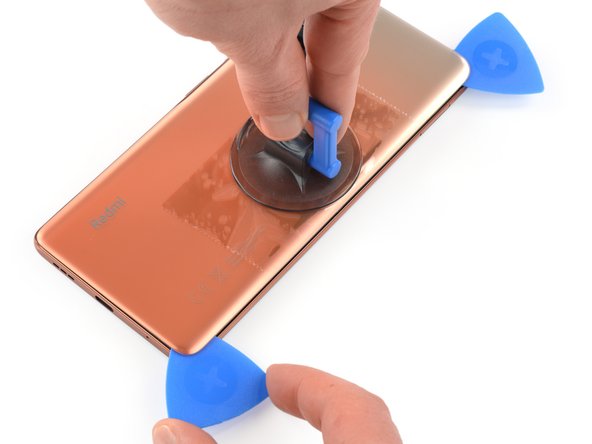
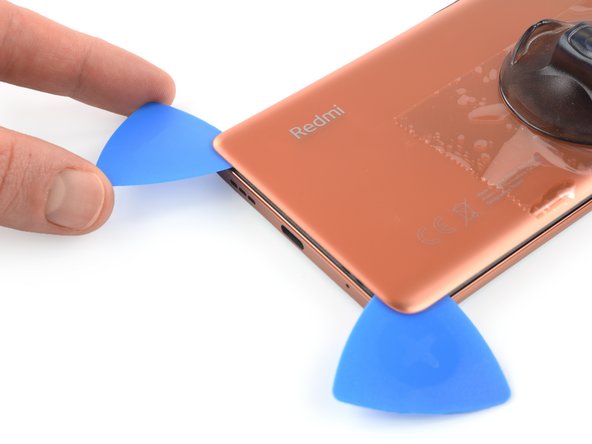
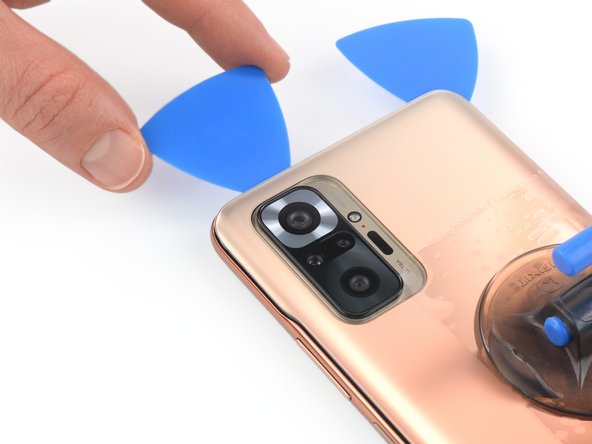
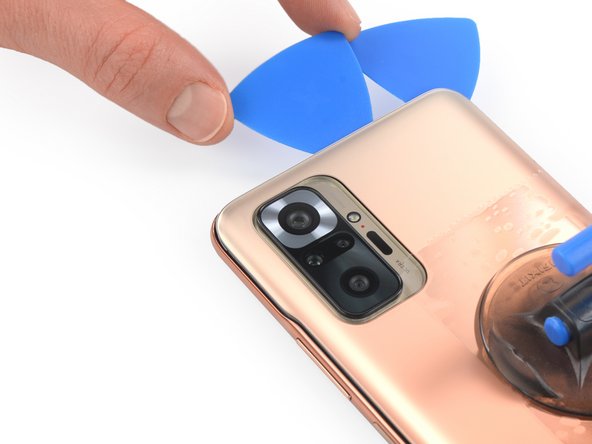
Insert a third opening pick at the bottom right corner of your phone.
-
Slide the opening pick along the bottom edge of your phone to slice the adhesive.
-
Leave the opening pick in the bottom left corner to prevent the adhesive from resealing.
-
-
-
-
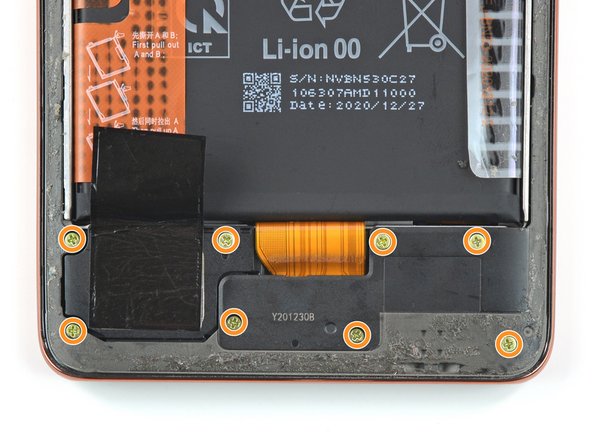
Use a Phillips screwdriver to remove the seventeen screws securing the midframe:
-
Nine 4.4 mm-long screws in the upper area of the midframe
-
Eight 3.4 mm-long screws in the lower area of the midframe
-
-
-
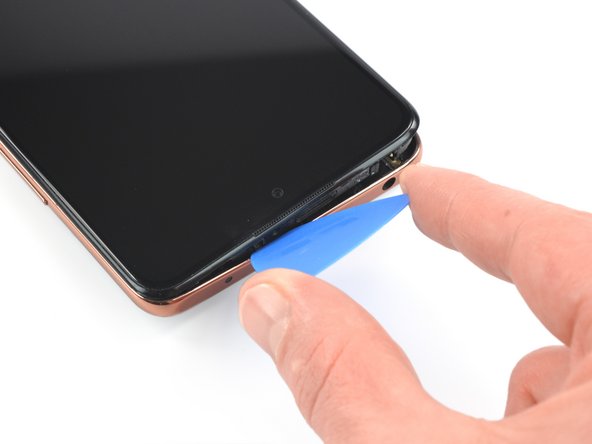
Insert an opening pick between the midframe and front panel assembly on the bottom of the phone near the charging port.
-
Slide the opening pick to the bottom left corner to release the plastic clips.
-
-
-
Slide the opening pick along the left edge of your phone to release the plastic clips.
-
-
-
Carefully swing the midframe open in the direction of the power and volume buttons and place the midframe close to the phone assembly.
-
-
-
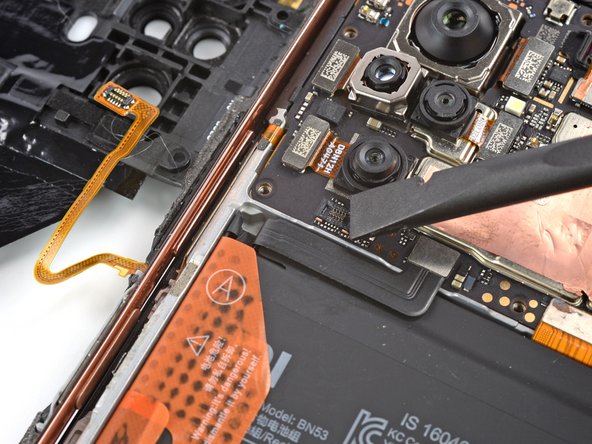
Use the flat end of a spudger to pry up and disconnect the power and volume button flex cable from the motherboard.
-
-
-
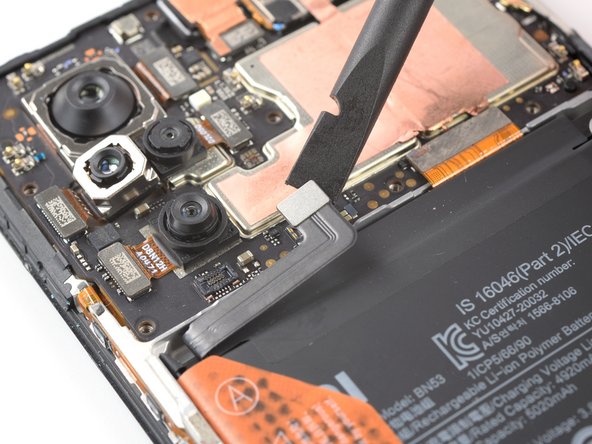
Use a spudger to disconnect the battery cable by prying the connector straight up from its socket.
-
-
-
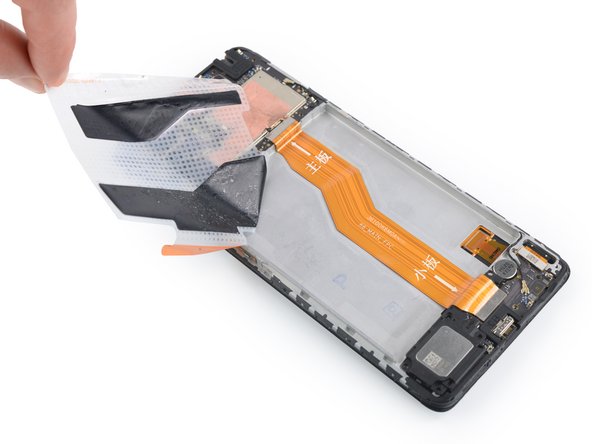
Carefully slide an opening pick underneath the graphite film covering the battery and the loudspeaker assembly to loosen its adhesive.
-
Remove the graphite film.
-
-
-
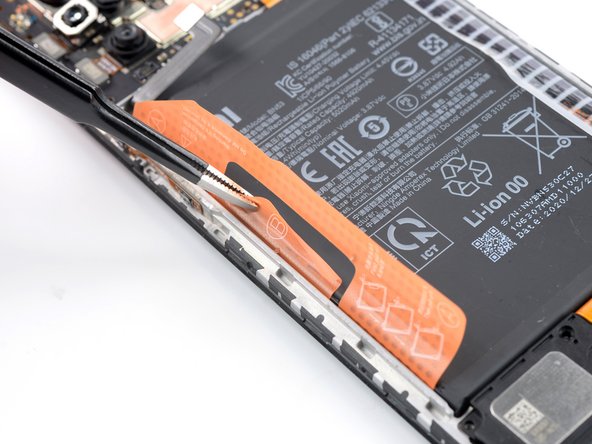
Use a pair of blunt nose tweezers or a clean fingernail to peel the orange adhesive strip labeled with a A off the battery.
-
Use a pair of blunt nose tweezers or a clean fingernail to peel the orange adhesive strip labeled with a B off the battery.
-
-
-
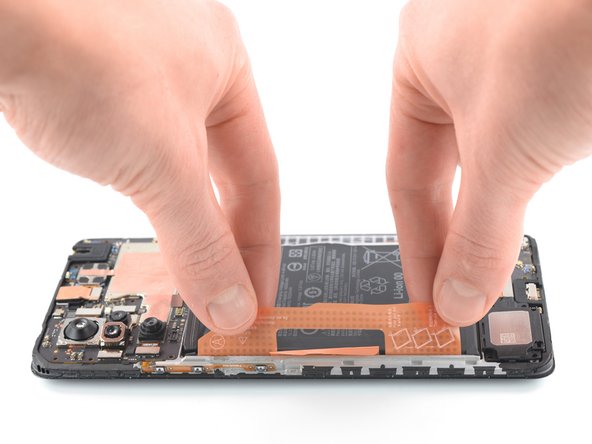
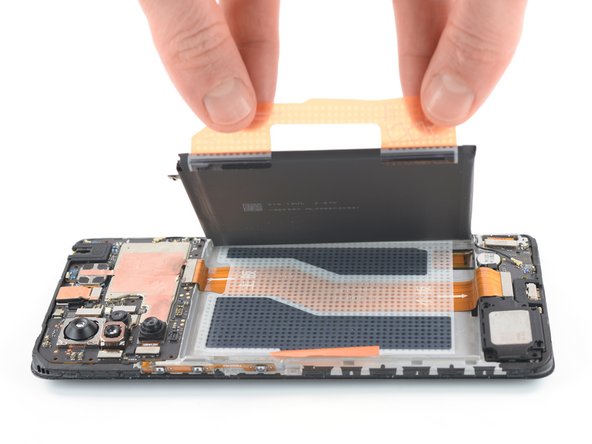
Pull up on the orange adhesive strip labeled with the A to lift the battery out of its recess and swing it up to an upright position.
-


If possible, turn on your device and test your repair before installing new adhesive and resealing.
For optimal performance, calibrate your newly installed battery after completing this guide.
Secure the new battery with pre-cut adhesive or double-sided adhesive tape. In order to position it correctly, apply the new adhesive into the device at the places where the old adhesive was located, not directly onto the battery. Press the new battery firmly into place.
Compare your new replacement part to the original part—you may need to transfer remaining components or remove adhesive backings from the new part before installing.
To reassemble your device, follow these instructions in reverse order. During reassembly apply new adhesive where necessary after cleaning the relevant areas with isopropyl alcohol (>90%).
Take your e-waste to an R2 or e-Stewards certified recycler.
Repair didn’t go as planned? Try some basic troubleshooting, or ask our Answers community for help.
다른 15명이 해당 안내서를 완성하였습니다.


댓글 2개
I noticed that both in your tutorial and in my device, the original battery compatible with the Redmi Note 10 Pro is the Model BN53. However, when I search for replacement batteries, the BN53 is not compatible with the cell phone, and they indicate the BN59. Could you tell me why?
Donde puedo conseguir esa bateria en España