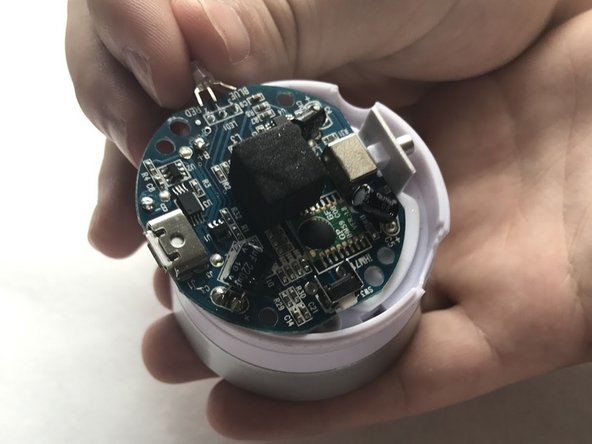
주요 콘텐츠로 건너뛰기

iHome iM71SC Base LED Replacement

필요한 것

  1. iHome iM71SC Base LED Replacement, iHome iM71SC Disassembly: 1 단계, 이미지 1/1
    • Push down and turn the top of the speaker clockwise. This will release the clips and expand the speaker.

  2. iHome iM71SC Base LED Replacement: 2 단계, 이미지 1/1
    • Use a #000 Phillips screwdriver to remove the four 1 mm screws from the bottom half of the speaker.

  3. iHome iM71SC Base LED Replacement: 3 단계, 이미지 1/1
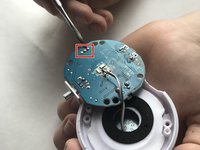
    • Flip the speaker over and use a #000 Phillips screwdriver to remove three 1mm screws . Unscrew these to unfasten the top.

  4. iHome iM71SC Base LED Replacement: 4 단계, 이미지 1/1
    • Remove the now unfastened coverings to expose the internals of the speaker.

  5. iHome iM71SC Base LED Replacement, Base LED: 5 단계, 이미지 1/1
    • Locate the LED on the circuit board.

  6. iHome iM71SC Base LED Replacement: 6 단계, 이미지 1/2 iHome iM71SC Base LED Replacement: 6 단계, 이미지 2/2
    • Desolder the three connections to the old LED to remove it from the board.

    • Check out this awesome guide for soldering & desoldering instructions.

결론

To reassemble your device, follow Steps 1-4 in reverse order.

Sarah Brown

회원 가입일: 03/21/17

301 평판

안내서 3개 작성하였습니다

UMass Dartmouth, Team S7-G5, Julie Spring 2017 UMass Dartmouth, Team S7-G5, Julie Spring 2017 회원

UMASSD-JULIE-S17S7G5

5 회원들

안내서 4개 작성하였습니다

댓글 0개

댓글 쓰기

조회 통계:

24 시간 전: 0

7일 전: 0

30일 전: 3

전체 시간: 210