소개
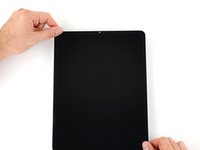
이 안내서를 사용하여 iPad Pro 12.9" 4세대에서 스크린을 교체하세요.
스크린을 수리해야 하는 일반적인 이유로는 깨졌거나 터치에 반응하지 않거나 죽은 픽셀이 있는 경우입니다.
스크린은 디스플레이와 상단 센서 어셈블리로 구성되어 있습니다. 상단 센서 어셈블리를 교체하지 않으면 Face ID 및 True Tone 기능이 손실됩니다. 센서 어셈블리는 스크린에 단단히 접착되어 있어 파손되기 쉽습니다. 상단 센서 어셈블리를 들어 올릴 때 매우 천천히 작업하세요.
이 수리를 완료하려면 얇은 양면 테이프 및 접착 풀과 같은 교체용 접착제가 필요합니다.
일부 사진에는 두 개의 카드 스트립이 배터리 커넥터를 막고 있는 모습이 나와 있습니다. 이 방법은 옵션이지만 배터리를 완전히 방전하는 것이 더 안정적입니다. 안내서를 진행하면서 이러한 시각적 차이는 무시하세요.
필요한 것
-
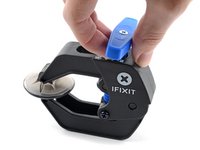
이 단계에 사용된 도구:Clampy - Anti-Clamp$24.95
-
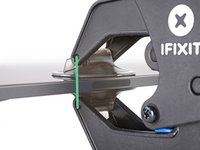
파란색 손잡이를 뒤로 당겨 안티-클램프의 팔을 잠금 해제하세요.
-
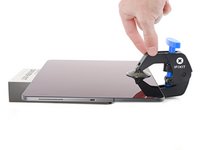
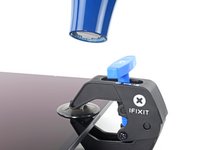
iPad 아래에 물체를 놓아 흡입 컵 사이에서 수평을 이루도록 하세요.
-
흡입 컵을 iPad의 오른쪽 가장자리 중앙 배치하세요—상단에 하나, 하단에 하나.
-
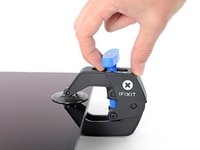
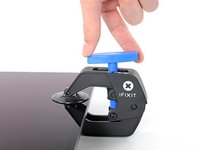
안티-클램프의 하단을 안정적으로 잡고 상단 컵을 꾹 눌러 흡입하세요.
-
-
-
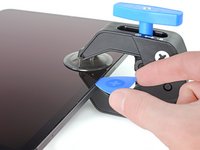
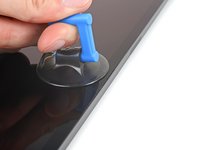
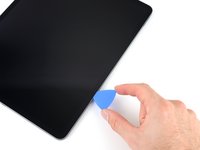
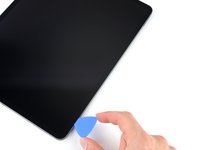
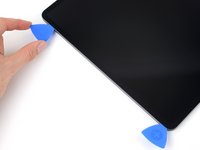
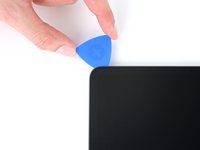
스크린에 흡입 손잡이를 최대한 오른쪽 가장자리 중앙에 가깝게 붙이세요.
-
강하고 일정한 힘으로 흡입 손잡이를 위로 당겨 프레임과 스크린 사이에 작은 간격을 만드세요.
-
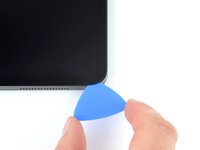
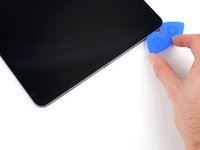
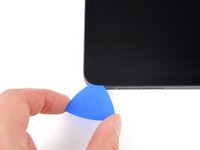
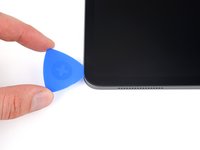
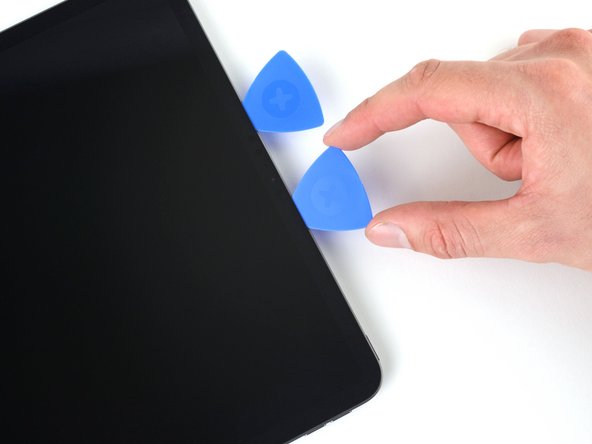
틈새에 여는 픽을 끼우세요.
-
-
-
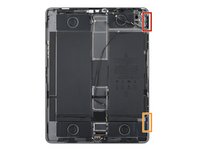
자석 하나는 상단 가장자리에서 2cm부터 시작하며 길이가 2.5cm입니다.
-
두 번째 자석은 아래쪽 가장자리에서 3cm부터 시작하며 길이는 2.5cm입니다.
-
-
-
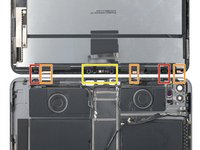
상단 구멍은 상단 가장자리에서 4cm부터 시작하며 길이는 2.5cm입니다.
-
중간 구멍은 프레임의 정확히 중앙에 있으며 길이는 2.5cm입니다.
-
하단 구멍은 하단 가장자리에서 4cm부터 시작하며 길이는 2.5cm입니다.
-
-
-
-
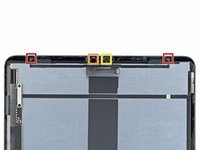
상단 가장자리 접착제가 부드러워지는 동안 다음 사항에 유의하세요:
-
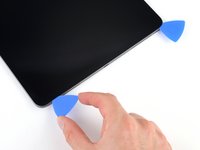
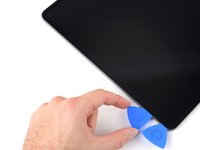
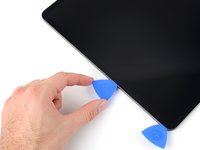
모서리 근처에 두 개의 주변 조명 센서가 있습니다. 센서가 손상됨을 방지하기 위해 픽의 끝 부분만 여기에 끼우세요.
-
열 분산 테이프가 세 개 있습니다. 이곳을 자를 때 픽의 각도를 위로 향하게 하세요.
-
전면 카메라 어셈블리는 상단 가장자리 중앙에 있습니다. 손상됨을 방지하기 위해 여기에 픽을 끼우지 마세요.
-
-
-
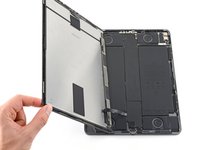
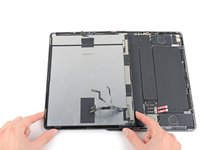
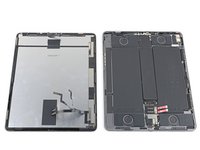
스크린의 반대쪽 두 모서리를 잡고 살살 움직여 프레임에서 분리하세요.
-
상단 가장자리 근처의 리본 케이블이 드러날 때까지 스크린을 프레임의 오른쪽 하단 모서리를 향해 옮기세요.
-
-
이 단계에 사용된 도구:FixMat$36.95
-
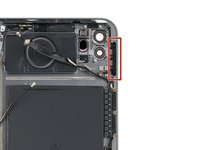
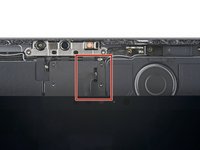
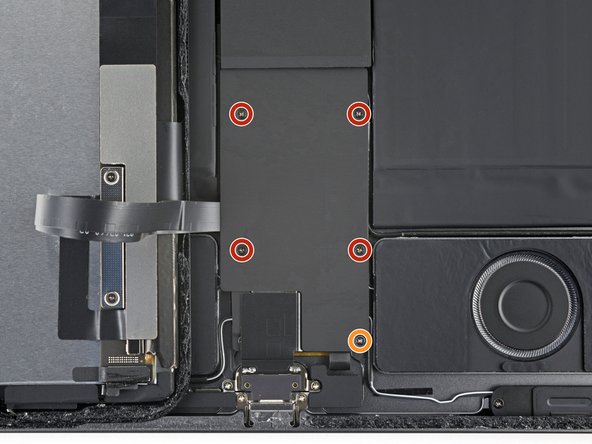
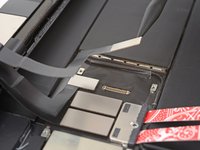
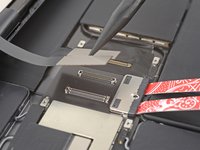
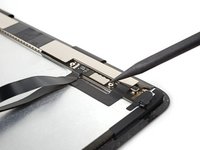
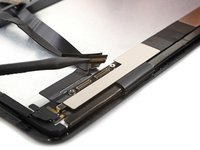
필립스 스크루드라이버를 사용하여 상단 케이블 실드를 고정하는 나사 두 개를 풀어주세요:
-
1.8mm 길이 나사 1개
-
2.0mm 길이 나사 1개
-
-
이 단계에 사용된 도구:Tweezers$4.99
-
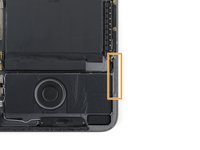
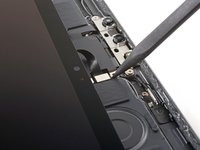
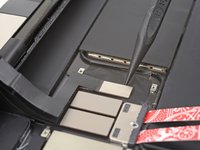
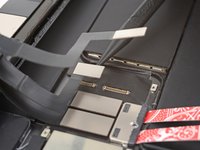
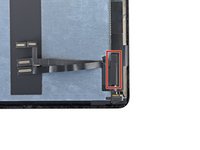
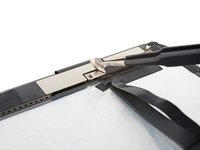
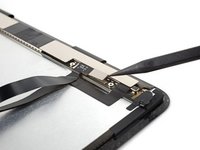
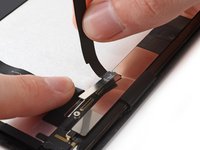
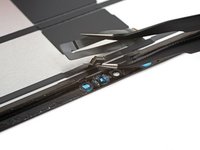
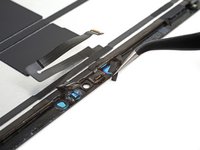
스퍼저를 사용하여 스크린의 하단 디스플레이 케이블 프레스 커넥터를 들어 올려 연결 해제하세요.
-
핀셋을 사용하여 하단 프레스 커넥터를 스크린에서 구부려서 상단 프레스 커넥터를 드러내세요.
-
-
-
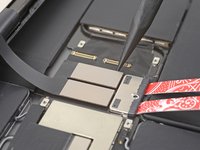
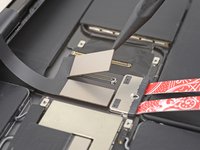
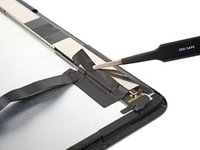
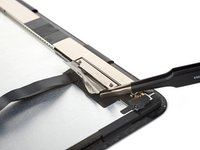
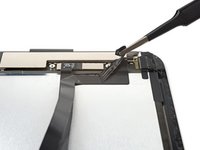
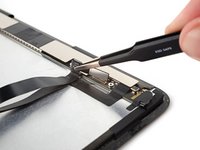
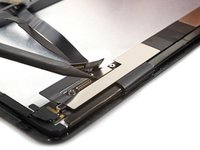
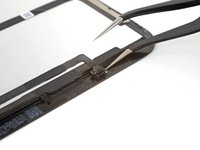
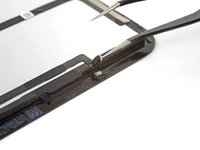
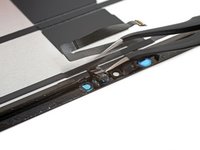
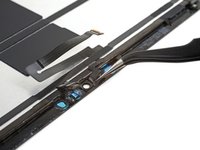
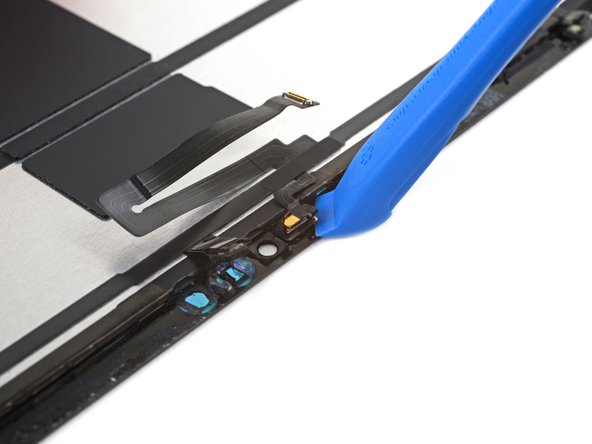
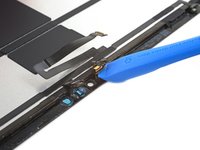
각진 핀셋의 한쪽 팔을 주변 조명 센서와 스크린 사이에 끼우세요.
-
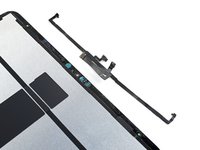
센서를 들어 올려 스크린에서 분리하세요.
-
다른 주변 조명 센서에 대해서도 이 절차를 반복하세요
-
-
이 단계에 사용된 도구:Tesa 61395 Tape$5.99


새 교체 부품과 원래 부품을 비교하세요—새 부품을 설치하기 전에 남은 부품을 옮기거나 새 부품에서 접착 백킹을 제거해야 할 수도 있습니다.
기기를 재조립하려면 이 지침을 역순으로 따르세요.
전자 폐기물을 R2 또는 e-Stewards 인증 재활용업체로 가져가세요.
수리가 계획대로 진행되지 않았나요? 기본 문제 해결을 참조하거나 iPad Pro 12.9" 4th Gen 답변 커뮤니티에 도움을 요청하세요.
새 교체 부품과 원래 부품을 비교하세요—새 부품을 설치하기 전에 남은 부품을 옮기거나 새 부품에서 접착 백킹을 제거해야 할 수도 있습니다.
기기를 재조립하려면 이 지침을 역순으로 따르세요.
전자 폐기물을 R2 또는 e-Stewards 인증 재활용업체로 가져가세요.
수리가 계획대로 진행되지 않았나요? 기본 문제 해결을 참조하거나 iPad Pro 12.9" 4th Gen 답변 커뮤니티에 도움을 요청하세요.
다른 9명이 해당 안내서를 완성하였습니다.
다음 번역가들에게 특별히 감사 드립니다:
100%

Christian Kim님은 저희가 세상을 수리하는데 동참하신 분입니다! 기여하시겠습니까?
번역 시작하기 ›

팀

댓글 6개
I completed this process today. I had a cracked screen on a 2020 12.9" iPad. Great guide but a couple of things I think should be mentioned.
1. Screen magnets along the right edge are not included on the replacement screen I got from iFixit, which I should have noticed but didn't. So don't forget to transfer these over. I did not realize this until I had sealed it up again, unfortunately, and I don't want to damage the adhesive or risk damaging the new screen just to have my case magnetize properly. Luckily my case has a latch piece that comes up around the Apple pencil and then attaches to the screen cover so these magnets are not necessary for me.
2. The description of the reattachment of the press connectors could use some clarification. "One side" refers to the short edges of the rectangular connector which could be nice to clarify, as I first assumed it meant the rows of pins. Though once you see how it works it is fairly obvious.
Overall I am happy with the result! No more cracks and fully functional!
I would also add that if you have a cracked screen be very careful with the opening process, the suction cup will only pull up larger shards individually, even with a lot of packing tape. Wear safety goggles because the shards can spring out when tension is suddenly released by cracking! I ended up having to remove a lot of smaller pieces with tweezers and eventually, I was able to finish cutting the adhesive and remove the old screen.
Will -
Follow up to this 4 months later - the screen is not good. It becomes completely unresponsive and randomly taps things on screen sometimes. It’s totally random when it does this which is stressful if I am trying to use the ipad for sheet music. I wouldn’t recommend the ifixit screen unfortunately. It also has a bright spot that is visible when scrolling on a page toward the bottom left of the screen. I didn’t notice at first - not nearly as much of a problem as the screen responsiveness issues that have appeared.
I know these issues are with the screen because when I use an external keyboard/trackpad the ipad is fully responsive, only the touch input is very spotty. I wish I could say it has to do with how I repaired it but all of the cables were securely attached and the top sensors (including FaceID) function perfectly. The screen looks great otherwise, it’s just intermittently unusable. I have tried restarting the ipad, restoring, etc. It doesn’t matter. It’s not an OS thing.
Will -
I'm sorry to hear your replacement screen isn't working as expected, Will. You may have some luck getting in touch with our customer service: https://help.ifixit.com/article/136-emai...
Thanks for all the extra tips (I'm sure I would have missed the magnets if it wasn't for your remark!), it helped me get through the steps! I got the full repair kit, but the iOpener never got hot enough (it was always just warm to the touch in the middle, never hot, and when I heated it some more, it exploded. While it was "warm" it never managed to loosen any glue). However the hair dryer worked like a charm.
It took a lot of effort to remove all small glass pieces, but it was worth it, everything works as before again! All in all I think I spent 5 hours.
I hope my replacement screen will last longer than yours!
My replacement screen already had sticky tape on it, so I didn't use the extra installation adhesive that was provided.
Claude -