필요한 것
동영상 개요
-
-
Power off your iPhone before beginning disassembly.
-
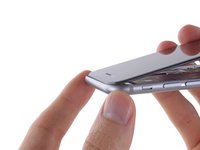
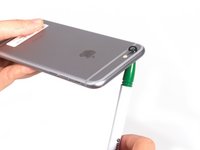
Remove the two 3.6 mm-long P2 Pentalobe screws next to the Lightning connector.
-
-
이 단계에 사용된 도구:Clampy - Anti-Clamp$24.95
-
Pull the blue handle backwards to unlock the Anti-Clamp's arms.
-
Slide the arms over either the left or right edge of your iPhone.
-
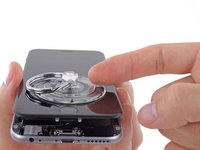
Position the suction cups near the bottom edge of the iPhone just above the home button—one on the front, and one on the back.
-
Squeeze the cups together to apply suction to the desired area.
-
-
이 단계에 사용된 도구:Clampy - Anti-Clamp$24.95
-
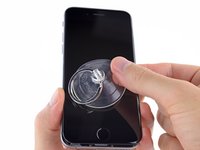
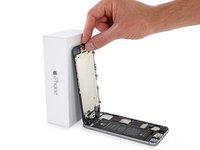
If you don't have an Anti-Clamp, use a single suction cup to lift the front panel:
-
Press a suction cup onto the screen, just above the home button.
-
-
-
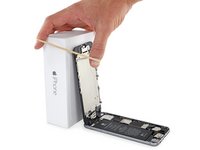
Open the iPhone by swinging the home button end of the front panel assembly away from the rear case, using the top of the phone as a hinge.
-
-
이 단계에 사용된 도구:Magnetic Project Mat$19.95
-
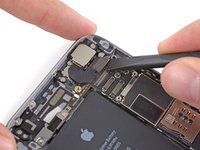
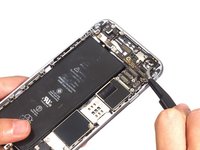
Remove the following Phillips screws from the battery connector bracket:
-
One 2.2 mm screw
-
One 3.2 mm screw
-
-
-
-
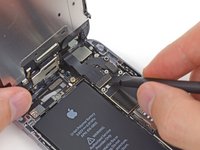
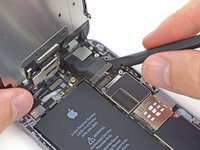
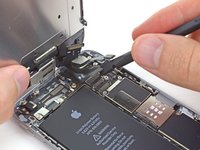
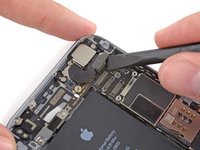
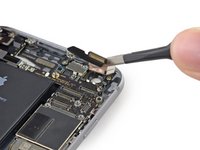
Use a plastic opening tool to gently pry the battery connector up from its socket on the logic board.
-
-
-
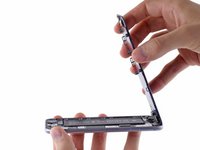
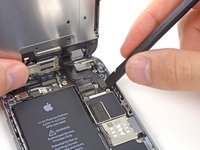
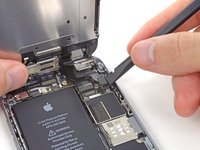
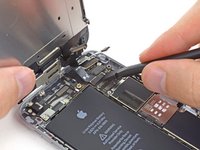
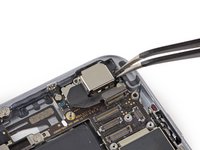
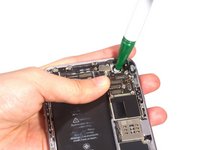
Remove the following five Phillips screws securing the front panel assembly cable bracket:
-
Three 1.2 mm screws
-
One 1.7 mm screw
-
One 3.1 mm screw
-
-
-
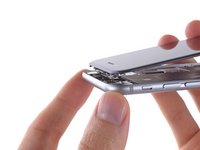
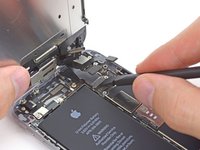
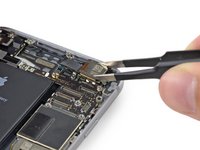
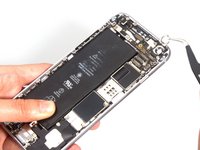
Remove the front panel assembly from the rear case.
-
-
-
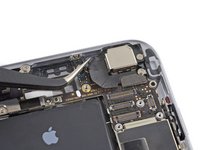
It's difficult to remove this bottom bracket. The inside round edge of this bracket seems soldered with camera lens ring. So you need a lot of effort and it's not unusual to break the bracket.
-
-
-
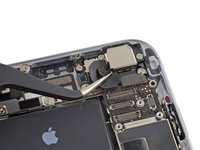
The last step is to push the cracked camera lens out from inside.
-
First, find a tool you prefer and easy to use with effort. Then, put your hands where your power will land to protect the rear case from bending. Next, push the camera lens with effort. Please be careful with the phone and your hand very much.
-
When you place the new camera lens, you will need glue or adhesive to fasten the camera lens as well as the new bottom bracket.
-
If you worry about the iPhone 6 being damaged, please send it to an Apple center.
-


To reassemble your device, follow these instructions in reverse order.
To reassemble your device, follow these instructions in reverse order.
다른 108명이 해당 안내서를 완성하였습니다.
댓글 39개
Thank you Sophia, very good guide. I just wanted to add more information to Step 5, 6, 7, and 8.
Step 5 - Disconnect the rear camera from motherboard, gently lift ribbon towards the top. This will help release the thin black tape covering the top left screw holding the bracket. I peel it back just enough to access the screw.
Step 6 - Gently lift the rear camera from the frame avoid touching the camera lens.
I reversed parts of Step 7 and 8.
Step 7 - You will destroy the bracket. The bracket and lens are crimped or pressed together somehow, as stated in the guide. The next step I modified; press out the rest of the broken glass in the lens. Then as in step 8 press the lens from the inside, outward to break the crimp.
Step 8 - Lift out the bracket, it may still be attached.Use heated air to remove the black foam square from the old bracket and reuse for the new bracket.
To repair, I'm still looking for the best way. I carefully used super glue to place the lens and bracket in place.
Does anyone know if the iPhone 6 plus Lens replacement is about the same?
Anyone knows where can I purchase the camera bracket? I don't seem to find it.
Thank you
Hi u can buy it here at the top of the guide :-) under relevant parts.
I'm with u Greg , I tried the hard way it's like pulling a good tooth ! Something gonna break and possible bend . Great video though exposing the hidden screw.