소개
이 안내서를 사용하여 전면 카메라 및 센서 어셈블리를 교체하세요.
필요한 것
-
-
분해를 시작하기 전에 iPhone 전원을 끄세요.
-
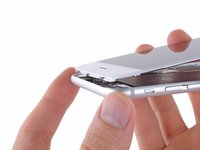
Lightning 커넥터 옆에 위치한 3.6mm-길이 P2 Pentalobe/펜타로브/별나사 두 개를 풀어주세요.
-
-
이 단계에 사용된 도구:Clampy - Anti-Clamp$24.95
-
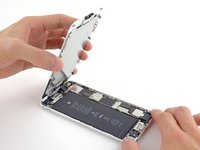
파란색 손잡이를 뒤로 당겨 안티-클램프의 팔을 잠금 해제하세요.
-
팔을 휴대폰의 왼편 또는 오른편 가장자리 위로 밀어 주세요.
-
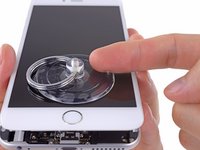
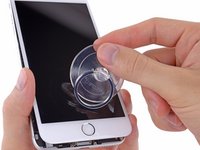
흡입 컵을 휴대폰의 하단 가장자리 홈 버튼 근처에 배치하세요—전면에 하나, 후면에 하나.
-
적절한 위치에 컵을 함께 꽉 쥐고 흡착하세요.
-
-


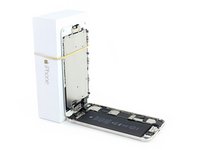


기기를 다시 조립하려면 위의 단계를 역순으로 따르세요.
기기를 다시 조립하려면 위의 단계를 역순으로 따르세요.
다른 126명이 해당 안내서를 완성하였습니다.
다음 번역가들에게 특별히 감사 드립니다:
100%

Christian Kim님은 저희가 세상을 수리하는데 동참하신 분입니다! 기여하시겠습니까?
번역 시작하기 ›

댓글 13개
My front microphone had completely stopped working exactly a week out of warranty. I replaced the front assembly with a new one from Fixit and afterwards it still did not work. Then I realized the microphone did pick up very soft sound if I shouted directly into it. I eventually repeated the entire disassembly and found a very thin yellow film glued to the microphone grill which had been muffling 97% of the sound. After peeling this off my microphone is working perfectly! I did not notice this on the microphone the first time and assume it was the backing for the self adhesive. Make sure you remove this - it is not obvious to spot!
Fantastic instructions! fixed my problem first time. Just be patient and try not to touch anything to roughly. Thanks for the tip from a previous comment saying to remove the yellow piece of film over the microphone. This saved me a lot of hassle. Thanks
Glad to have siri, dictation, sound in videos and hansfree calls back :)
Is the picture quality the same