이 버전에는 잘못된 편집 사항이 있을 수 있습니다. 최신 확인된 스냅샷으로 전환하십시오.
필요한 것
-
-
분해를 시작하기 전에 iPhone 전원을 끄세요.
-
Lightning 포트 양 옆에 위치한 3.4mm Pentalobe/펜타로브/별나사 두 개를 풀어주세요.
-
-
-
파란색 핸들을 뒤로 당겨 Anti-Clamp의 팔을 풀어 주세요 .
-
Anti-Clamp의 팔을 iPhone의 왼편 또는 오른편 가장자리로 밀어 주세요.
-
흡입 컵을 iPhone의 홈 버튼 바로 위 하단 가장자리 근처에 배치하세요—전면에 하나, 후면에 하나.
-
흡입 컵을 함께 눌러서 원하는 부위에 흡입하세요.
-
-
이 단계는 번역되지 않았습니다. 번역을 도와주십시오
-
Remove the following Phillips screws over the camera bracket:
-
One 1.9 mm screw
-
One 2.4 mm screw
-
-
이 단계는 번역되지 않았습니다. 번역을 도와주십시오
-
Disconnect the iSight camera connector from its socket on the logic board.
-
-
이 단계는 번역되지 않았습니다. 번역을 도와주십시오
-
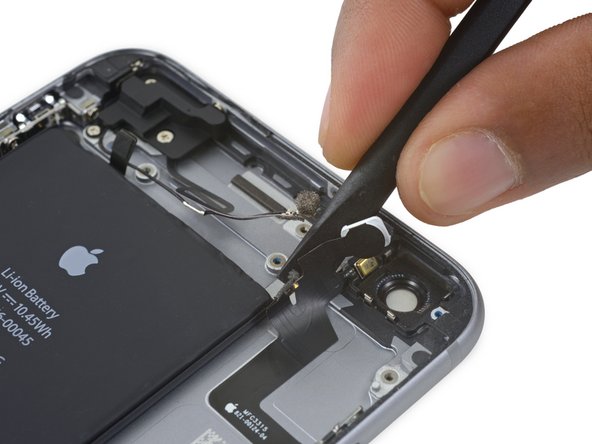
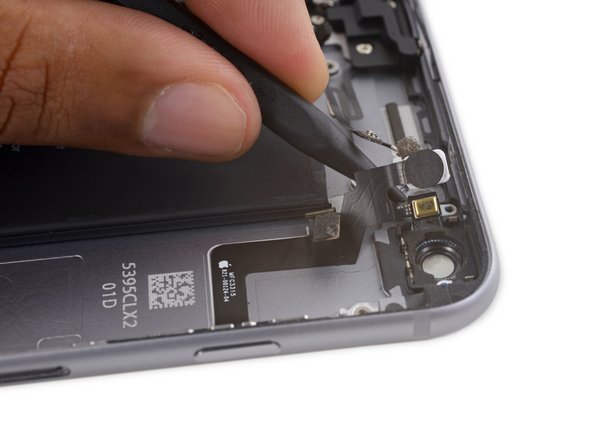
Insert the flat end of the spudger between the iSight camera and rear casing.
-
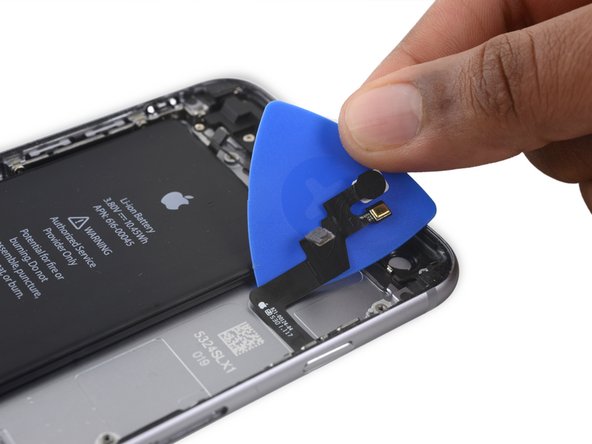
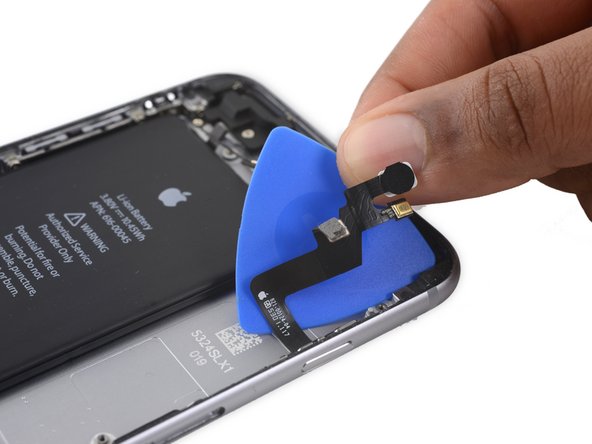
Gently pry the camera out from its housing.
-
-
이 단계는 번역되지 않았습니다. 번역을 도와주십시오
-
Insert a SIM eject tool into the hole in the SIM tray.
-
Press to eject the SIM tray.
-
-
-
이 단계는 번역되지 않았습니다. 번역을 도와주십시오
-
Remove the single 1.4 mm Phillips screw holding the NFC bracket in place.
-
-
이 단계는 번역되지 않았습니다. 번역을 도와주십시오
-
Remove the two 2.7 mm Phillips screws securing the audio control cable bracket to the logic board.
-
-
이 단계는 번역되지 않았습니다. 번역을 도와주십시오
-
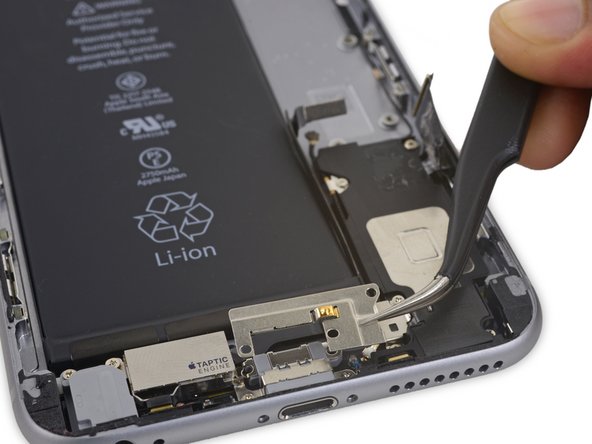
Disconnect the audio control cable by prying its connector straight up from its socket on the logic board.
-
-
이 단계는 번역되지 않았습니다. 번역을 도와주십시오
-
Disconnect the cellular antenna cable by prying its connector straight up from its respective socket on the logic board.
-
-
이 단계는 번역되지 않았습니다. 번역을 도와주십시오
-
Disconnect the Wi-Fi diversity antenna cable by prying its connector up from the logic board.
-
-
이 단계는 번역되지 않았습니다. 번역을 도와주십시오
-
Disconnect the power button flex cable from its socket on the logic board.
-
-
이 단계는 번역되지 않았습니다. 번역을 도와주십시오
-
Use the flat end of a spudger to disconnect the Lightning connector flex cable from the logic board.
-
-
이 단계는 번역되지 않았습니다. 번역을 도와주십시오
-
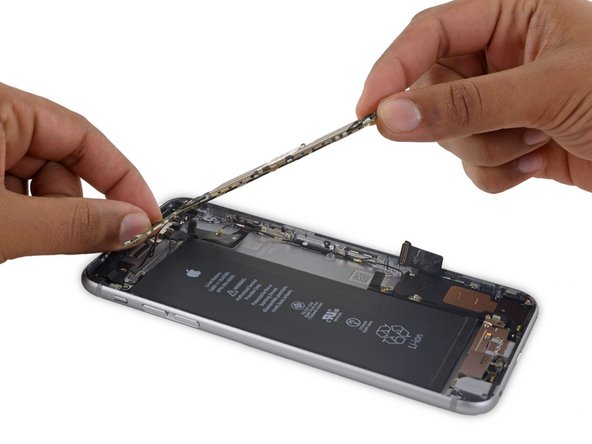
Deroute the antenna cable from the two clips on the right edge of the logic board.
-
-
이 단계는 번역되지 않았습니다. 번역을 도와주십시오
-
Remove the following screws:
-
One 1.3 mm Phillips screw
-
One 2.6 mm Phillips screw
-
One 2.2 mm standoff screw
-
-
이 단계는 번역되지 않았습니다. 번역을 도와주십시오
-
Deroute the upper left cellular antenna cable from the first logic board clip by nudging it out from under the clip, towards the battery.
-
-
이 단계는 번역되지 않았습니다. 번역을 도와주십시오
-
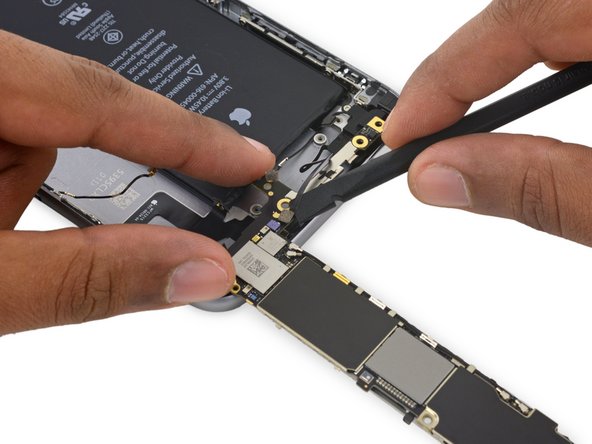
Continue derouting the cellular antenna cable from the second and third logic board clips.
-
Use the pointed tip of a spudger to gently pry the cellular antenna cable from the middle logic board clip.
-
-
이 단계는 번역되지 않았습니다. 번역을 도와주십시오
-
Remove the final 2.0 mm Phillips screw directly below the SIM card reader.
-
-
이 단계는 번역되지 않았습니다. 번역을 도와주십시오
-
Carefully raise—but do not remove—the logic board, lifting it from the bottom edge nearest the Lightning connector.
-
-
이 단계는 번역되지 않았습니다. 번역을 도와주십시오
-
Tip the logic board up to a vertical position to expose the single antenna connector on the underside, near the top edge of the board.
-
-
이 단계는 번역되지 않았습니다. 번역을 도와주십시오
-
Gently lay the logic board upside-down, with the top portion resting against the rear case of the iPhone.
-
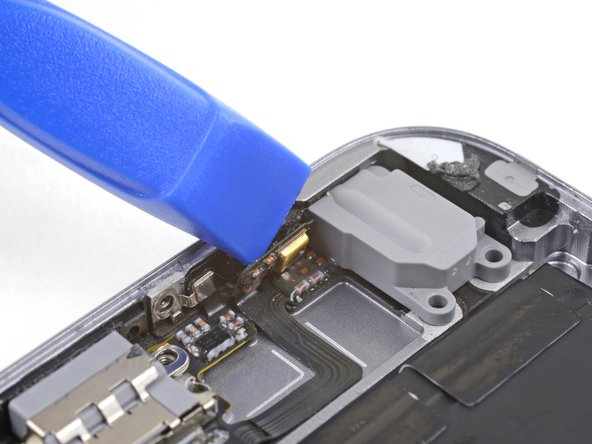
Use the flat end of the spudger to disconnect the Wi-Fi/Bluetooth antenna cable from its socket on the back of the logic board.
-
-
이 단계는 번역되지 않았습니다. 번역을 도와주십시오
-
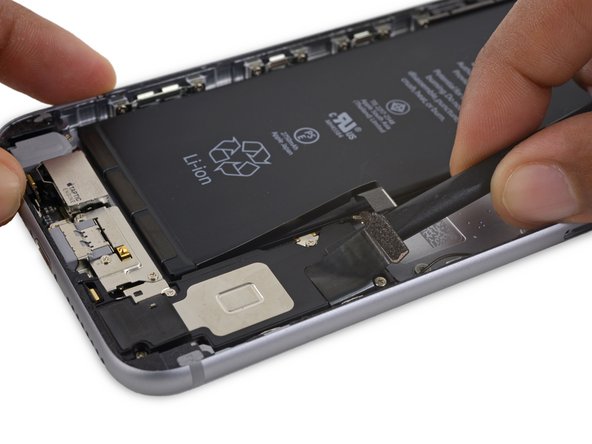
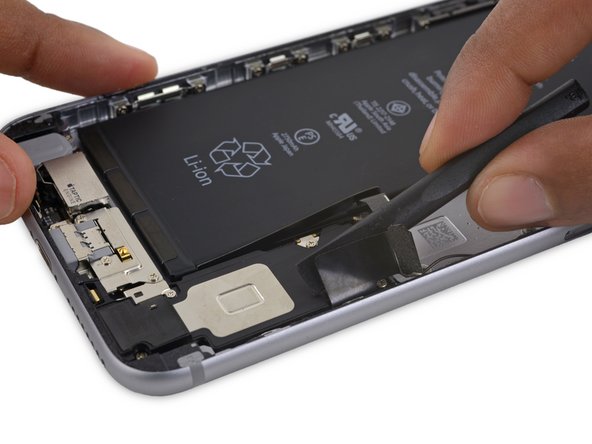
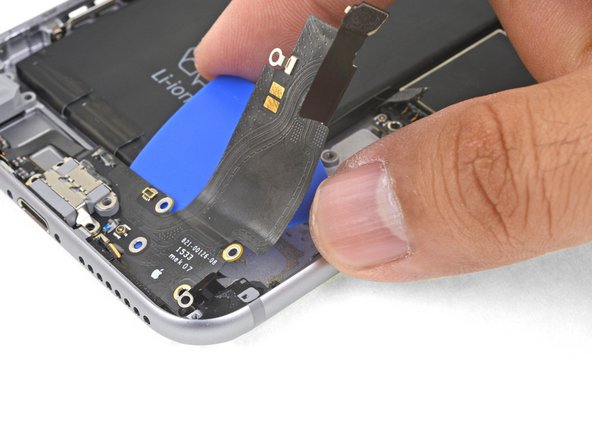
Use the flat end of a spudger to peel the Lightning connector flex cable off the speaker.
-
-
이 단계는 번역되지 않았습니다. 번역을 도와주십시오
-
Remove the following three Phillips screws from the Taptic Engine cable bracket:
-
Two 3.5 mm screws
-
One 2.7 mm screw
-
Remove the bracket.
-
-
이 단계는 번역되지 않았습니다. 번역을 도와주십시오
-
Remove the five Phillips screws securing the speaker to the rear case:
-
Two 2.7 mm screws
-
One 2.5 mm screw
-
One 1.5 mm screw
-
One 1.7 mm screw
-
-
이 단계는 번역되지 않았습니다. 번역을 도와주십시오
-
Deroute the Wi-Fi diversity antenna cable from its rubber sleeve.
-
If the white water damage indicator sticker makes it difficult to deroute the antenna cable, gently peel the sticker back for better access.
-
-
이 단계는 번역되지 않았습니다. 번역을 도와주십시오
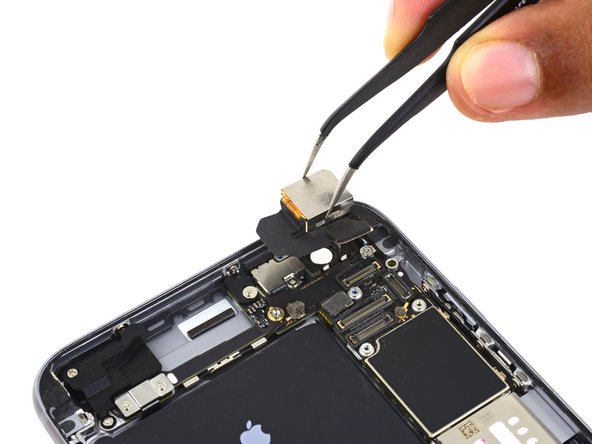
-
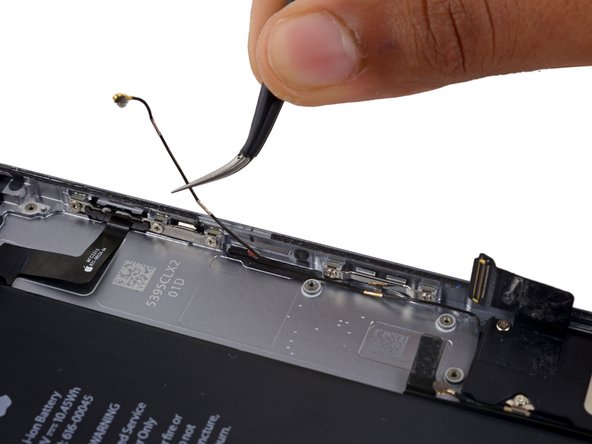
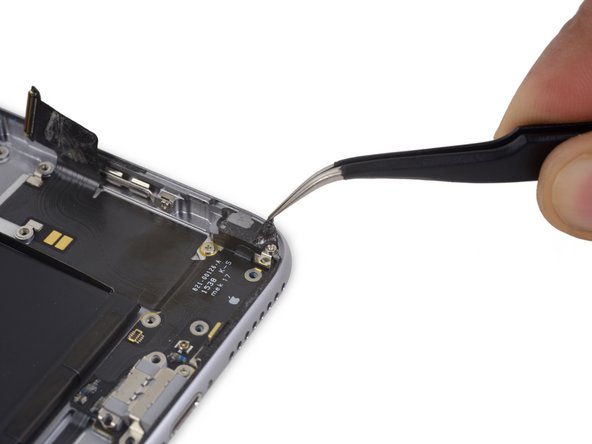
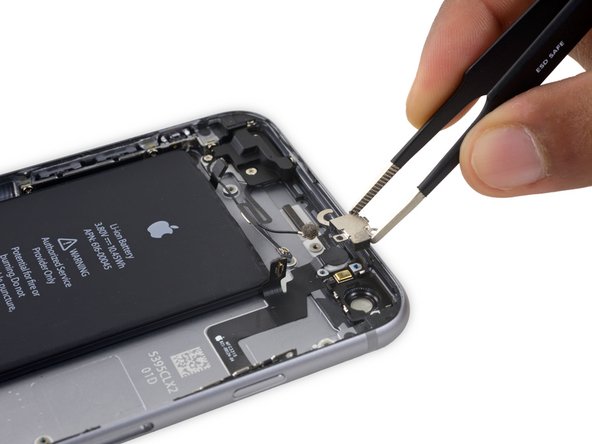
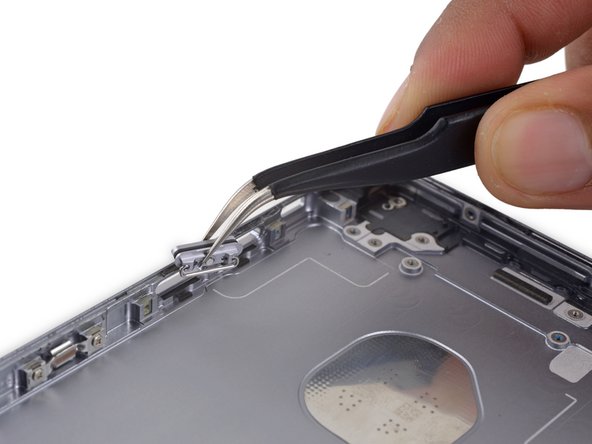
Use a pair of tweezers to disconnect the Wi-Fi diversity antenna cable from the Lightning connector flex cable.
-
-
이 단계는 번역되지 않았습니다. 번역을 도와주십시오
-
Remove the final 2.6 mm Phillips screw securing the speaker to the rear case.
-
-
이 단계는 번역되지 않았습니다. 번역을 도와주십시오
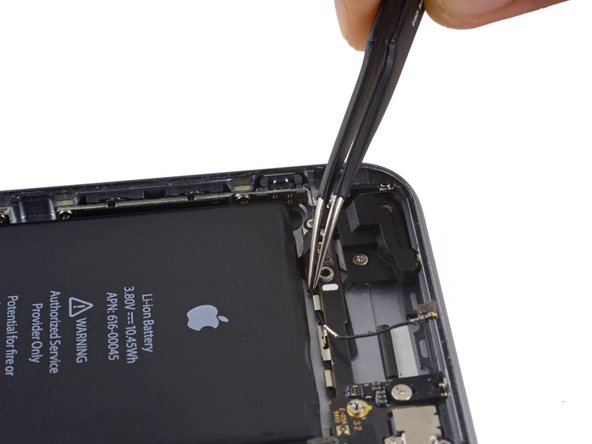
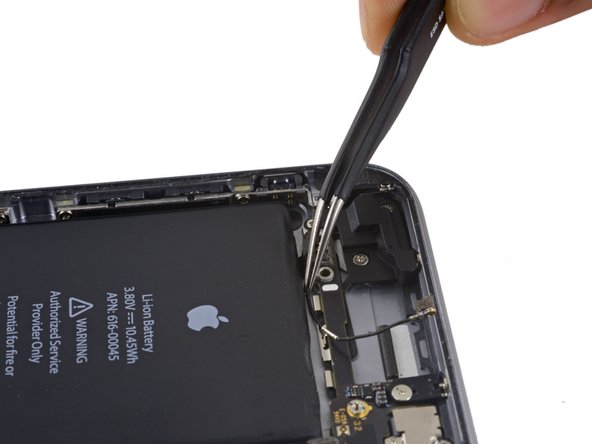
-
Use the flat end of a spudger to lift the speaker assembly out of its housing.
-
Remove the speaker assembly.
-
-
이 단계는 번역되지 않았습니다. 번역을 도와주십시오
-
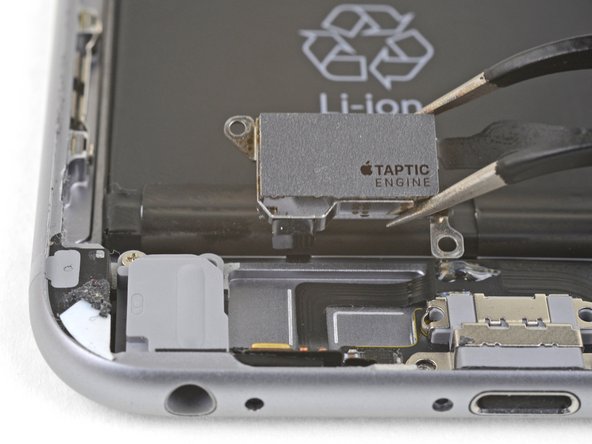
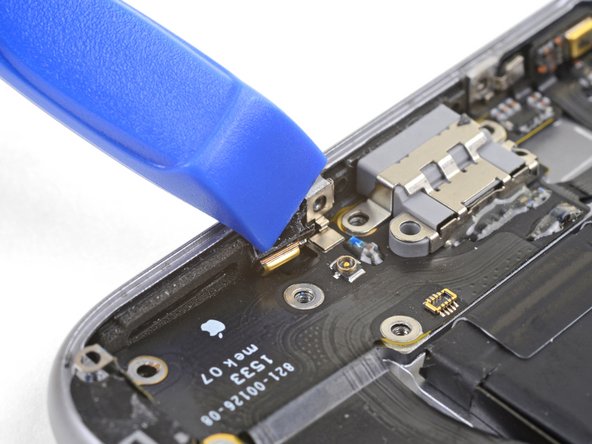
Use the point of a spudger to disconnect the Taptic Engine flex cable from the lower flex cable.
-
-
이 단계는 번역되지 않았습니다. 번역을 도와주십시오
-
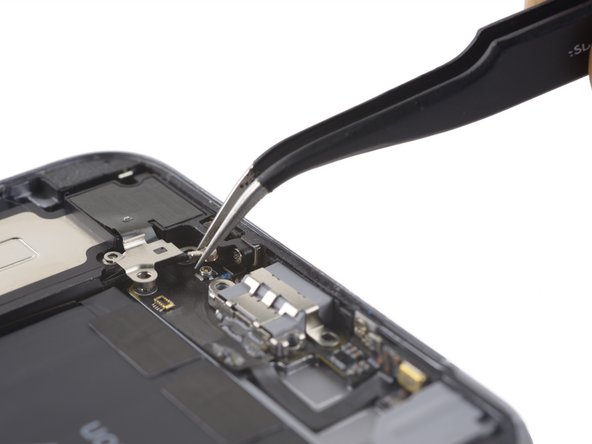
Remove the two Phillips screws securing the Taptic Engine to the rear case:
-
One 3.1 mm screw
-
One 2.1 mm screw
-
Remove the Taptic Engine.
-
-
이 단계는 번역되지 않았습니다. 번역을 도와주십시오
-
Peel back the tape over the screw securing the Lightning connector flex cable to the lip of the phone.
-
-
이 단계는 번역되지 않았습니다. 번역을 도와주십시오
-
Remove the following five Phillips screws:
-
One 2.9 mm screw
-
One 1.9 mm screw
-
One 1.5 mm screw
-
One 1.6 mm screw
-
One 1.3 mm screw set in the bottom edge of the rear case
-
-
이 단계는 번역되지 않았습니다. 번역을 도와주십시오
-
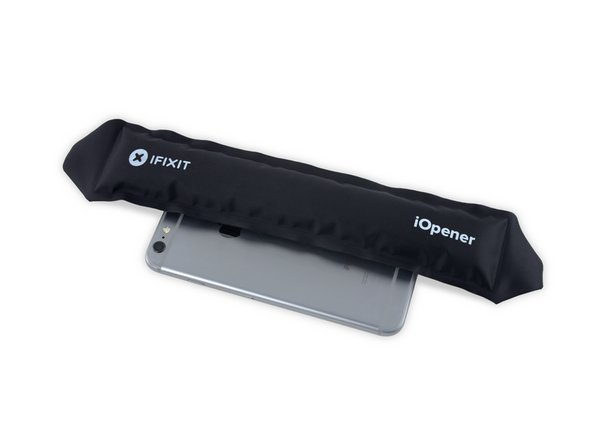
Prepare an iOpener and lay it across the bottom of the phone to soften the adhesive holding the Lightning connector flex cable in place.
-
Wait about a minute for the adhesive to soften before removing the iOpener and continuing.
-
-
이 단계는 번역되지 않았습니다. 번역을 도와주십시오
-
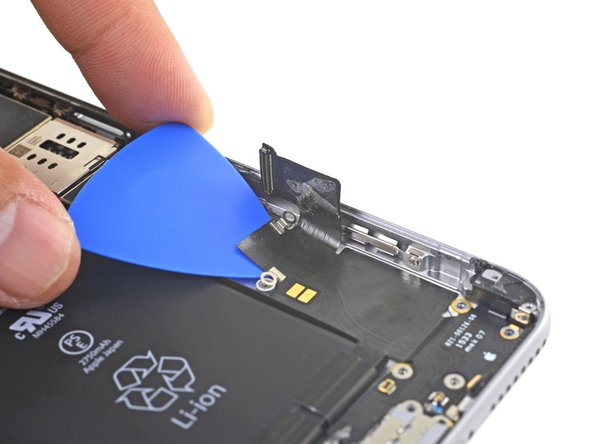
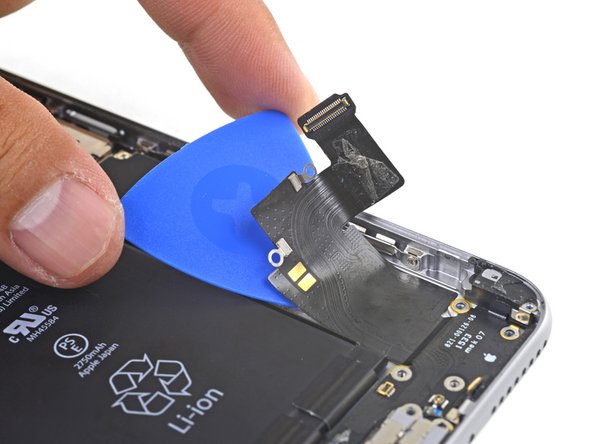
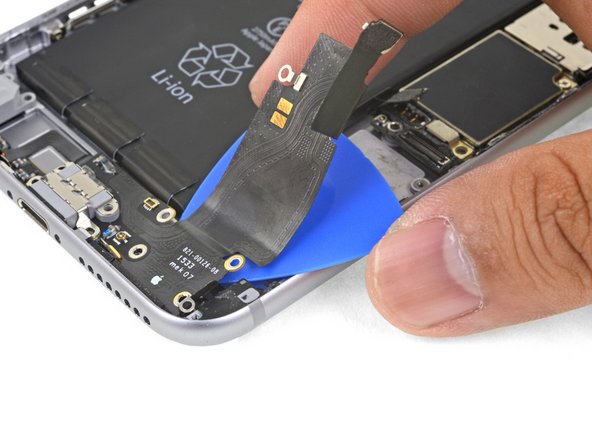
Insert an opening pick under the Lightning connector flex cable and slowly slice through the adhesive holding the cable to the rear case.
-
-
이 단계는 번역되지 않았습니다. 번역을 도와주십시오
-
Use an opening pick to pry the left microphone off the edge of the rear case.
-
-
이 단계는 번역되지 않았습니다. 번역을 도와주십시오
-
Insert the point of a spudger into the headphone jack and wiggle it slightly to loosen the headphone jack from the bottom edge of the case.
-
-
이 단계는 번역되지 않았습니다. 번역을 도와주십시오
-
Remove the following four Phillips screws:
-
Three 2.0 mm screws holding the power button bracket in place
-
One 1.3 mm Phillips screw over the flash and microphone bracket
-
-
이 단계는 번역되지 않았습니다. 번역을 도와주십시오
-
Use the pointed end of a spudger to lift the flash out of its housing in the rear case.
-
-
이 단계는 번역되지 않았습니다. 번역을 도와주십시오
-
Use the flat end of a spudger to peel the power button flex cable off the rear case.
-
-
이 단계는 번역되지 않았습니다. 번역을 도와주십시오
-
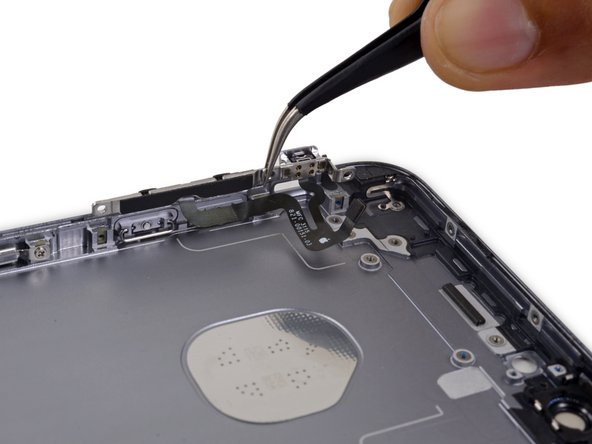
Insert the tip of a spudger underneath the microphone portion of the flex cable and gently pry it off of the rear case.
-
-
이 단계는 번역되지 않았습니다. 번역을 도와주십시오
-
Slide an opening pick underneath the power button flex cable to pry the cable off the rear case.
-
-
이 단계는 번역되지 않았습니다. 번역을 도와주십시오
-
Remove the following screws holding the cellular antenna in place:
-
One 2.7 mm Phillips screw
-
One 1.7 mm Phillips screw
-
One 1.3 mm Phillips screw
-
-
이 단계는 번역되지 않았습니다. 번역을 도와주십시오
-
Remove the single 1.3 mm Phillips screw securing the Wi-Fi/Bluetooth antenna to the rear case.
-
-
이 단계는 번역되지 않았습니다. 번역을 도와주십시오
-
Use a pair of tweezers to peel back the tips of the three battery adhesive strips along the bottom edge of the battery.
-
-
이 단계는 번역되지 않았습니다. 번역을 도와주십시오
-
Pull the adhesive strips straight out, keeping the strips flat and wide until they are completely removed. For best results, pull the strips at a 60º angle or less.
-
-
이 단계는 번역되지 않았습니다. 번역을 도와주십시오
-
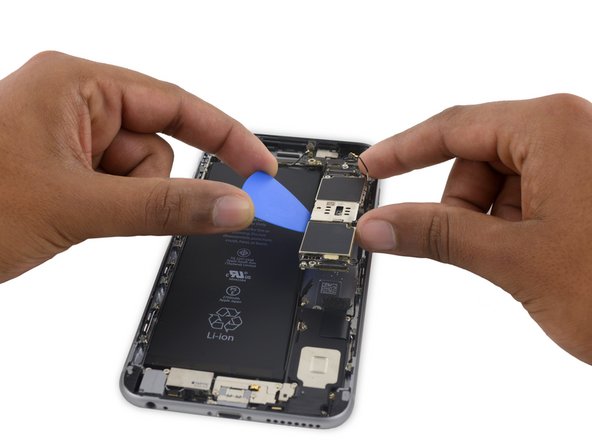
Prepare an iOpener and apply it to the back of the rear case, directly over the battery. Alternatively, you can apply heat using a heat gun or hair dryer.
-
After about a minute, flip the phone over and use a plastic card to tear through any remaining adhesive.
-
-
이 단계는 번역되지 않았습니다. 번역을 도와주십시오
-
Remove the three 2.4 mm Phillips screws over the audio control cable bracket.
-
-
이 단계는 번역되지 않았습니다. 번역을 도와주십시오
-
Use the flat end of a spudger to peel up the volume control flex cable.
-
-
이 단계는 번역되지 않았습니다. 번역을 도와주십시오
-
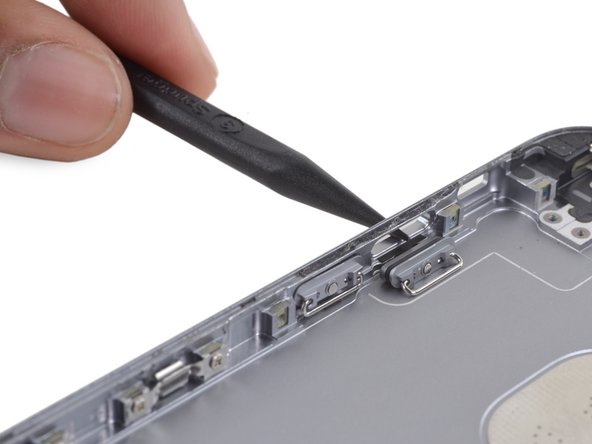
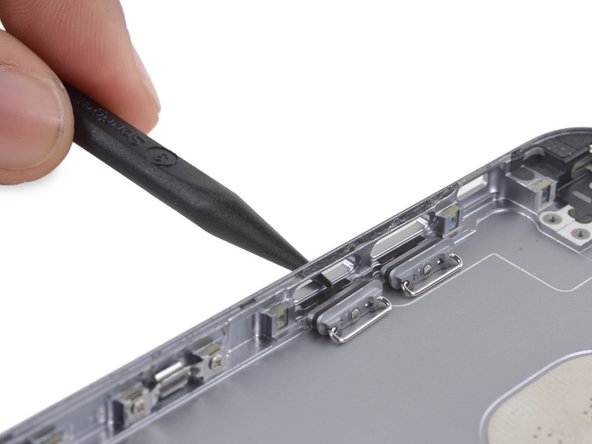
Use the pointed tip of a spudger to nudge the volume control button covers out of their slots in the rear case.
-


다른 38명이 해당 안내서를 완성하였습니다.

댓글 6개
Absolutely brilliant clear instructions
i like a challenge !
whomever wrote this instruction is a star
many thx
chris
Wow Evan! This is Ashwin from bellarmine. This was done really well and it came in handy, thanks for the contribution!
perfect step by step guide.
Took me 3 hours to swap the cover.
only think that missed is the application of the adhesive for the battery and the screen.
thanks mate!!