소개
If you've tried cleaning the lightning port to no avail, use this guide to replace a nonfunctioning Lightning connector assembly, including headphone jack and microphone, in an iPhone SE.
This component is not compatible with the iPhone 5s.
필요한 것
-
-
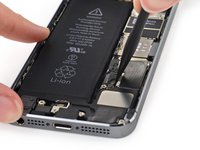
Power off your iPhone before beginning disassembly.
-
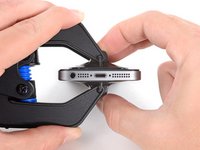
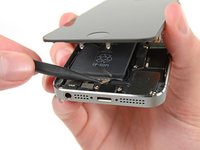
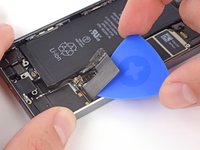
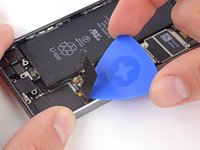
Remove the two 3.9 mm Pentalobe screws from either side of Lightning connector.
-
-
-
If your display glass is cracked, keep further breakage contained and prevent bodily harm during your repair by taping the glass.
-
Lay overlapping strips of clear packing tape over the iPhone's display until the whole face is covered.
-
-
-
Regardless of the tool you use, you need to be sure you pull up the entire display.
-
If the glass begins to separate from the plastic, as shown in the first image, slide a plastic opening tool between the plastic frame and the metal phone body to pry the metal clips out of the case.
-
-
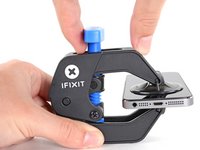
이 단계에 사용된 도구:Clampy - Anti-Clamp$24.95
-
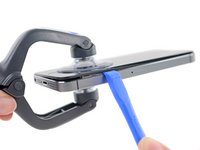
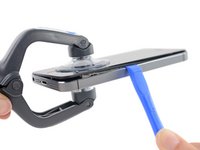
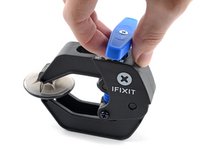
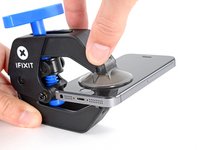
Pull the blue handle backwards to unlock the Anti-Clamp's arms.
-
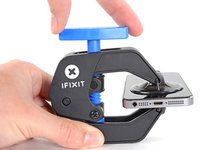
Slide the arms over either the left or right edge of your iPhone.
-
Position the suction cups near the bottom edge of the iPhone just above the home button—one on the front, and one on the back.
-
Squeeze the cups together to apply suction to the desired area.
-
-
-
If you don't have an Anti-Clamp, use a single suction cup to lift the front panel:
-
Press a suction cup onto the screen, just above the home button.
-
-
-
While holding the iPhone down with one hand, pull up on the suction cup to slightly separate the home button end of the front panel from the rear case.
-
With a plastic opening tool, gently pry the edges of the rear case down, away from the front panel assembly, while you pull up with the suction cup.
-
-
이 단계에 사용된 도구:Tweezers$4.99
-
Open the phone just enough to reveal the metal bracket covering the home button cable.
-
Only the phone's original home button assembly will be capable of using the Touch ID functionality. If you rip the cable, installing a new home button will only restore ordinary home button functions, not the Touch ID features.
-
Use the tip of a spudger to push the bracket free and remove it with tweezers.
-
-
-
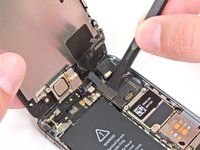
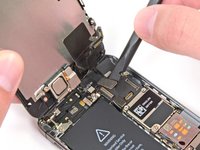
Use the tip of a spudger to pry the home button cable connector up out of its socket.
-
-
-
-
Once the connector has been released, pull the home button end of the assembly away from the rear case, using the top of the phone as a hinge.
-
Open the display to about a 90º angle, and lean it against something to keep it propped up while you're working on the phone.
-
Add a rubber band to keep the display securely in place while you work. This prevents undue strain on the display cables.
-
-
이 단계에 사용된 도구:Tweezers$4.99
-
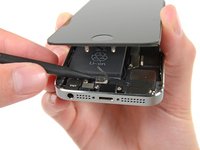
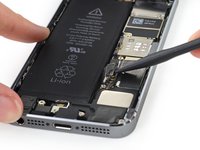
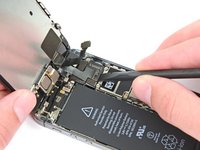
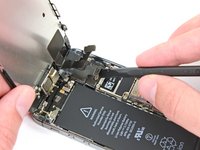
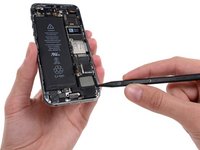
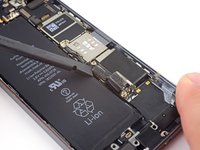
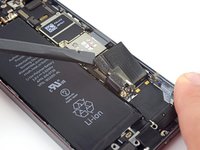
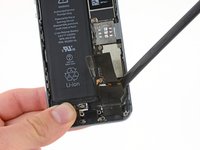
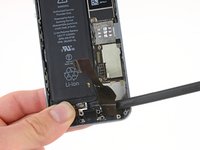
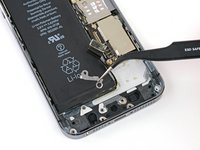
Use the tip of a spudger to pry the antenna cable up from its socket on the logic board.
-
-
-
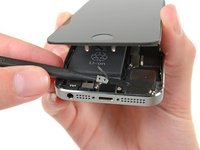
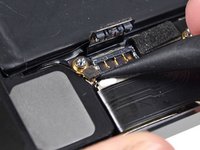
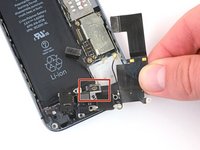
Remove the following four Phillips #000 screws:
-
One 3.1 mm screw
-
One 2.9 mm screw
-
One 1.5 mm screw
-
One 3.4 mm screw
-
-
-
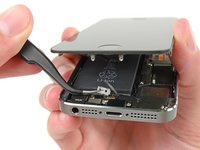
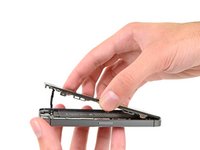
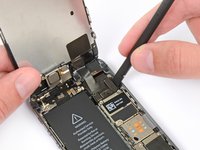
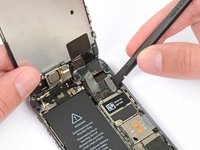
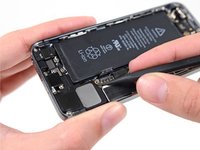
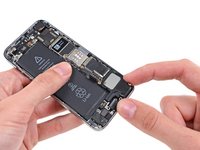
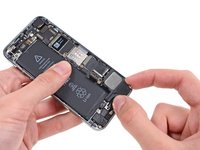
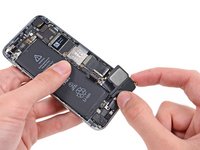
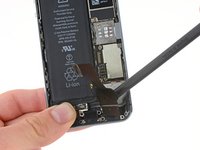
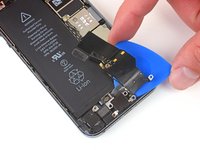
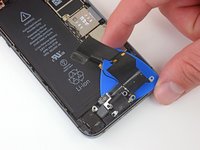
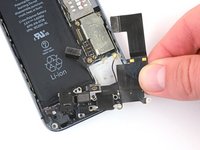
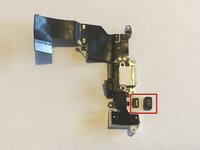
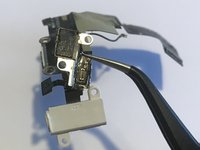
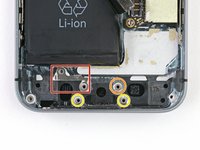
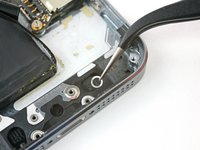
Remove the Lightning connector assembly.
-
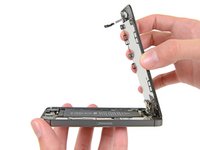
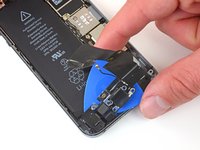
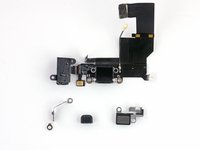
Components that commonly need to be transferred include a clip routed along the left and top edges of the headphone jack, the rubber microphone cover, and the bracket for the Touch ID cable connector. Refer to the following steps to transfer the rubber microphone cover and/or Touch ID cable connector.
-
-
이 단계에 사용된 도구:Tweezers$4.99
-
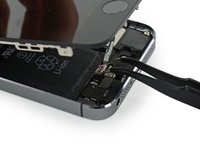
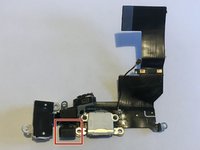
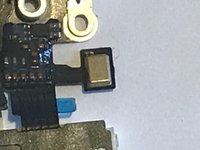
Fold the microphone cable down to straighten it out.
-
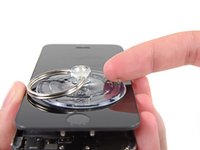
Pull the microphone cover off of the microphone with your fingers or tweezers.
-
-
-
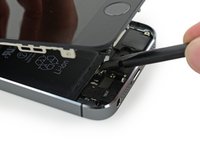
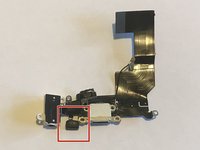
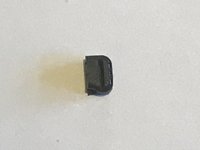
Remove any covering on the microphone (this one does not have a covering).
-
Slide the slotted side (shown facing up) onto the microphone. It may help to hold the microphone cover steady by inserting tweezers into the hole on the bottom.
-
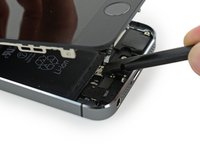
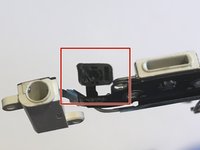
Fold the microphone up so that it points out, as shown.
-
-
-
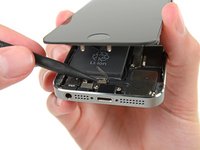
Flip the Touch ID cable and connector over to the reverse side of the Lightning connector assembly, and peel the Touch ID cable off of the bracket.
-
Thread the Touch ID cable on the replacement Lightning cable assembly into the bracket as shown. It is strongly recommended to affix the Touch ID cable to the bracket with mild adhesive, such as B-7000.
-


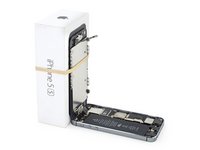


To reassemble your device, follow these instructions in reverse order.
To reassemble your device, follow these instructions in reverse order.
다른 140명이 해당 안내서를 완성하였습니다.


댓글 21개
Thanks for all the awesome guides!!
After replacing my screen it is now just a black screen can't see any thing on it! What could it b?
Changed and the headphone still doesn’t work any ideas?