-
-
iPod 후면에서 후면 패널을 분리하면 후면 패널에 상당한 손상이 발생할 수 있습니다. iPod을 올바르게 재조립하려면 후면 패널을 추가로 구입하는 것이 좋습니다.
-
iPod을 열기 전에, 홀드(Hold) 스위치가 잠김(Locked) 위치에 있는지 확인하세요.
-
-
후면 패널은 후면 패널에 영구적으로 부착된 8개의 클립으로 전면 케이스에 고정되어 있습니다. 이 클립들은 전면 케이스에 가공된 작은 탭에 걸려 잠깁니다.
-
탭을 풀려면, 나노의 중앙 방향으로 밀어야 합니다. 후면 패널의 모든 탭 위치를 확인하세요. iPod 오프닝 도구를 사용하여 후면 패널을 분리할 때는, 반드시 클립이 있는 위치에서 도구를 사용해 작업하세요.
-
시각적으로 이해를 돕기 위해, 빨간색 상자로 표시된 두 개의 클립이 헤드폰 잭에 가장 가까이 위치해 있습니다.
-
-
-
iPod을 여는 작업은 까다로울 수 있습니다. iPod을 열기까지 몇 번 시도해야 한다고 해서 낙담하지 마세요.
-
iPod의 도크 커넥터 위쪽, 전면 케이스와 후면 패널 사이의 틈에 큰 iPod 오프닝 도구를 삽입하세요. 도구의 끝은 후면 패널을 향하도록 하여 양극산화 알루미늄 전면 케이스가 긁히는 것을 방지하세요.
-
-
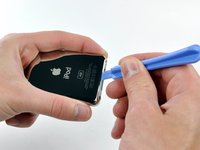
나노의 헤드폰 잭 쪽 틈에 작은 iPod 오프닝 도구를 삽입하고, 도구의 끝이 후면 패널을 향하도록 하세요.
-
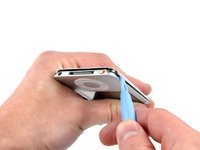
작은 iPod 오프닝 도구를 기존 틈에 넣고 살살 눌러가며 흔들어, 후면 케이스에 붙어 있는 두 개의 탭 근처 틈을 점차 넓히세요. 클립을 나노의 중앙 방향으로 밀어 두 개 모두 풀릴 때까지 작업합니다.
-
-
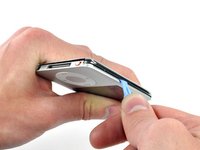
iPod 왼쪽 측면에 접근하는 데 더 이상 큰 iPod 오프닝 도구는 필요하지 않습니다.
-
이전 단계에서 설명한 절차를 반복하여, 나노의 홀드 스위치 쪽에 있는 세 개의 클립을 모두 풀어주세요.
-
-
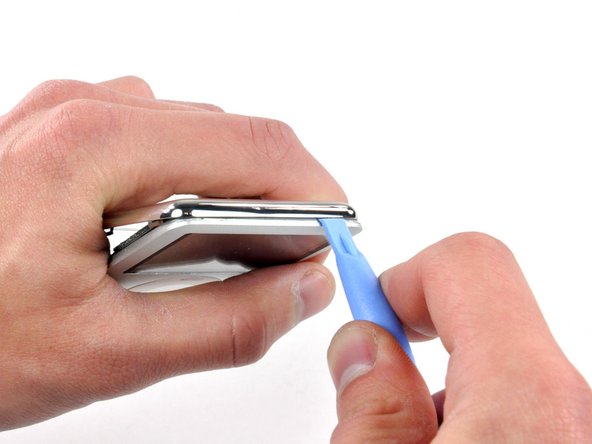
나노의 왼쪽 상단 모서리 근처 틈에 iPod 오프닝 도구를 삽입하고, 후면 패널 상단 가장자리를 따라 있는 세 개의 클립을 모두 풀어주세요.
-
모든 탭이 풀렸는지 확인한 후, iPod의 전면과 후면을 분리하세요.
hyeonwi8님은 저희가 세상을 수리하는데 동참하신 분입니다! 기여하시겠습니까?
번역 시작하기 ›
해당 안내서 넣기
해당 안내서를 사이트/포럼에 작은 위젯으로 포함하려면 크기를 선택하고 아래 코드를 복사하십시오.
미리보기