주요 콘텐츠로 건너뛰기

필요한 것

해당 분해도는 수리 안내서가 아닙니다. Gateway ID47H07u 수리는 저희 서비스 설명서를 사용하십시오.

  1. Gateway ID47H07u Teardown, Gateway ID47H07u Teardown: 1 단계, 이미지 1/2 Gateway ID47H07u Teardown, Gateway ID47H07u Teardown: 1 단계, 이미지 2/2
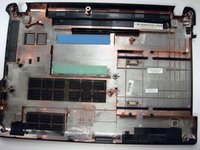
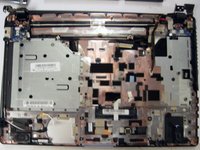
    • The base is relatively simple, but there are no sections removable for easy parts upgrading/replacement.

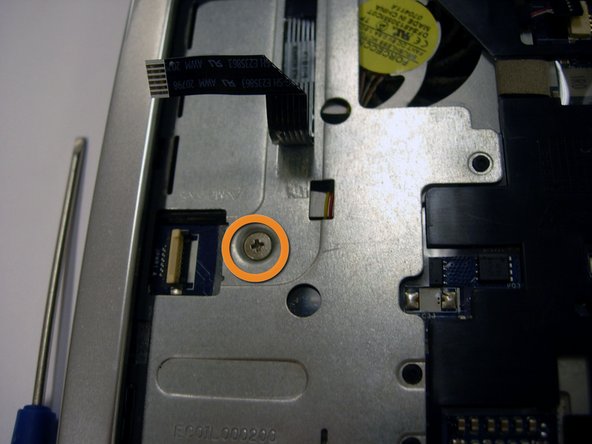
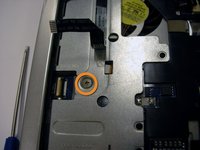
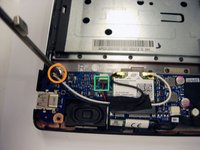
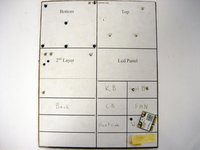
    • The orange markers indicate the locations of the screws to remove.

    • The base would have to be removed in order to replace any parts, including the battery. The only exception to this is the CD drive, which is held in by one screw.

  2. Gateway ID47H07u Teardown: 2 단계, 이미지 1/3 Gateway ID47H07u Teardown: 2 단계, 이미지 2/3 Gateway ID47H07u Teardown: 2 단계, 이미지 3/3
    • Here we see the top of the system. The keyboard would have to be removed before the base could be removed.

    • There are clips that line the top of the keyboard, which hold it in place.

    • As indicated by the second picture, simply pry up the keyboard to remove it.

    • Make sure to detach the ribbon cable before setting the keyboard aside.

  3. Gateway ID47H07u Teardown: 3 단계, 이미지 1/2 Gateway ID47H07u Teardown: 3 단계, 이미지 2/2
    • There are only four screw that tie the palm rest to the base. Their positions are indicated by the orange circles.

    • Make sure to disconnect all of the cables if you wish to remove the motherboard or screen. Their positions are indicated by the green squares.

    • There is one sneaky screw underneath the ribbon cable that leads to the power switch.

  4. Gateway ID47H07u Teardown: 4 단계, 이미지 1/2 Gateway ID47H07u Teardown: 4 단계, 이미지 2/2
    • After the screws are removed from the top and bottom, you will find that the entire base is still held down by small clips all around the laptop.

    • I found it easiest to start from the front and work my way around, using a Flathead screwdriver to pry it apart from the palm rest.

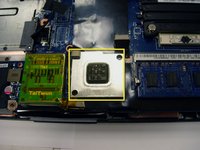
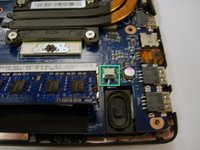
    • The second picture shows the heatsink for the Intel GMA 3000 Graphics chip located on the opposite side of the motherboard to the touchpad. On the top of it is a sticky thermal pad that helps to distribute heat to the base.

    • That thermal pad on the heatsink has a double function, in that it is stuck to the base and would need a little effort to separate them from each other.

  5. Gateway ID47H07u Teardown: 5 단계, 이미지 1/2 Gateway ID47H07u Teardown: 5 단계, 이미지 2/2
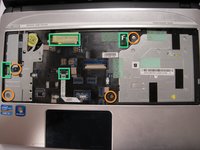
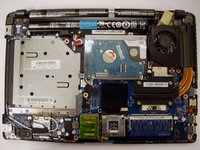
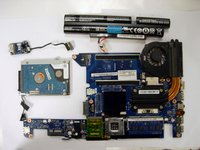
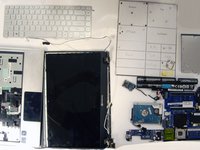
    • Here is a view of the bottom of the laptop with the base off.

    • The battery is on a cable and is easily removed at this point.

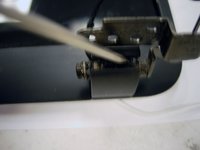
    • The hard drive is also on a cable but there are 2 screws holding it into position.

    • Unfortunately there is only one slot for memory, where currently resides a 4GB module.

    • I have not found documentation from Gateway indicating that it supports 8GB. But it is using the Intel HM65 which does support 8GB of RAM per channel in junction with the i5 CPU.

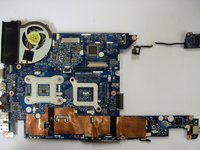
    • The second picture is of the base after it has been removed from the rest of the system.

  6. Gateway ID47H07u Teardown: 6 단계, 이미지 1/3 Gateway ID47H07u Teardown: 6 단계, 이미지 2/3 Gateway ID47H07u Teardown: 6 단계, 이미지 3/3
    • The speakers are located near the front of the laptop, and connected by separate cables.

    • There is only one screw that is holding the motherboard to the casing, and is located by the Wi-Fi module at the front/left of the laptop. It is indicated by an orange circle.

    • There is tape near the front center of the laptop which is the last thing holding the motherboard in place after the screw has been removed. Give it a tug, and it will give way.

  7. Gateway ID47H07u Teardown: 7 단계, 이미지 1/3 Gateway ID47H07u Teardown: 7 단계, 이미지 2/3 Gateway ID47H07u Teardown: 7 단계, 이미지 3/3
    • Here is the motherboard pulled from the system, with the accessories in their respective positions.

    • The second picture is the motherboard on the flip side.

    • The third picture I included shows the base after it has been stripped of its Motherboard and parts.

    • You will also see that the hinges have been removed at this point. There are simply three screws (2 Left / 1 Right) which bind it to the casing. Make sure to pull the Wi-Fi cable before removing the screen entirely.

  8. Gateway ID47H07u Teardown: 8 단계, 이미지 1/3 Gateway ID47H07u Teardown: 8 단계, 이미지 2/3 Gateway ID47H07u Teardown: 8 단계, 이미지 3/3
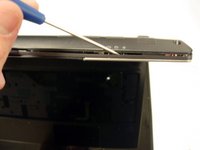
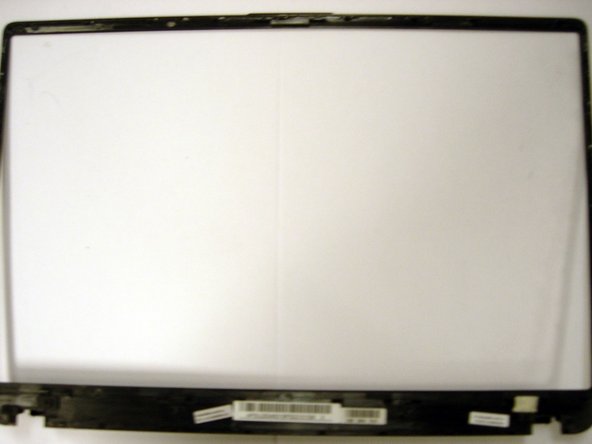
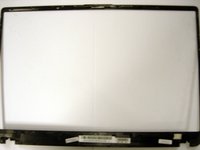
    • There are no screws that hold the front bezel to the rest of the screen.

    • Simply pick a corner at the bottom of the screen and pry the bezel from its binding clips around the screen. There is a little tape over the inverter board, but it is nothing you can not overcome already.

    • Make sure to release the clip that binds the hinge covers together, indicated by the second picture.

    • The front bezel is somewhat thin and delicate and can be broken if you are not careful.

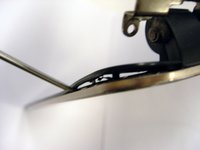
    • To remove the screen, There are clips all around the screen that are pretty easy to work with just a Flathead screwdriver. The white plastic is part of the screen itself and should not be damaged when removing the screen.

  9. Gateway ID47H07u Teardown: 9 단계, 이미지 1/3 Gateway ID47H07u Teardown: 9 단계, 이미지 2/3 Gateway ID47H07u Teardown: 9 단계, 이미지 3/3
    • Here we see the front bezel after it has been removed from the screen.

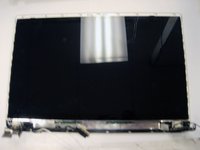
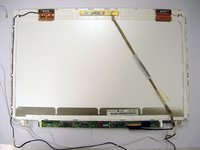
    • The second image is of the LED Backpanel. The hinges are mount directly to this and there are no screen mounts in between the hinges and backpanel. You might also note that the webcam and wireless cables are not mounted to this.

    • The third image is of the screen itself from the backside. Here we see the wireless cables and webcam.

    • The screen itself is not very common among laptops and will require some extra searching to locate a proper replacement if it is needed.

    • I am providing the model number of the screen I pulled in case you want to order the screen in advance to replacing it. Part #: LK140080101

  10. Gateway ID47H07u Teardown: 10 단계, 이미지 1/2 Gateway ID47H07u Teardown: 10 단계, 이미지 2/2
    • Here is the full tear-down of the laptop. There are a lot of parts to deal with, and unfortunately the image had to be cropped.

    • The second image is for anyone trying to figure out where a screw might belong in case they had extra when reassembling it.

    • There are very few screws holding this together, which is not always a bad thing, especially since there is no glue that binds parts down. This does mean that the clips are doing all the work, so try not to damage them in the process of working on the laptop.

    • Hopefully my tear-down has been informative to you!

Joel

회원 가입일: 10/25/10

2,599 평판

안내서 2개 작성하였습니다

댓글 0개

댓글 쓰기

조회 통계:

24 시간 전: 0

7일 전: 3

30일 전: 16

전체 시간: 4,305