소개
Apple’s beloved voice assistant is back again, this time in the form of a toilet-paper roll Mac Pro wearing a jacket. Siri can now (attempt to) answer your questions with 360°, high-fidelity sound. How did Apple fit such big sound in such a small space—and what took them so long to do it? We might just have to take it apart to find out!
Hey Siri, where can I get more teardown news? Check us out on Facebook, Instagram, and Twitter. If you'd like your teardown delivered, go ahead and sign up for our newsletter.
필요한 것
동영상 개요
-
-
What kind of tech did Apple hide in there? Here's what they've told us:
-
4" high-excursion, upward-firing woofer
-
Beamforming seven-tweeter array
-
Beamforming six-microphone array
-
Low frequency microphone for real-time woofer calibration
-
Top-mounted touch interface
-
802.11ac Wi-Fi with MIMO + Bluetooth 5.0
 FixBot에 문의하기
-
-
-
It's not the first smart speaker, nor the tallest, nor the most compact. But it's certainly the Apple-est.
-
Still, it keeps the basically cylindrical form factor typical of 360° smart speakers.
-
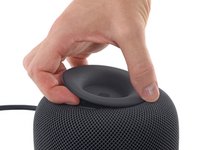
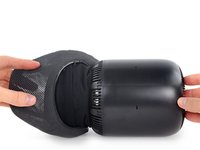
Perhaps the most apparent difference is that, unlike the Amazon Echo and Google Home, the HomePod packs an integrated power supply with a non-removable power cable. Update: Turns out it's removable if you pull hard enough.
-
-
-
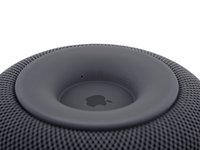
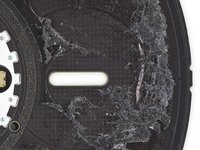
We spy a lot of regulatory information printed inconspicuously under the foot:
-
FCC, e-waste warnings, and EU, Australia and regulatory markings—despite the permanent US plug on our model—and a marker for being double-insulated.
-
Newly minted model number, A1639.
-
And a couple tiny holes.
-
-
-
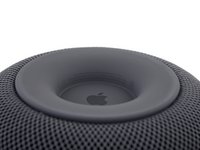
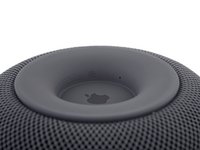
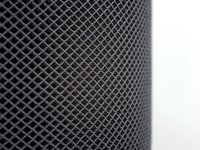
Next we take our first good look at Apple's seamless 3D acoustic mesh.
-
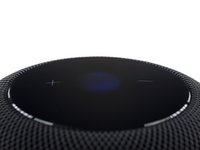
A sleek touch interface (in case Siri needs a break) and a rather familiar LED indicator sit atop the HomePod.
-
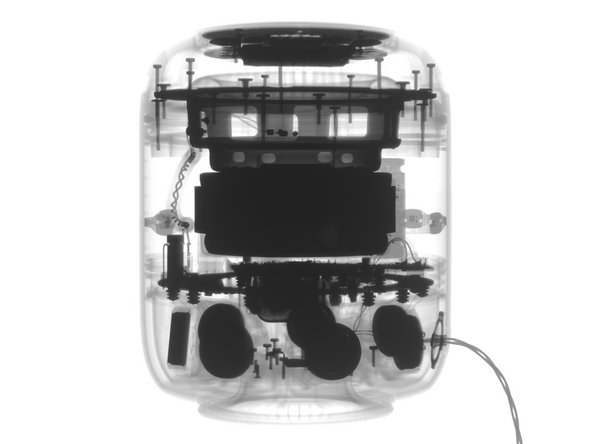
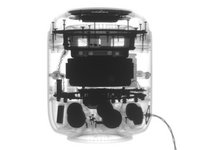
Thanks to Creative Electron's X-rays, we get a peek at the internals—and it looks like there are some enormous magnets in here (as shown by those dark spots).
-
-
-
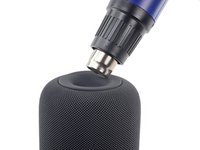
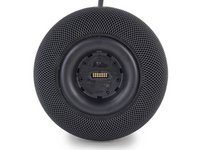
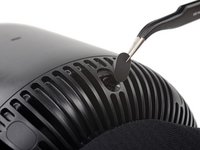
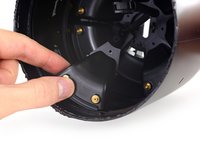
Our X-ray intelligence showed us some screws under the foot, so we concentrated our fire on the adhesive holding it down. Only after some serious heat-gunning were we able to slowly peel the foot up and off.
-
Even knowing the screws are there, we're prepared for the worst, after that gooey chore...
-
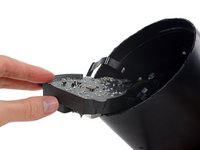
...but are relieved to find those repair-friendly Torx screws ready to unscrew. Also under the glue-foot is a 14-pin port, probably used to test or program HomePods on Pogo pins during assembly.
-
-
-
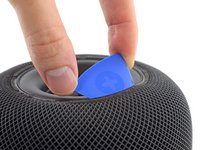
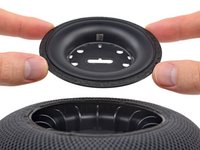
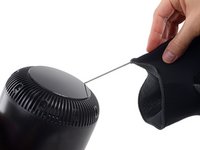
Maybe those screws aren't as friendly as we thought. After removing them, the plastic plate they're holding in is ... still held in. Looks like the mesh is holding the access plate down.
-
We really don't want to cut this mesh, so we slide a pick along the glued-down edge of the mesh and pull out the plate. Our prize? More impregnable plastic that doesn't go anywhere.
-
-
-
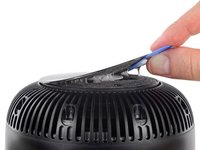
Probably something sharp. We tried our best to keep the mesh seamless, but to no avail. Well, this won't be the first time we've had to cut through some fancy fabric.
-
Slicing through the thick, wiry 3D mesh, we find a secondary, internal fabric sleeve.
-
This thinner, more flexible sleeve is trapped under the top, so it stays put for now.
-
Thankfully, the interior body isn't as seamless as the mesh, and we find some more Torx screws hiding under (seriously fancy) rubber plugs.
-
-
-
-
One benefit of our newly-made seam: we get to see just what kind of fiber magic went into this sleeve.
-
No magic, but we can see that the mesh consists of a net-like layer on the top and bottom, with tiny wiry coils in between.
-
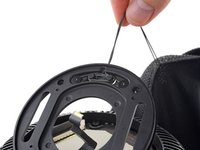
Now that we have the mesh off, we can see that it had a drawstring all along! Does this mean that there's a non-destructive way in through the top?
-
-
-
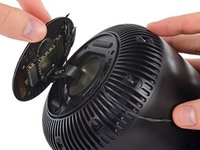
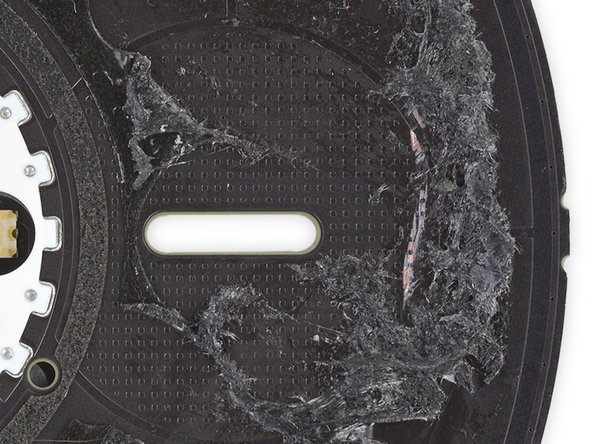
In pursuit of an entrance, we peel the glue-covered top up, only to find more screws that lead—well, seemingly nowhere.
-
After even more heat, and another glue pad, we dive another layer deeper and finally hit pay dirt.
-
Under door number three, we get: a well-shielded board, a wide ribbon cable, and the drawstring's mooring posts.
-
-
-
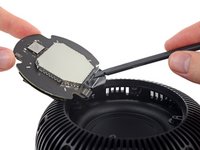
De-shielding that board shows us some of the fun that's running the light show up top:
-
Texas Instruments TLC5971 LED driver
-
Cypress CY8C4245LQI-483 Programmable System-on-Chip, likely tasked with touch control
-
ON Semiconductor FPF1039 slew-rate-controlled load switch
-
Texas Instruments TPS62135 4 A step-down converter
-
The flip side of the board houses the LEDs and the diffuser that gives the indicator its cloudy look.
-
The top side of the board (second photo) sports a neatly organized pattern of tiny divots—possibly a capacitive grid, like on the Google Home, for registering your taps and touches on the surface above.
-
-
-
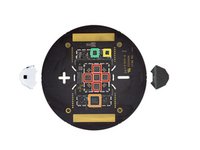
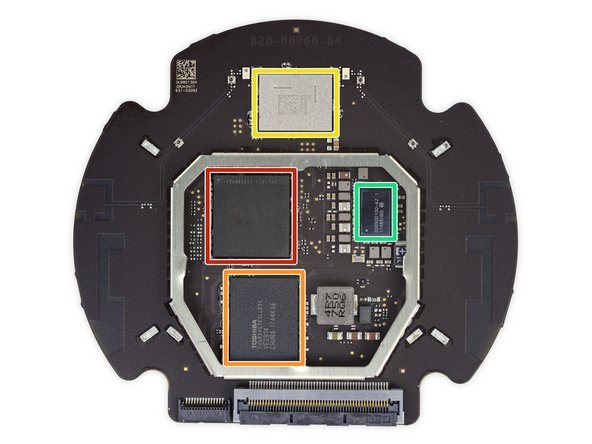
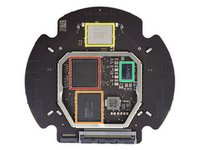
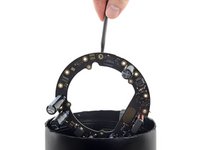
The next disc to come out holds those elaborate drawstring moorings—and behind it, the main logic board.
-
Chipwise, we spy:
-
Apple A8 APL1011 SoC (we’ve seen this before, but doing a different job), likely paired with 1 GB RAM (layered on top in typical PoP configuration)
-
Toshiba THGBX4G7D2LLDYC 16 GB NAND flash
-
USI 339S00450 WiFi/Bluetooth module, likely with a Broadcom BCM43572 trapped inside
-
Apple/Dialog Semiconductor 338S00100-AZ PMIC
-
Interestingly, the reverse has some unpopulated SMD pads, for a few chips and several passives. Maybe the HomePod underwent some last-minute design changes?
-
-
-
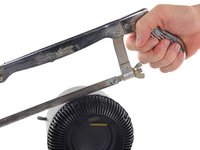
After a lot of fruitless goofing around with all manner of heat and twisting, we're stumped as to how to proceed from here. Finally we get impatient and grab the hacksaw (and our ultrasonic cutter) and release the super beefy woofer.
-
If the magnet on this woofer looks big for a speaker this size, that's because it is. Deep, dramatic bass notes depend on a speaker's ability to move lots of air.
-
-
-
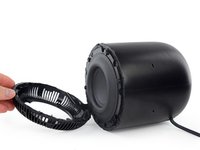
After slicing and prying our way into this fortress of a speaker, we reach the final obstacle: a threaded ring.
-
We're forced to conclude that—at some point—the HomePod was able to be unscrewed to separate the control/woofer component and the tweeter/power supply unit.
-
But we don't feel too bad about getting hacky: judging by the adhesive you can see on the lower face of the tube, the threads aren't meant for the consumer—this thing was glued shut.
-
-
-
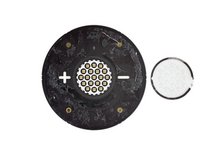
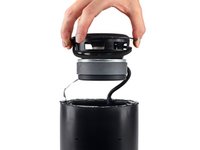
The next layer of our HomePod onion (or maybe parfait?) is the two-part power supply, composed of an inner block handling the AC/DC conversion, and an outer ring distributing power to all eight of the speakers.
-
The AC-in board's hefty hardware is flooded with epoxy, probably to keep the mad vibes from shaking it apart. It sends power to the ring board via conductive posts à la Mac Pro.
-
-
이 단계에 사용된 도구:Halberd Spudger$2.99
-
We've got part two of the power supply, the
StargateHalopower distribution ring, on the hook. -
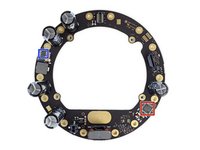
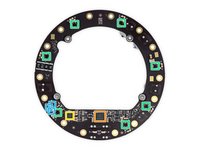
The capacitor-studded side of our intergalactic power supply board is home to a STMicroelectronics STM32L051C8T7 ultra-low-power ARM MCU.
-
And on the other side we find:
-
International Rectifier PowlRaudio 98-0431 audio amplifier
-
Cirrus Logic CS4350 stereo DAC w/ intergrated PLL
-
And around the perimeter, seven Analog Devices SSM3515B audio amplifiers—looks like these are the individual amps for the tweeters!
-
Maxim Integrated MAX9938 and Texas Instruments INA210 current sense amplifier
-
Texas Instruments TPS54560 5 A step down converter
-
-
-
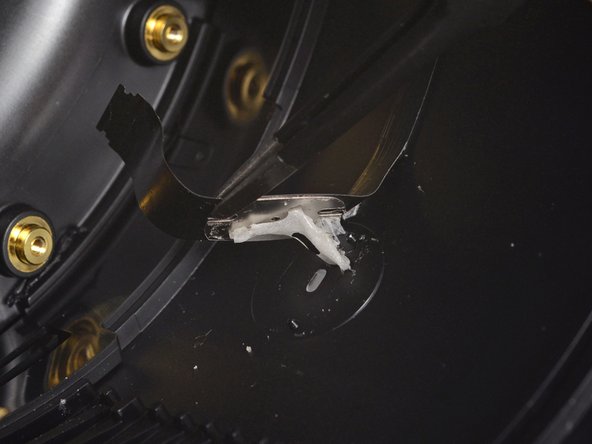
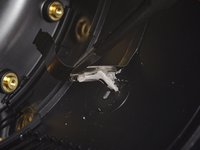
We wrestle a small board from the adhesive holding it to the barrel, and notice two Conexant CX20810 ADC chips by Synaptics for the microphone array.
-
Not to be outdone, the board has a microphone of its own—likely the low frequency microphone for woofer calibration.
-
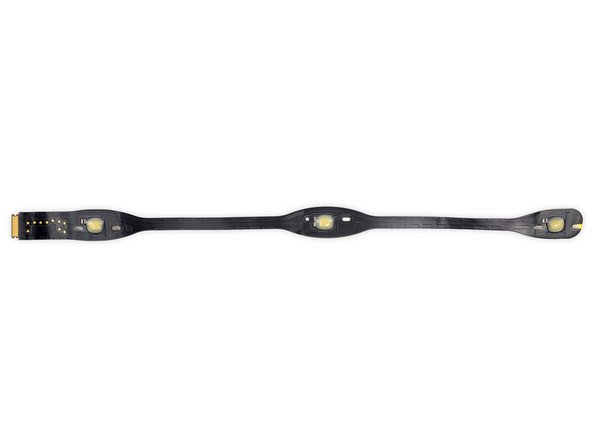
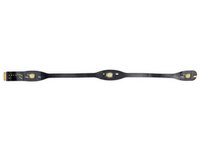
Back to the rest of the microphones: they come in two long strips of three mics each. Each strip is glued firmly to the inside of the case, with the mics positioned over funnel-shaped channels.
-
-
-
We pull another threaded ring out of the HomeBody and finally gain access to
snow white andthe seven tweeters, complete with their conductive power posts. -
That's right—those gold screwposts are delivering power to the tweeters.
-
Taking a look at a port, we've got a very bad feeling about this. Or maybe it's the tweeter that's nervous.
-
Time to break out the ultrasonic cutter and pop this unit open!
-
-
-
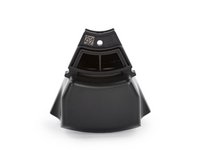
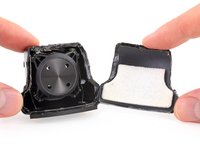
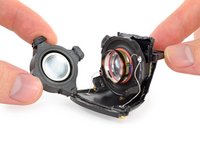
With the tweeter assembly open, we get a better look at the vented, horn-loaded tweeter that gives the HomePod its "precise" sound.
-
The vents on the sides of the voice coil bobbin and the four holes at the rear of the tweeter prevent air pressure from building up behind the tweeter dome as it moves.
-
-
-
And with that: here are all the bits that make a Siri house a HomePod.
-
Do you know how Apple gets into these things? Did we miss a speaker nugget of wisdom? Let us know in the comments and be sure to check out our teardown video on YouTube.
-
Lastly, it's time to assign a repairability score. Despite many positives, if the opening procedure is truly not reversible, we're going to have to score it accordingly.
-
- The HomePod is built like a tank. Durability should not be an issue.
- The outer fabric mesh, despite its lack of seams, can be peeled off undamaged thanks to a wicked cool drawstring.
- All threaded fasteners are of the standard Torx variety—no annoying security screws here.
- Extremely clever use of conductive screw posts minimizes the cabling mess across multiple stacked layers of components.
- Very strong adhesives secure the touch input cover, microphone array, rubber foot, and (most annoyingly) the main point of entry on the top of the device—which otherwise looks designed to twist off without much fuss.
- Even though it looks like there ought to be a nondestructive way inside, we failed to decode it. Without a repair manual, your odds of success are slim.


최종 의견


84가이드 댓글
Thanks guys, very interesting report!
The power cable is actually user removable and replaceable. You just have to pull on it *really* hard. https://www.youtube.com/watch?v=gjxILSOf...
Very good teardown! Thanks!
Juan Miguel - 답글 공유
Apparently the AC cable is replaceable, yet not meant to be user-replaced: https://9to5mac.com/2018/02/10/remove-ho...
What is the DAC?
Wayne Wilmot - 답글 공유