주요 콘텐츠로 건너뛰기

해당 분해도는 작업 중 입니다 – 최신 변경 사항을 보려면 주기적으로 다시 로드 하십시오!

필요한 것

  1. Vornado Zippi Fan Teardown, Removing Stand: 1 단계, 이미지 1/3 Vornado Zippi Fan Teardown, Removing Stand: 1 단계, 이미지 2/3 Vornado Zippi Fan Teardown, Removing Stand: 1 단계, 이미지 3/3
    • Pull the stand out of the enclosure on each side

  2. Vornado Zippi Fan Teardown, Remove Blades and Speed Control: 2 단계, 이미지 1/3 Vornado Zippi Fan Teardown, Remove Blades and Speed Control: 2 단계, 이미지 2/3 Vornado Zippi Fan Teardown, Remove Blades and Speed Control: 2 단계, 이미지 3/3
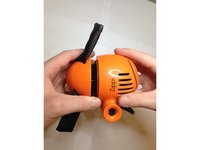
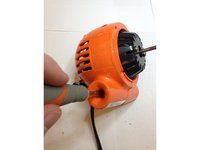
    • Remove the blades by pulling away from the enclosure

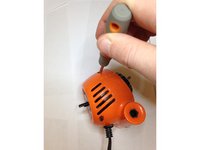
    • Remove the speed control by pulling away from the enclosure

  3. Vornado Zippi Fan Teardown, Remove Guard Screws: 3 단계, 이미지 1/2 Vornado Zippi Fan Teardown, Remove Guard Screws: 3 단계, 이미지 2/2
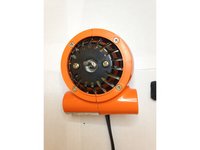
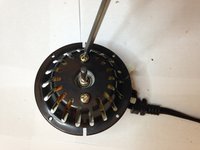
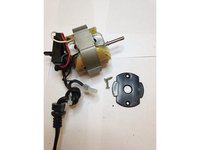
    • Remove the 4 screws coupling the orange plastic enclosure and black plastic guard

  4. Vornado Zippi Fan Teardown, Remove Enclosure Screws: 4 단계, 이미지 1/3 Vornado Zippi Fan Teardown, Remove Enclosure Screws: 4 단계, 이미지 2/3 Vornado Zippi Fan Teardown, Remove Enclosure Screws: 4 단계, 이미지 3/3
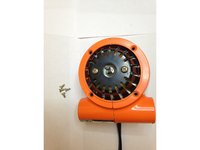
    • Remove the screw coupling the top half of the enclosure

    • Remove the screw coupling the bottom of the enclosure, near the power cable

    • Remove the screw beneath the rubber inserts holding the stand

  5. Vornado Zippi Fan Teardown, Remove Enclosure and Guard: 5 단계, 이미지 1/3 Vornado Zippi Fan Teardown, Remove Enclosure and Guard: 5 단계, 이미지 2/3 Vornado Zippi Fan Teardown, Remove Enclosure and Guard: 5 단계, 이미지 3/3
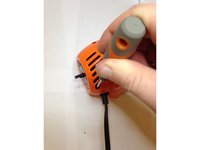
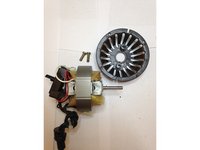
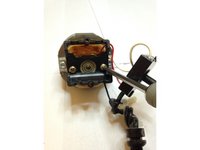
    • Separate the two halves of the enclosure, leaving the power cable, switch, motor and guard

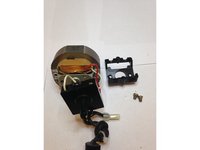
    • Remove the 2 screws attaching the guard to the motor

  6. Vornado Zippi Fan Teardown, Remove Switch: 6 단계, 이미지 1/2 Vornado Zippi Fan Teardown, Remove Switch: 6 단계, 이미지 2/2
    • Remove the 2 screws holding the switch in the mount connected to the motor

  7. Vornado Zippi Fan Teardown, Remove Switch Mount: 7 단계, 이미지 1/2 Vornado Zippi Fan Teardown, Remove Switch Mount: 7 단계, 이미지 2/2
    • Remove the two screws securing the switch mount to the motor

Nathan Lentz

회원 가입일: 11/19/15

20 평판

안내서 1개 작성함

댓글 2개

Mine was making noise and difficult to get the nose cone pulled off. I used two coins in the crack on opposing sides and twisted them.

S Lewis - 답글

it won't keep it`s position ,folds and flaps out ,if i could tighten the arm

andre b - 답글

댓글 쓰기

조회 통계:

24 시간 전: 0

7일 전: 3

30일 전: 9

전체 시간: 1,152