This manual will guide you through the steps involved in successfully removing the components of your Zune. This includes the hard drive, battery, screen, logic board, etc.
해당 분해도는 수리 안내서가 아닙니다 . Microsoft Zune 80 수리는 자사의 서비스 설명서 를 사용하세요.
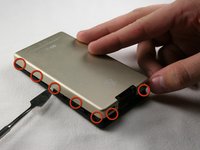
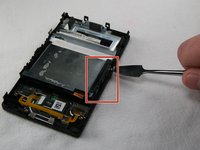
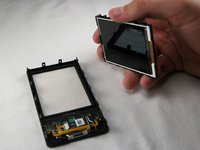
Using a metal spudger or Zune opening tool, remove the aluminum backing starting from the top. There are five clips on each side and two on the bottom.
WARNING: Be careful not to press the tools in too far because there are exposed cables right inside the edge of the device.
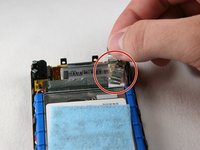
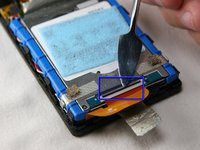
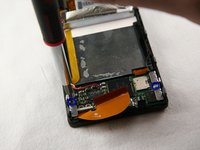
Unclick the black bar connecting the orange hard drive cable to the bottom of the hard drive.
Gently push towards the bottom of the device on the black bar until you hear a click sound. It is now disengaged from the hard drive.
If the cable does not come off easily, the black bar has not been un-clicked.
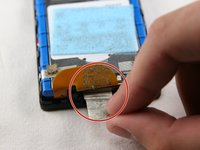
Now, gently pull the orange hard drive cable to remove it from the hard drive cable.
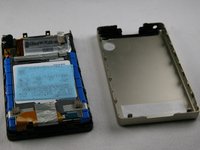
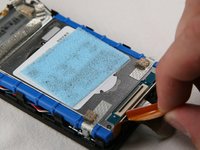
Lift the hard drive out of the device.
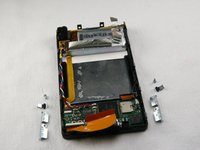
Remove the two T4 screws holding the metal brackets on both sides of the bottom of the device.
Remove the screws, brackets, and clips from the device. These are small pieces, so put them in a safe place.
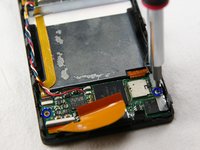
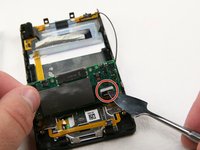
The orange audio board cable is clipped in with a small black bar, like the hard drive cable.
Un-clip the bar by pushing upwards on the edge of the black bar towards the orange cable. You will hear it click when it disengages.
If the cable does not come off easily, the black bar has not been unclicked.
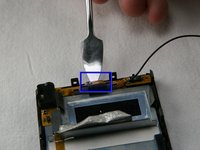
Flip the black bar to unclip the left side of the hard drive cable. You may now remove the hard drive cable.
If the cable does not come off easily, the black bar has not been unclicked.
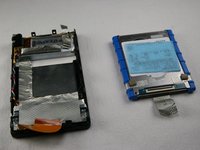
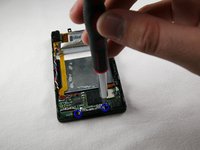
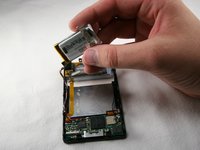
Remove the battery from the device with the cables still connected.
Carefully lift up the logic board located at the base of the Zune.
Unclip the orange ribbon cable in the same manner as in the previous steps.
Remove the logic board from the Zune, leaving the black wire connected.
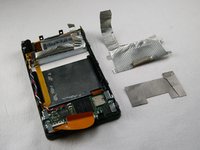
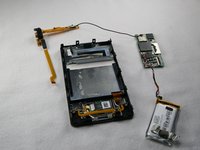
Carefully remove the wireless assembly that runs along the top and upper left edges of the Zune.
The assembly is lightly glued to the device. Use caution, as some force will be needed, but too much force will damage the board.
Remove the assembly and the battery together as one unit.
해당 안내서 넣기
해당 안내서를 사이트/포럼에 작은 위젯으로 포함하려면 크기를 선택하고 아래 코드를 복사하십시오.
단일 단계
전체 안내서
소형 - 600px
중형 - 800px
대형 - 1200px
미리보기