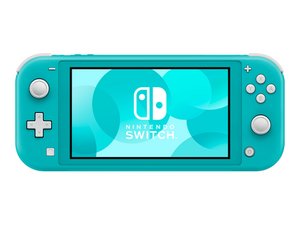
You're definitely seeing a problem with the LCD; it's really hard to say whether it's a problem with the flex cable where it is attached to the glass, or if it's a crack or defect in the LCD itself, but either way the effect is the same; you'll have to replace the entire LCD to fix it.
There is a very small chance it could have something to do with the connector where the display plugs into the motherboard, and it's worth checking, but I'm fairly confident you're going to have to replace the LCD. Here in the US, iFixit sells a replacement for $55 USD, which isn't cheap, but it's less than the cost of a whole new Switch.
Nintendo Switch Lite LCD: Replacement Display Panel
The job of replacing the LCD is, unfortunately, one of the more difficult repairs possible on a Switch. To get to the screen, you literally have to remove every other part inside the case, so it's a fairly big job as far as Switch repairs go. It is, on the other hand, straight-forward and if you can use a screwdriver and tweezers anyone can successfully replace a screen if you follow the guide.
Nintendo Switch Lite Screen Replacement - iFixit Repair Guide
If you want to try to check the connector first before committing to replacing the screen, follow the Game Card Reader / Headphone Jack replacement guide to access that connector.
Nintendo Switch Lite Game Card Reader and Headphone Jack Replacement - iFixit Repair Guide
Once you get to the last step, you can then open the retaining tab on the LCD cable and pull it out to see if you can find any signs of damage or corrosion. Use a magnifying glass and a bright light to check the motherboard connector, and both sides of as much of the cable as you can see. Clean the pins on the cable with 90% or higher isopropyl alcohol (don't use the 70% stuff we all have around the house) and reinsert the flex cable then lock it down. See steps 26 and 27 on the Screen Replacement guide for instructions. When reinserting the cable, make sure the two little ears on either side are both butted up against the motherboard connector. If you don't get it in all the way, you'll have more problems with the screen and may have to open it up again to resecure the connector.
Once you're done with that, reassemble everything and see if there's any difference. If not, you'll have to make the choice as to whether you can live with the display as is or if you want to tackle a somewhat difficult repair and incur the cost of a replacement screen.
Either way, I wish you luck. Let us know how it goes.


 2
2  1
1 
 99
99 


댓글 2개
Can you attach a picture of the screen please?
guardian10 의
@guardian10 Can i upload the photo here via iphone? Sorry i am a first timer here :(
iamadihakimi 의