주요 콘텐츠로 건너뛰기

Acer Chromebook 15 CB5-571-C09S Fan Replacement

필요한 것

  1. Acer Chromebook 15 CB5-571-C09S Fan Replacement, Back Cover: 1 단계, 이미지 1/1
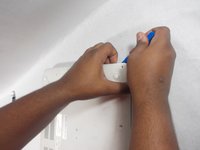
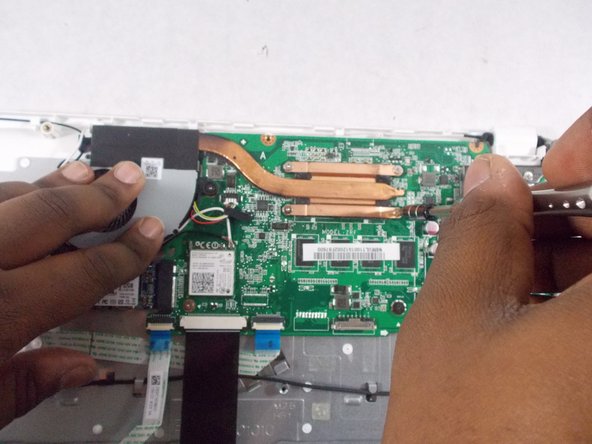
    • Place the device on a flat surface faced down so that the fan vents are at the top of the device.

  2. Acer Chromebook 15 CB5-571-C09S Fan Replacement: 2 단계, 이미지 1/2 Acer Chromebook 15 CB5-571-C09S Fan Replacement: 2 단계, 이미지 2/2
    • Unscrew the eighteen 6 mm PH0 Phillips head screws from the back of the device.

  3. Acer Chromebook 15 CB5-571-C09S Fan Replacement: 3 단계, 이미지 1/2 Acer Chromebook 15 CB5-571-C09S Fan Replacement: 3 단계, 이미지 2/2
    • Use a plastic opening tool to pry open the back cover around the edges of the device.

    • Be careful not to crack or break the back cover of the device.

    • You will have to adjust the position of the device to pry it open along all the edges.

  4. Acer Chromebook 15 CB5-571-C09S Fan Replacement: 4 단계, 이미지 1/2 Acer Chromebook 15 CB5-571-C09S Fan Replacement: 4 단계, 이미지 2/2
    • Stand the device up with the hinges on top and carefully pull apart the back cover from the device.

  5. Acer Chromebook 15 CB5-571-C09S Fan Replacement, Fan: 5 단계, 이미지 1/3 Acer Chromebook 15 CB5-571-C09S Fan Replacement, Fan: 5 단계, 이미지 2/3 Acer Chromebook 15 CB5-571-C09S Fan Replacement, Fan: 5 단계, 이미지 3/3
    • The fan is located at the top of the device enclosed by a grey plastic covering and is attached to the motherboard by a piece of brass colored metal.

    • Unscrew the four 3 mm PH00 Phillips screws located on the corner edges of the brass colored piece of metal.

  6. Acer Chromebook 15 CB5-571-C09S Fan Replacement: 6 단계, 이미지 1/2 Acer Chromebook 15 CB5-571-C09S Fan Replacement: 6 단계, 이미지 2/2
    • Unscrew the two 4 mm PH00 Phillips head screws on either side of the the fan.

    • Be aware that these screw are enclosed by small pieces of plastic and are not to be removed from the fan cover.

  7. Acer Chromebook 15 CB5-571-C09S Fan Replacement: 7 단계, 이미지 1/2 Acer Chromebook 15 CB5-571-C09S Fan Replacement: 7 단계, 이미지 2/2
    • Disconnect the fan connector from the motherboard using two plastic opening tools.

    • The fan connector is the white "plug" that connects the battery to the motherboard with yellow, white, red and black wires attached to it.

  8. Acer Chromebook 15 CB5-571-C09S Fan Replacement: 8 단계, 이미지 1/2 Acer Chromebook 15 CB5-571-C09S Fan Replacement: 8 단계, 이미지 2/2
    • Carefully unwrap the black and white wires from around the fan cover.

    • Be careful not to remove the wires from the Intel Dual Band Wireless-AC 7260 ports located just beneath the fan connector.

  9. Acer Chromebook 15 CB5-571-C09S Fan Replacement: 9 단계, 이미지 1/1
    • Grab the fan by its cover and the brass colored piece of metal and carefully lift up and pull out the fan from the device.

결론

To reassemble your device, follow these instructions in reverse order.

다른 한 분이 해당 안내서를 완성하였습니다.

Sakiynah Howard

회원 가입일: 10/17/17

1,000 평판

안내서 6개 작성하였습니다

UMass Dartmouth, Team S1-G3, Simcock Fall 2017 UMass Dartmouth, Team S1-G3, Simcock Fall 2017 회원

UMASSD-SIMCOCK-F17S1G3

3 회원들

안내서 12개 작성하였습니다

댓글 한 개

Thanks for the guide. I was able to successfully replace my fan using it. I would like to point out a couple of things:

1. 10 minutes is not a realistic completion time for this guide.

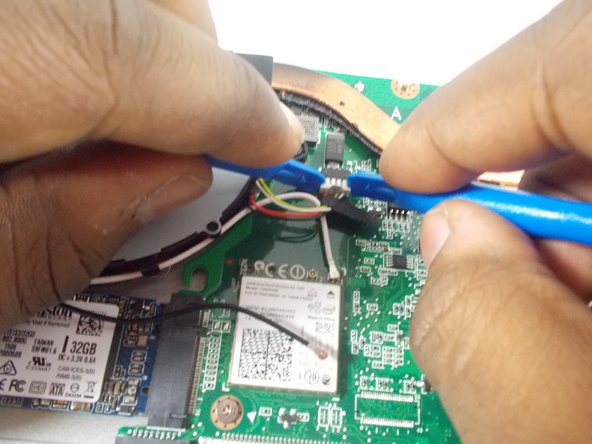
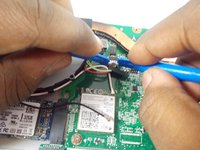
2. Disconnecting the fan plug is challenging. It might have been easier with a small pair of pliers.

3. Since this guide involves dis/re-connecting the thermal interface between the processor and heat sink, you should be prepared to properly clean both surfaces and re-apply new thermal compound. There is an excellent guide on applying thermal compound here:

How to Apply Thermal Paste

Tristan Mackey - 답글

댓글 쓰기

조회 통계:

24 시간 전: 1

7일 전: 3

30일 전: 5

전체 시간: 343