주요 콘텐츠로 건너뛰기

Apple Watch Series 4 Screen Replacement

필요한 것

  1. Apple Watch Series 4 Screen Replacement, Display Opening: 1 단계, 이미지 1/2 Apple Watch Series 4 Screen Replacement, Display Opening: 1 단계, 이미지 2/2
  2. Apple Watch Series 4 Screen Replacement, Safety Requirements: 2 단계, 이미지 1/3 Apple Watch Series 4 Screen Replacement, Safety Requirements: 2 단계, 이미지 2/3 Apple Watch Series 4 Screen Replacement, Safety Requirements: 2 단계, 이미지 3/3
    이 단계에 사용된 도구:
    Safety Glasses
    $3.19
    구매
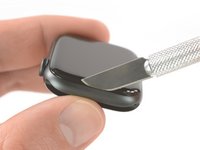
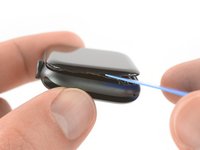
    • Because the gap between the screen and watch body is so thin, a sharp blade is needed to separate the two. Read the following warnings carefully before proceeding.

    • Protect your fingers by keeping them completely clear of the knife. If in doubt, protect your free hand with a heavy glove, such as a leather shop glove or gardening glove.

    • Be careful not to apply too much pressure, as this might cause the knife to slip and cut you, or damage the watch.

    • Wear eye protection. The knife or glass may break, sending pieces flying.

    • Feel free to attach or remove the watch band as needed to provide more control as you make repairs.

  3. Apple Watch Series 4 Screen Replacement: 3 단계, 이미지 1/1
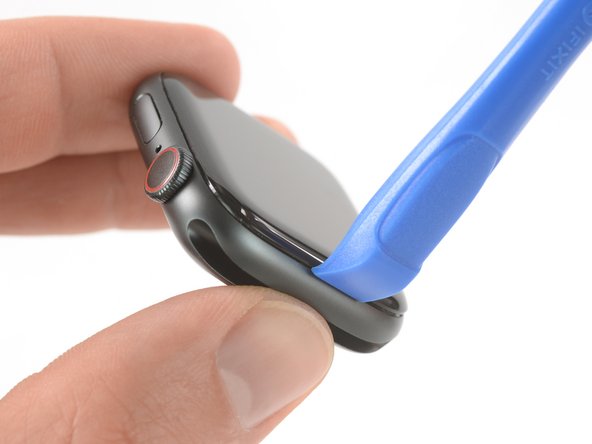
    • Prepare an iOpener (or use a hair dryer or heat gun) and heat the face of the watch to loosen the display adhesive.

    • Leave the iOpener on the watch for at least two minutes to fully heat the screen and soften the adhesive holding it to the case.

    • You may need to reheat the iOpener and repeat this procedure several times until the display adhesive gets loose enough.

  4. Apple Watch Series 4 Screen Replacement: 4 단계, 이미지 1/3 Apple Watch Series 4 Screen Replacement: 4 단계, 이미지 2/3 Apple Watch Series 4 Screen Replacement: 4 단계, 이미지 3/3
    • Place the edge of a curved blade into the thin gap between the display and the outer case. Start at the short side of the display, closest to the digital crown.

    • Press firmly straight down into the gap.

    • Once inserted, tilt the blade to pry the display open slightly.

    • Do not insert the knife more than 1/16th of an inch (~2 mm) to avoid damaging the Force Touch sensor.

  5. Apple Watch Series 4 Screen Replacement: 5 단계, 이미지 1/2 Apple Watch Series 4 Screen Replacement: 5 단계, 이미지 2/2
    • Once you've opened a small gap with the curved blade, remove the blade and insert the thinner edge of an opening tool into the gap.

    • Push the opening tool into the gap, using your thumb as a pivot to lift the display open a bit farther.

    • Don't try to fully open or detach the display yet.

  6. Apple Watch Series 4 Screen Replacement: 6 단계, 이미지 1/3 Apple Watch Series 4 Screen Replacement: 6 단계, 이미지 2/3 Apple Watch Series 4 Screen Replacement: 6 단계, 이미지 3/3
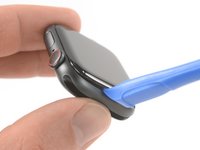
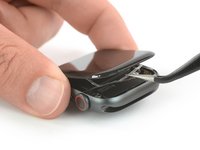
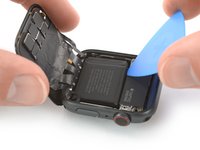
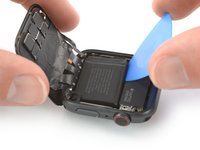
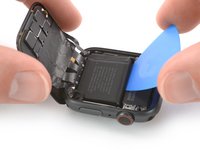
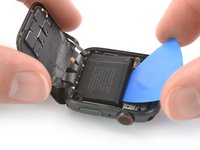
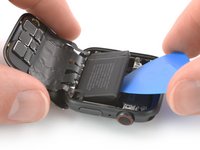
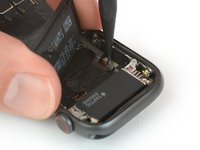
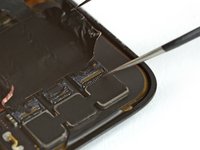
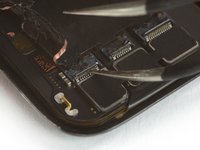
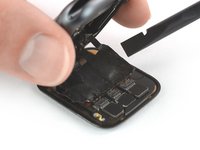
    • It's likely that the Force Touch sensor will stick to the display frame instead to the watch's body. In this case, insert an opening pick under the display and carefully separate the Force Touch gasket from the display.

    • To preserve the Force Touch gasket, pry carefully under the edge of the display. If the Force Touch gasket splits when lifting the display, or if you separate the gasket layers, you'll also need to replace the Force Touch gasket itself.

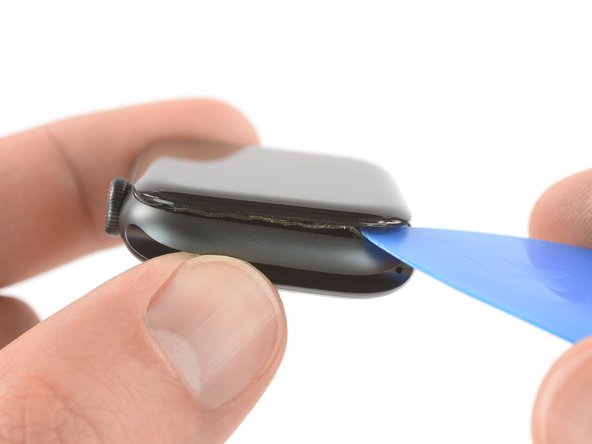
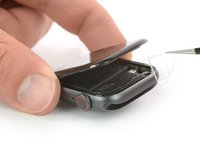
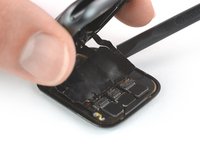
    • Slide the pick around the display to separate the adhesive between the Force Touch gasket and the display.

    • Don't insert the opening pick deeper than 1/16th of an inch (~2 mm) to avoid damaging other components.

  7. Apple Watch Series 4 Screen Replacement: 7 단계, 이미지 1/3 Apple Watch Series 4 Screen Replacement: 7 단계, 이미지 2/3 Apple Watch Series 4 Screen Replacement: 7 단계, 이미지 3/3
    • To avoid straining the display cables, don't open the display all the way yet.

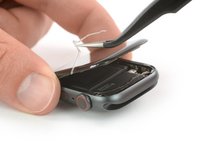
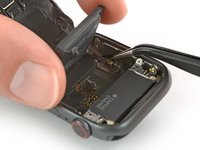
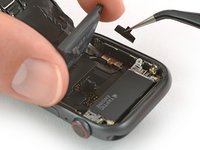
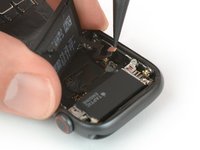
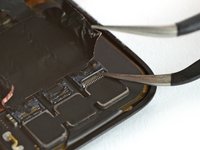
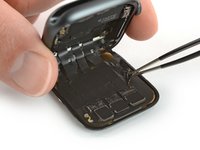
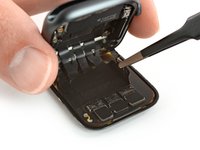
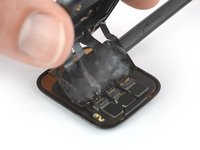
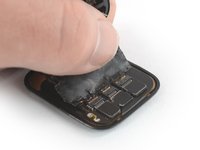
    • Open the display at max. to an 45° angle, and use tweezers to peel off the adhesive between the display and the Force Touch gasket.

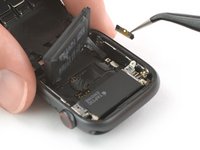
    • Thread the adhesive around and behind the display cables to get it off completely. Since the adhesive needs to be replaced anyway, you can cut it if that makes removal easier for you.

    • Make sure to return to this point during the reassembly of your watch and then continue with the Resealing Procedure.

  8. Apple Watch Series 4 Screen Replacement, Battery: 8 단계, 이미지 1/2 Apple Watch Series 4 Screen Replacement, Battery: 8 단계, 이미지 2/2
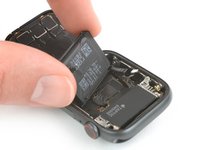
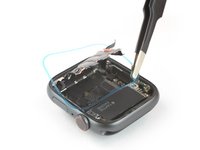
    • Carefully fold the screen to the back until you get enough space to pry out the battery.

    • Avoid tensioning the display cables when folding the screen to the back.

    • Insert an opening pick between the battery and the Taptic Engine.

    • A regular opening pick works fine with the 44mm version of the Apple Watch Series 4. However if you own the 40mm version and don't have enough space you can customize your opening pick with scissors.

  9. Apple Watch Series 4 Screen Replacement: 9 단계, 이미지 1/3 Apple Watch Series 4 Screen Replacement: 9 단계, 이미지 2/3 Apple Watch Series 4 Screen Replacement: 9 단계, 이미지 3/3
    • Slide the opening pick along the edge of the battery to loosen the adhesive.

    • The adhesive which holds the battery in place is soft. However, if you're struggling to pry out the battery you can place a heated iOpener on the rear side of the watch to loosen the adhesive. Apply the iOpener for at least two minutes.

    • Use constant, steady pressure to slowly pry the battery up, separating it from the adhesive securing it to the system board.

    • Mind the display cables and especially the Force Touch cable which covers the battery in one corner so you don't damage them when levering the battery out.

    • Make sure you don't puncture or deform the battery, as it can catch fire and/or explode if damaged.

    • Don't try to remove the battery all the way yet. It is still connected to the watch assembly.

  10. Apple Watch Series 4 Screen Replacement: 10 단계, 이미지 1/2 Apple Watch Series 4 Screen Replacement: 10 단계, 이미지 2/2
    • Carefully lift the battery and bring it in a 75° angle.

    • Use a pair of tweezers to peel the black sticker off the metal plate which covers the battery connector.

  11. Apple Watch Series 4 Screen Replacement: 11 단계, 이미지 1/1
    • Remove the Y000 screw (1.2 mm length).

  12. Apple Watch Series 4 Screen Replacement: 12 단계, 이미지 1/2 Apple Watch Series 4 Screen Replacement: 12 단계, 이미지 2/2
    • Use a pair of tweezers to remove the metal plate which covers the battery connector.

  13. Apple Watch Series 4 Screen Replacement: 13 단계, 이미지 1/2 Apple Watch Series 4 Screen Replacement: 13 단계, 이미지 2/2
    • Use the pointed end of a spudger to pry up and disconnect the battery flex cable.

  14. Apple Watch Series 4 Screen Replacement: 14 단계, 이미지 1/2 Apple Watch Series 4 Screen Replacement: 14 단계, 이미지 2/2
    이 단계에 사용된 도구:
    Tesa 61395 Tape
    $5.99
    구매
    • Remove the battery.

    • Be sure to remove the protective liner to expose the adhesive on your new battery before you set it in place.

    • Do not reinstall a damaged or deformed battery, as doing so is a potential safety hazard.

    • If you are reusing your old battery during reassembly, you can reuse the existing adhesive to secure the battery during reassembly. Alternatively, remove the old adhesive with high isopropyl alcohol and a lint free cloth and use a small piece of double-sided tape such as Tesa 61395, or a dab of liquid adhesive such as E6000.

  15. Apple Watch Series 4 Screen Replacement, Screen Removal: 15 단계, 이미지 1/2 Apple Watch Series 4 Screen Replacement, Screen Removal: 15 단계, 이미지 2/2
    • The black foil which covers the display connectors is very fragile and likely to rip. To keep the tape intact while peeling it off, it's necessary to use high isopropyl alcohol or an iOpener.

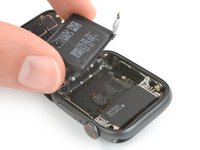
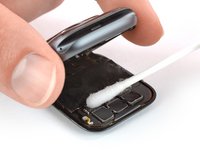
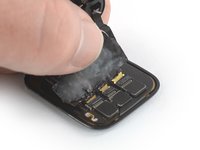
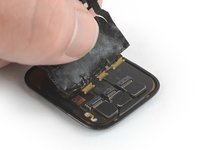
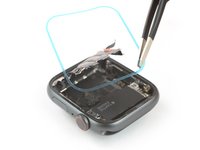
    • Apply a little bit of high isopropyl alcohol (>99%) to a Q-tip and apply it to the black adhesive foil. Let it penetrate the adhesive for about two minutes.

    • Alternatively you can place an a heated iOpener on top of the screen to loosen the adhesive. Apply the iOpener at least for two minutes.

  16. Apple Watch Series 4 Screen Replacement: 16 단계, 이미지 1/1
    • Use a pair of tweezers to carefully peel off the tape covering the three display cable connectors.

  17. Apple Watch Series 4 Screen Replacement: 17 단계, 이미지 1/3 Apple Watch Series 4 Screen Replacement: 17 단계, 이미지 2/3 Apple Watch Series 4 Screen Replacement: 17 단계, 이미지 3/3
    • Use one arm of a pair of tweezers to carfully open the three ZIF connectors on the rear side of the screen.

  18. Apple Watch Series 4 Screen Replacement: 18 단계, 이미지 1/3 Apple Watch Series 4 Screen Replacement: 18 단계, 이미지 2/3 Apple Watch Series 4 Screen Replacement: 18 단계, 이미지 3/3
    • Use a pair of blunt nose tweezers to peel up the sides of the black foil which adheres the cable to the rear side of the screen.

  19. Apple Watch Series 4 Screen Replacement: 19 단계, 이미지 1/3 Apple Watch Series 4 Screen Replacement: 19 단계, 이미지 2/3 Apple Watch Series 4 Screen Replacement: 19 단계, 이미지 3/3
    • Lift the body of the watch up and carefully slide a spudger underneath the display flex cable to loosen remaining adhesive.

  20. Apple Watch Series 4 Screen Replacement: 20 단계, 이미지 1/3 Apple Watch Series 4 Screen Replacement: 20 단계, 이미지 2/3 Apple Watch Series 4 Screen Replacement: 20 단계, 이미지 3/3
    • Carefully pull the display flex cables out of their ZIF connectors.

    • Make sure to hold on to the display flex cable during this procedure and avoid pulling only on the body of the watch. Otherwise the display cable might rip.

    • Separate the watch assembly and the screen.

  21. Apple Watch Series 4 Screen Replacement, Screen: 21 단계, 이미지 1/3 Apple Watch Series 4 Screen Replacement, Screen: 21 단계, 이미지 2/3 Apple Watch Series 4 Screen Replacement, Screen: 21 단계, 이미지 3/3
    이 단계에 사용된 도구:
    Adhesive Cleanup Kit (Set of 12)
    $4.99
    구매
    • The following steps describe how to apply replacement adhesive before reassembling your watch.

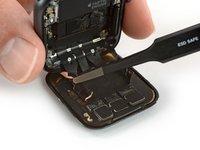
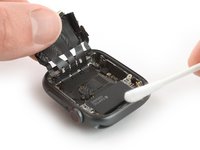
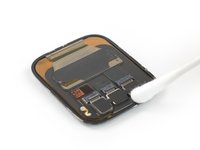
    • Apply a little bit of high isopropyl alcohol (>99%) to a Q-tip or use a cleaning pad to gently remove the leftover adhesive on top of the Force Touch gasket.

  22. Apple Watch Series 4 Screen Replacement: 22 단계, 이미지 1/1
    • Use a pair of tweezers to carefully remove the replacement adhesive with the blue protective film from the backing paper.

  23. Apple Watch Series 4 Screen Replacement: 23 단계, 이미지 1/3 Apple Watch Series 4 Screen Replacement: 23 단계, 이미지 2/3 Apple Watch Series 4 Screen Replacement: 23 단계, 이미지 3/3
    • Hold the replacement adhesive diagonally to thread it over the display cable.

    • Position the replacement adhesive on top of the Force Touch gasket.

  24. Apple Watch Series 4 Screen Replacement: 24 단계, 이미지 1/1
    • Use the pointed end of a spudger to make final position adjustments and press the adhesive into place.

결론

To reassemble your Apple Watch Series 4 follow these instructions in reverse order to reattach the screen and the battery.

Take your e-waste to an R2 or e-Stewards certified recycler.

Repair didn’t go as planned? Check out our Answers community for troubleshooting help.

다른 34명이 해당 안내서를 완성하였습니다.

Dominik Schnabelrauch

회원 가입일: 11/23/16

201,012 평판

안내서 682개 작성하였습니다

iFixit iFixit 회원

Staff

136 회원들

안내서 16,560개 작성하였습니다

댓글 17개

Do not buy does not come with all the pieces needed to make the screen repair all the connections are not possible

jachs780 - 답글

Can you tell me what the black adhesive tape with flex ends that covers the flex ribbons is used for and can it be replaced ?

Sheila Blackwell - 답글

That is for shielding and grounding purposes. If you get a spare you can of course replace it. But be careful not to damage the display cables.

Tobias Isakeit -

Sheila, this you can purchase on Aliexpress. i tried to get it elsewhere, seems noone else stocks it. cost approx $10. i found it here: https://www.aliexpress.com/item/10050019...

palokiller -

I have replaced an original screen from another apple watch and everything seems to have gone well. But when I try to pair with the iphone it doesn't succeed. Is it because I didn't put the NFC chip from the original apple watch? What can be?.

It is an apple watch series 4 44 mm + cellular.

Thank you very much.

ihsack - 답글

댓글 쓰기

조회 통계:

24 시간 전: 54

7일 전: 314

30일 전: 1,490

전체 시간: 129,974