
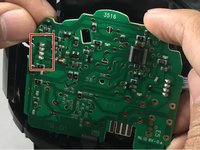
The circuit board is a vital component to the function of the Braun Series 7 790cc-7 charging base. Many consumers may discard the charging base if it malfunctions rather than replace the circuit board. This can be expensive but by replacing the circuit board the razor can be used for an extended period of time. With the use of this Replacement Guide, one can easily change the circuit board in the charging base when it is required.
필요한 것
부품
도구


더보기...
-
-
-
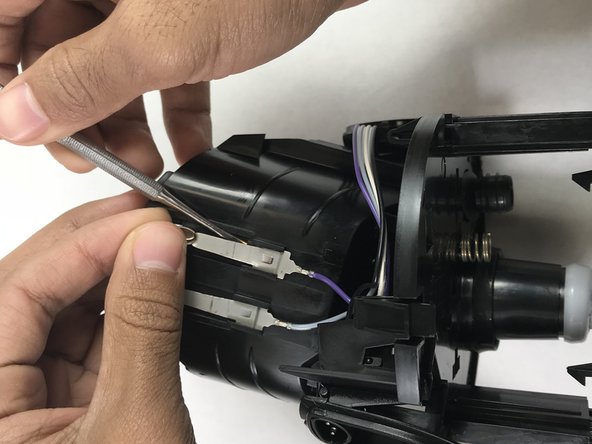
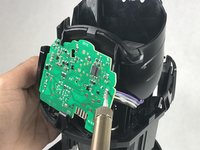
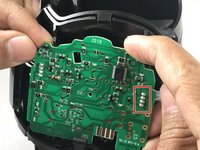
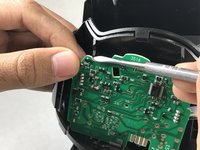
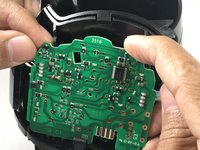
Remove solder from wire harness leading to the charging base motor.
-


To reassemble your device, follow these instructions in reverse order.
To reassemble your device, follow these instructions in reverse order.
다른 3명이 해당 안내서를 완성하였습니다.
팀

IUPUI, Team S3-G6, Harley Fall 2017 IUPUI, Team S3-G6, Harley Fall 2017 회원
IUPUI-HARLEY-F17S3G6
3 회원들
안내서 9개를 작성함
댓글 8개
Step 6-8
If you are only doing an investigation you can release the board enough to inspect and reconnect all connectors without desoldering. This was enough to fix my problems. I found it easier to pull the bottom of the board forward and down, rather than force the tab at the top.
Ian has also not mentioned the 3 things that can fall off, and make reassembly tricky. All these needed to be carefully stored and repositioned on my reassembly.
1. The Base spring release button. Although it goes on the outside I refitted to the inner unit first
2. The carbon/rubber button contacts in the case. These fall off when not in contact with the pcb. They fit on very fine pins on the shell button covers.
3. The angular molding that sits in the front of the well. Needs to be fitted completely to the Base before reassemble
Martin, / Anyone,
Can someone provide pictures showing the reassemble process of the parts that fell out when I separated cover from the base (steps 6-8, as Martin Bird mentioned above)?
I have 2 small rubber pieces (assuming they go on the buttons on base, not exactly sure where they go), & the angular molding - not sure how this piece fits in the front somewhere?
Brent Bono - 답글
But where do I find a replacement PCB?
I found it hard to put the charging base back together again. Seems like something was broken, a tab or two, and it won´t close all the way down. Now there´s a gap at the bottom that I am too lazy to fix (I have already opened and closed the damned unit five times and I got bored of it.)
I had difficulty with separating the base under steps 2 and 3. This is a great tutorial, but I think there’s more to steps 2 and 3 without breaking the unit. For example, I think one needs to depress the left-side cartridge release button while pulling the base from the cover. I didn’t appreciate this and ended up breaking the plastic tab associated with that release button, so then when the unit is reassembled, it won’t stay in the down position. I ended up purchasing a new base from Braun.FactoryOutletStore.com.
I ended with a green rubber or washer that I couldn’t find its place.
@muratlogin the green washer attaches to the drain of the tub and mates with the little adapter that fits in the base.
@lucagiacca I found an "official" source here: https://braun.encompass.com/item/1062491...
But they have the part gated: "Available to authorized repair agents only - 017"
But that page gave me a model number that I was able to search for and found somebody selling the same thing w/o restrictions:
https://www.ebay.com/itm/154316644929
If that link ever goes dead:
Listing title: Braun 67030883 Tub With Pcb Black
Seller: Order Parts Today - https://www.ebay.com/sch/i.html?_ssn=ord...