소개
In this guide, you will learn how to safely replace the hard drive of a Fujitsu LIFEBOOK P7010D laptop.
Typically, laptop hard drives should be replaced every 3-5 years. If you keep track of your hard drive’s age, you can preemptively replace it before it fails. Hard drive failure can lead to slow functioning, data corruption, and overheating.
필요한 것
-
-
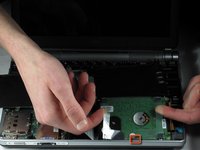
Locate the battery (the grey block). Find the two tabs on one end of the battery, as pictured.
-
Using two fingers, press both tabs down at once until they are fully depressed.
-
-
-
While holding the tabs down, slowly pivot the battery up.
-
The battery is now free and safe to pull out.
-
-
-
-
Push the tab down as far as possible using your finger or opening tool to unlock the disc drive.
-
While still holding the tab down, use your other hand to pull out the disc drive straight out of its place.
-
-
-
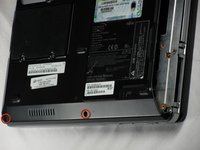
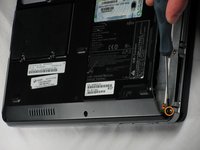
On the bottom of the laptop, find the two bottom-plate screw holes near the disc drive. Parallel to them is a 2.4mm screw (second photo).
-
After locating the 2.4mm screw, use a Phillips #0 screwdriver to unscrew it.
-
-
이 단계에 사용된 도구:Anti-Static Wrist Strap$7.95
-
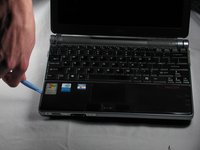
Flip the laptop over and open it facing you.
-
Use a plastic opening tool to lift the bottom black cover on both sides.
-
-
-
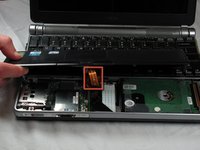
Once the black cover is lifted, gently flip it and set it on the keyboard.
-
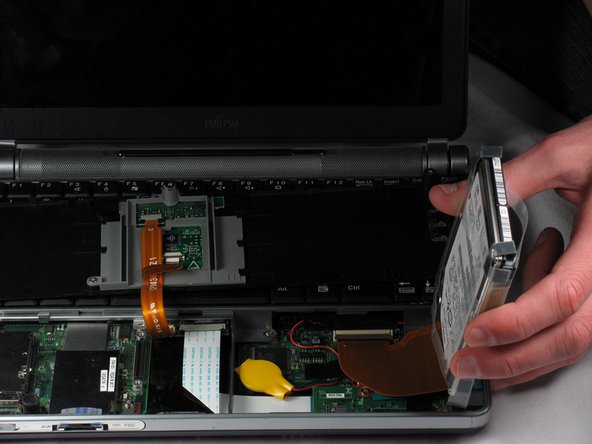
Locate the disc drive on the right side, as pictured.
-
Using two fingers and the clear plastic handles on the top, gently lift it out. Place it on the side of the laptop.
-
-
-
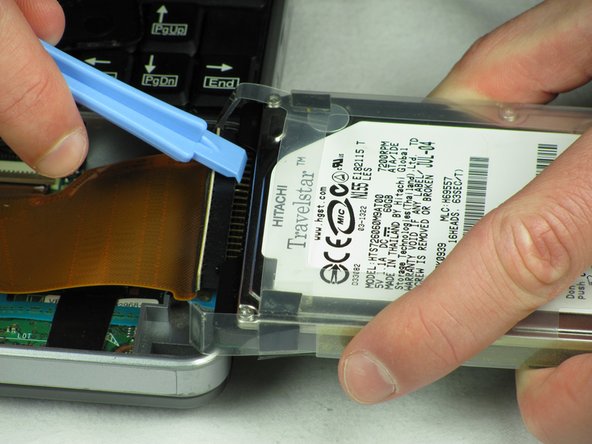
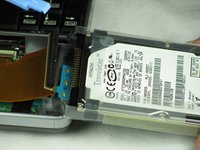
Flip the hard drive on its side.
-
Hold the hard drive and insert a plastic opening tool, preferably a wider one, in between the black pin holder and the hard drive.
-
Gently wiggle the black pin holder back and forth, on each side, until it comes off.
-


To reassemble your device, follow these instructions in reverse order.
다른 3명이 해당 안내서를 완성하였습니다.

팀

Cal Poly, Team 10-31, Amido Winter 2012 Cal Poly, Team 10-31, Amido Winter 2012 회원
CPSU-AMIDO-W12S10G31
5 회원들
안내서 21개를 작성함
1가이드 댓글
hai sir..please help me..how to replacement hdd lifebook PH770/5AN ? can you answer to my email antogantengnian@gmail.com..thanks a lot
anto adhitya - 답글 공유