주요 콘텐츠로 건너뛰기

Google Pixel XL Rear Glass Replacement

필요한 것

  1. Google Pixel XL Rear Glass Replacement, Rear Glass: 1 단계, 이미지 1/1
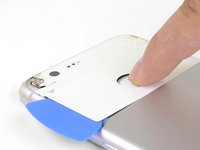
    • Heat an iOpener and apply it to the phone's back glass panel for two minutes.

    • A hair dryer, heat gun, or hot plate may also be used, but be careful not to overheat the phone—the display and internal battery are both susceptible to heat damage.

  2. Google Pixel XL Rear Glass Replacement: 2 단계, 이미지 1/3 Google Pixel XL Rear Glass Replacement: 2 단계, 이미지 2/3 Google Pixel XL Rear Glass Replacement: 2 단계, 이미지 3/3
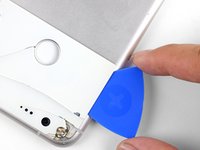
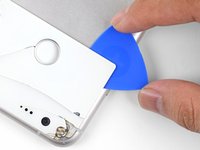
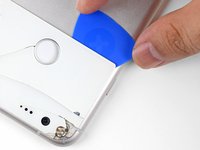
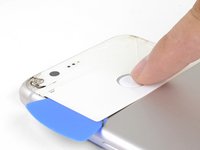
    • When the glass is warm to the touch, apply a suction cup close to the edge.

    • Lift on the suction cup and insert an opening pick in the gap.

    • If your back glass is badly cracked, covering it with a layer of clear packing tape may allow the suction cup to adhere. Alternatively, very strong tape may be used instead of the suction cup. You can also superglue the suction cup to the broken screen.

    • If the edge of the glass is cracked, you can try to slide an opening pick underneath the crack and slowly chip the glass out.

    • Reapplying heat will help loosen adhesive and make the process easier.

  3. Google Pixel XL Rear Glass Replacement: 3 단계, 이미지 1/3 Google Pixel XL Rear Glass Replacement: 3 단계, 이미지 2/3 Google Pixel XL Rear Glass Replacement: 3 단계, 이미지 3/3
    • Use the opening pick to slice through the glass panel's perimeter adhesive.

    • As you slice the adhesive, make sure that you are slicing above the NFC pad.

    • If the slicing becomes hard, reapply heat to the panel.

  4. Google Pixel XL Rear Glass Replacement: 4 단계, 이미지 1/2 Google Pixel XL Rear Glass Replacement: 4 단계, 이미지 2/2
    • When you free the back glass around the fingerprint sensor, press down on the sensor firmly until it separates from the back glass.

    • Continue to slice through the adhesive underneath the back glass until you are able to remove the panel.

    • Cracked glass can be extremely sharp! Be careful while prying and clean up all glass fragments.

  5. Google Pixel XL Rear Glass Replacement: 5 단계, 이미지 1/1
    • If your replacement rear glass does not come with a microphone mesh, you will have to transfer the original over.

    • Use an opening pick and tweezers to carefully pry up and remove the mesh.

  6. Google Pixel XL Rear Glass Replacement: 6 단계, 이미지 1/1
    • Use a spudger or opening tool to scrape all adhesive from the frame.

    • Use high concentration isopropyl alcohol (over 90%) to wipe away any remaining residue.

    • Be meticulous with the cleaning. If any adhesive is left on the frame, the replacement panel may not lay flat and adhere properly.

  7. Google Pixel XL Rear Glass Replacement: 7 단계, 이미지 1/3 Google Pixel XL Rear Glass Replacement: 7 단계, 이미지 2/3 Google Pixel XL Rear Glass Replacement: 7 단계, 이미지 3/3
    • Peel the white backing away from the included adhesive sheet, making sure to punch out all cutouts.

    • Line the bottom edge of the adhesive to the bottom edge of the replacement glass panel.

    • Make sure that the backside of the glass panel is facing upwards.

    • Slowly lower the adhesive onto the glass panel.

    • Rub your fingers against the adhesive to help it bond with the glass panel.

  8. Google Pixel XL Rear Glass Replacement: 8 단계, 이미지 1/3 Google Pixel XL Rear Glass Replacement: 8 단계, 이미지 2/3 Google Pixel XL Rear Glass Replacement: 8 단계, 이미지 3/3
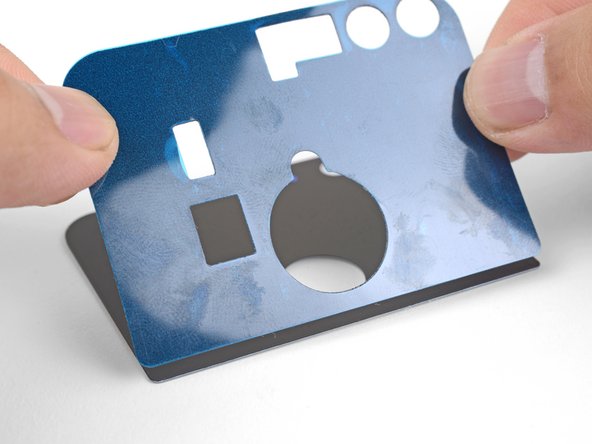
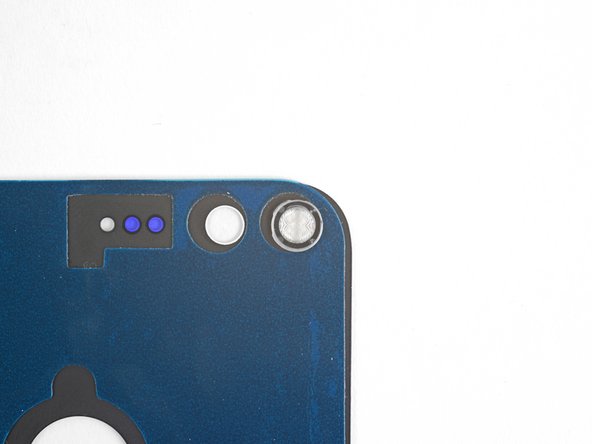
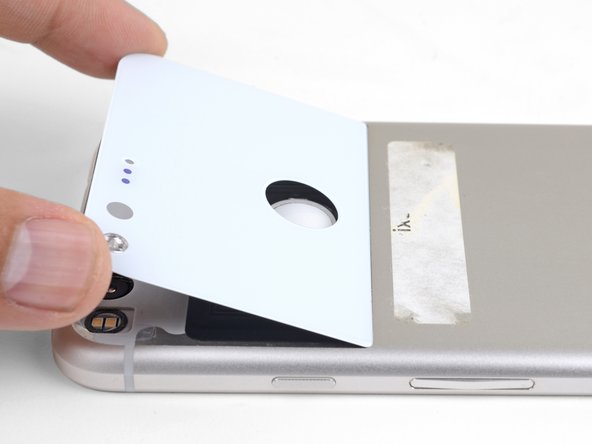
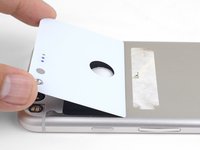
    • If your replacement part did not come with a flash lens, you must transfer it from your old panel.

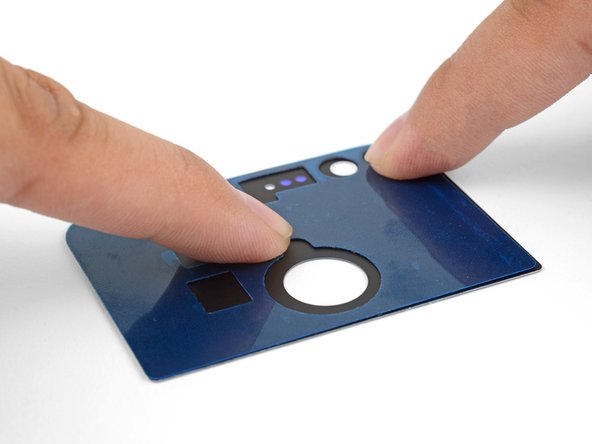
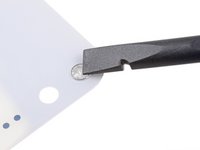
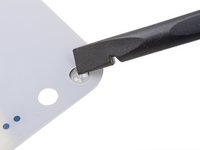
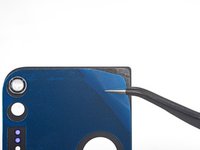
    • Use a spudger or your finger to firmly press on the lens from the outward-facing side (the side you can usually see on the phone) of the glass panel until it loosens from its recess.

    • Remove the lens and transfer it onto the back side of the replacement panel.

    • Make sure to orient the flash lens properly such that the fresnel rings are stacked vertically.

  9. Google Pixel XL Rear Glass Replacement: 9 단계, 이미지 1/3 Google Pixel XL Rear Glass Replacement: 9 단계, 이미지 2/3 Google Pixel XL Rear Glass Replacement: 9 단계, 이미지 3/3
    • Peel the liner off of the adhesive-backed glass panel.

    • Align the glass panel to the bottom edge of the indentation.

    • Lower the glass panel into place.

  10. Google Pixel XL Rear Glass Replacement: 10 단계, 이미지 1/1
    • To help the back glass adhesive bond more securely, stack some heavy books on top of the phone for 30 minutes.

결론

To reassemble your device, follow these instructions in reverse order.

Repair didn’t go as planned? Check out our Google Pixel XL Answers community for troubleshooting help.

다른 16명이 해당 안내서를 완성하였습니다.

Arthur Shi

회원 가입일: 01/03/18

248,445 평판

안내서 503개 작성하였습니다

iFixit iFixit 회원

Staff

136 회원들

안내서 16,573개 작성하였습니다

댓글 한 개

thank for this tutorial. I’ve used an halogen lamp to heat the phone

Nicolas - 답글

댓글 쓰기

조회 통계:

24 시간 전: 0

7일 전: 1

30일 전: 20

전체 시간: 6,563