
HP Pavilion dv7-6c90us Cooling Fan Replacement
Replacing any component in a laptop requires patience, strong organization skills, and a good work space. With enough patience and perseverance anyone can do it!
In order to successfully replace the dv7 cooling fan you need to work on a flat surface with good lighting and plenty of room to keep small parts organized so that the computer can be put back together without issue.
Make sure enough time is set aside to complete the process in one sitting. This project's estimated time frame is 4 to 6 hours.
WARNING: Before touching electronic computer components, such as the motherboard, CPU, or RAM, discharge all static electricity by touching a grounded metal object.
WARNING: Disassembling a laptop and replacing components by yourself often voids the warranty. Handle all computer parts with care, and be patient.
필요한 것
부품
도구


더보기...
-
-
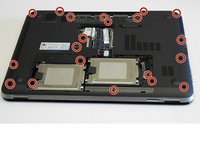
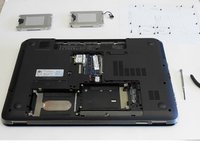
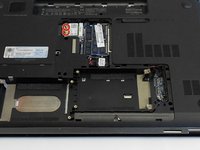
Carefully remove all twenty screws from the external laptop case.
-
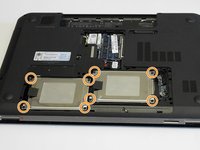
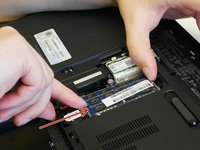
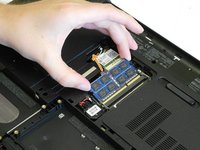
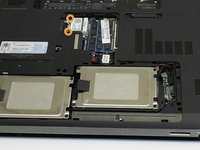
Remove the eight Phillips PM2.5x5.0 screws from both hard drive compartments, and place them on the diagram.
-
Carefully place all screws in the correct spot on the diagram. Many screws are different sizes and lengths. It is extremely important that all screws go back into the same screw hole they came out of during re-assembly.
-
-
-
-
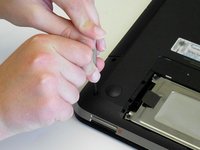
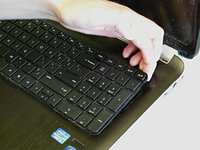
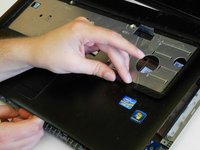
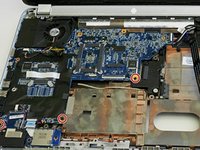
Turn the laptop right-side-up, and open the screen. Loosen the keyboard by carefully prying it up using your fingernails, carefully working along the edges.
-
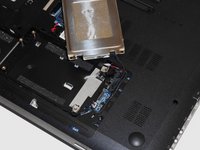
Slowly lift the keyboard away from the case.
-
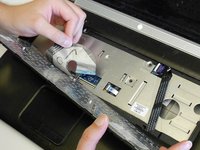
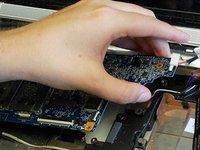
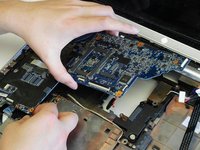
Lift the plastic tab that connects the keyboard ribbon cable to the motherboard.
-
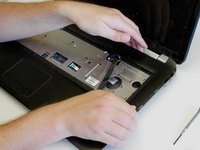
Set the keyboard aside.
-
-
-
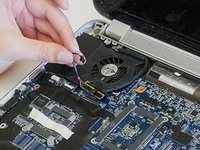
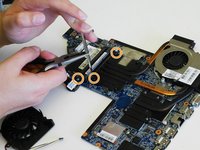
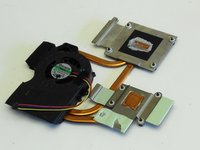
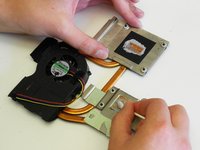
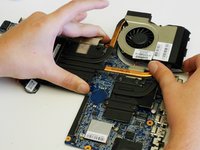
Use cotton swabs, paper towels, and alcohol to gently remove old thermal compound from the fan/heat sink assembly and motherboard.
-
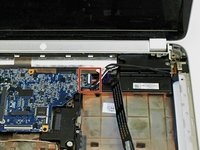
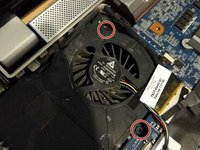
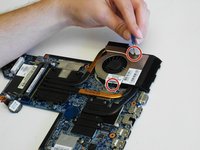
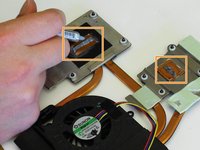
Apply a small amount of new thermal compound to the center of the brass section of the heat sink. Both areas that need new thermal compound are marked with red boxes.
-


Follow the steps in reverse order to reassemble.
Once you have reassembled the laptop, your repair is complete. If you need additional help, see the HP Pavilion dv7 Maintenance and Service Guide on HP's support website (link to guide: http://h10032.www1.hp.com/ctg/Manual/c03...).
Follow the steps in reverse order to reassemble.
Once you have reassembled the laptop, your repair is complete. If you need additional help, see the HP Pavilion dv7 Maintenance and Service Guide on HP's support website (link to guide: http://h10032.www1.hp.com/ctg/Manual/c03...).
다른 43명이 해당 안내서를 완성하였습니다.
팀

Colorado Springs, Team 1-1, Mcmichael SU 2015 Colorado Springs, Team 1-1, Mcmichael SU 2015 회원
UCCS-MCMICHAEL-SU15S1G1
3 회원들
안내서 1개 작성
댓글 15개
My HP Pavilion dv7 Cooling Fan failed and this procedure was exactly what I needed to install a new fan. The steps are right on. I would have done a lot of experimentation and possible damage had I not had this reference to follow. Thank you very much.
You used way too much thermal compound.
A pea sized drop will be just fine, my dude.
the link works just fine!by the way author i thank you for your work,its really help me!!
Extremely helpful,thank you