주요 콘텐츠로 건너뛰기
수리 커뮤니티 가입 - 계정 만들기

Hott T725-8G Screen/Display Replacement

필요한 것

  1. Hott T725-8G Screen/Display Replacement, Screen/Display: 1 단계, 이미지 1개 중 1개
    • Use the Metal Spudger tool and your fingers to peel off any existing screen protector.

    댓글 쓰기

  2. Hott T725-8G Screen/Display Replacement: 2 단계, 이미지 1개 중 1개
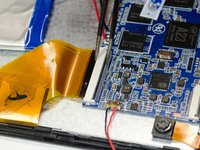
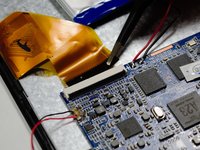
    • Remove black electrical tape to release the sensor and ribbon wires connecting the camera to the motherboard.

    댓글 쓰기

  3. Hott T725-8G Screen/Display Replacement: 3 단계, 이미지 1개 중 1개
    • Dislodge the sensor from the front panel.

    댓글 쓰기

  4. Hott T725-8G Screen/Display Replacement: 4 단계, 이미지 2개 중 1개 Hott T725-8G Screen/Display Replacement: 4 단계, 이미지 2개 중 2개
    이 단계에 사용된 도구:
    Tweezers
    $4.99
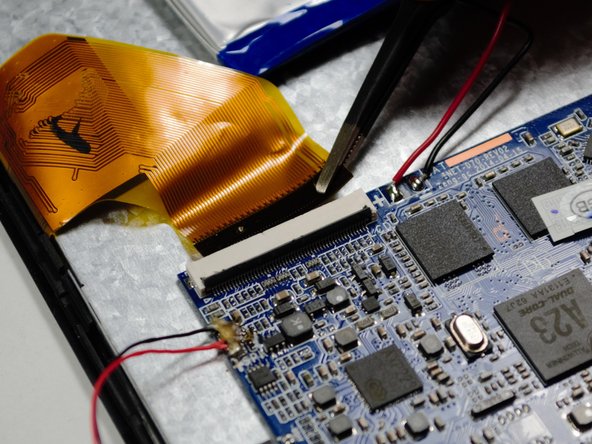
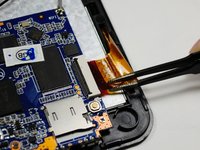
    • Use a pair of Precision Tweezers to squeeze the clip of the ribbon wire to release it.

    댓글 쓰기

  5. Hott T725-8G Screen/Display Replacement: 5 단계, 이미지 3개 중 1개 Hott T725-8G Screen/Display Replacement: 5 단계, 이미지 3개 중 2개 Hott T725-8G Screen/Display Replacement: 5 단계, 이미지 3개 중 3개
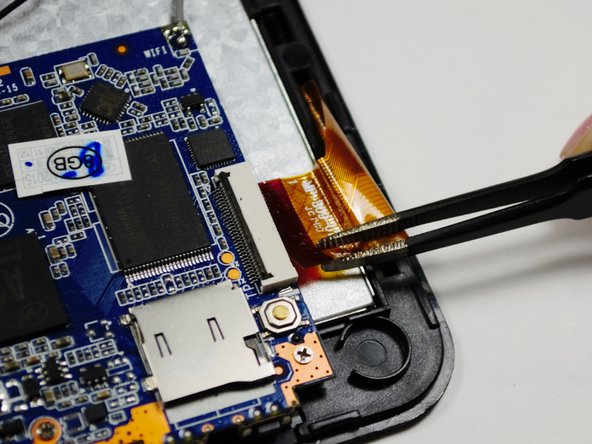
    • Using a pair of the Precision Tweezers, remove the ribbon wire from the clip.

    댓글 쓰기

  6. Hott T725-8G Screen/Display Replacement: 6 단계, 이미지 1개 중 1개
    • Follow the guide to remove the motherboard from the back of the display.

    댓글 쓰기

  7. Hott T725-8G Screen/Display Replacement: 7 단계, 이미지 1개 중 1개
    • Follow the guide to remove the battery from the back of the display.

    댓글 쓰기

  8. Hott T725-8G Screen/Display Replacement: 8 단계, 이미지 1개 중 1개
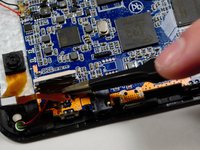
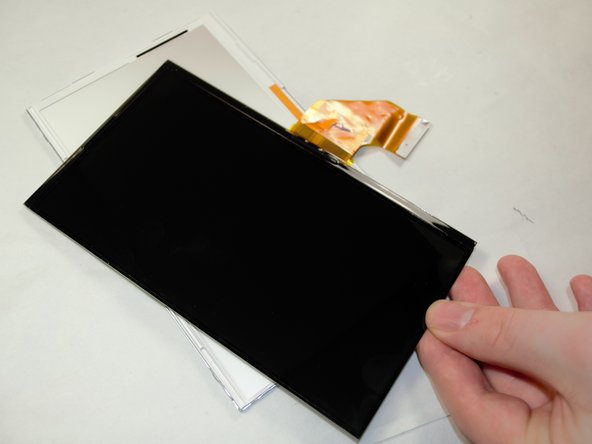
    • With the motherboard and battery detached, use the Metal Spudger tool to gently remove the display from the front panel.

    댓글 쓰기

  9. Hott T725-8G Screen/Display Replacement: 9 단계, 이미지 1개 중 1개
    • Remove Digitizer Panel from the front panel.

    댓글 쓰기

  10. Hott T725-8G Screen/Display Replacement: 10 단계, 이미지 1개 중 1개
    • Remove the LCD 5-Point Touch Screen from the display case.

    댓글 쓰기

  11. Hott T725-8G Screen/Display Replacement: 11 단계, 이미지 1개 중 1개
    • Remove the display from the plastic casing. The screen is now ready for replacement.

    댓글 쓰기

결론

To reassemble your device, follow these instructions in reverse order.

취소: 해당 안내서를 완성하지 않았습니다.

다른 2명이 해당 안내서를 완성하였습니다.

작성자

2다른 기여자 명과 함께

Emma Carroll

회원 가입일: 10/20/16

220 평판

안내서 5개를 작성함

UMass Dartmouth, Team 6-2, Martin Fall 2016 UMass Dartmouth, Team 6-2, Martin Fall 2016 회원

UMASSD-MARTIN-F16S6G2

3 회원들

안내서 11개를 작성함

0가이드 댓글

댓글 쓰기

조회 통계:

지난 24시간: 0

지난 7일: 4

지난 30일: 22

전체 시간: 536