주요 콘텐츠로 건너뛰기
수리 커뮤니티 가입 - 계정 만들기

How to Fix a Broken XLR Microphone Cable

필요한 것

    1. How to Fix a Broken XLR Microphone Cable, How to Fix a Broken XLR Microphone Cable: 1 단계, 이미지 3개 중 1개 How to Fix a Broken XLR Microphone Cable, How to Fix a Broken XLR Microphone Cable: 1 단계, 이미지 3개 중 2개 How to Fix a Broken XLR Microphone Cable, How to Fix a Broken XLR Microphone Cable: 1 단계, 이미지 3개 중 3개
      • This guide will utilize a soldering iron. Please use a heat-resistant surface and proceed with caution.

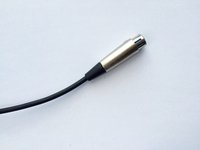
      • Place the end of the XLR Cable on a clean, uncluttered surface.

      • Using a small screwdriver, unscrew the single screw near the top of the cable.

      • Gently pull apart the exterior metal from the internal mechanism.

      댓글 쓰기

    2. How to Fix a Broken XLR Microphone Cable: 2 단계, 이미지 1개 중 1개
      • Assess which connections have fallen loose. In this instance, the white cable is disconnected.

      댓글 쓰기

    3. How to Fix a Broken XLR Microphone Cable: 3 단계, 이미지 2개 중 1개 How to Fix a Broken XLR Microphone Cable: 3 단계, 이미지 2개 중 2개
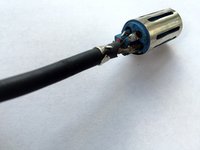
      • Assess whether or not there's enough exposed wire to reconnect loose cables. In this instance, the exposed cables are too short to effectively reconnect.

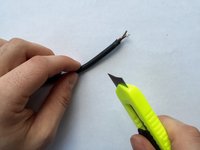
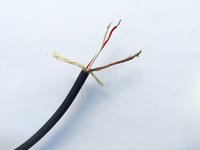
      • If the exposed wires are too short, use wire strippers or a razor to cut back the insulation.

      • Separate the wires.

      댓글 쓰기

    4. How to Fix a Broken XLR Microphone Cable: 4 단계, 이미지 3개 중 1개 How to Fix a Broken XLR Microphone Cable: 4 단계, 이미지 3개 중 2개 How to Fix a Broken XLR Microphone Cable: 4 단계, 이미지 3개 중 3개
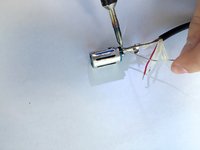
      • Soldering irons are extremely hot. Proceed with extreme caution.

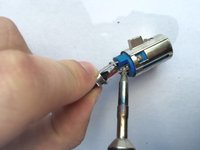
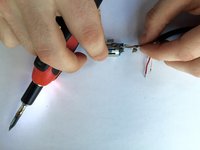
      • Solder each of the loose wires to the coinciding metal prong.

      • For more information on effectively soldering wire, please visit iFixit's Soldering Guide.

      • If necessary, use a thin wire to further manipulate the connection.

      댓글 쓰기

    5. How to Fix a Broken XLR Microphone Cable: 5 단계, 이미지 2개 중 1개 How to Fix a Broken XLR Microphone Cable: 5 단계, 이미지 2개 중 2개
      • When the soldering is complete, reconnect the metal exterior to the head of the cable.

      • Using a small screwdriver, reattach the single screw.

      댓글 쓰기

결론

To reassemble your device, follow these instructions in reverse order.

취소: 해당 안내서를 완성하지 않았습니다.

다른 4명이 해당 안내서를 완성하였습니다.

작성자

4다른 기여자 명과 함께

Abbie Zajac

회원 가입일: 01/19/16

203 평판

안내서 1개를 작성함

Oakland University, Team 6-3, Walwema Winter 2016 Oakland University, Team 6-3, Walwema Winter 2016 회원

OAK-WALWEMA-W16S6G3

2 회원들

안내서 12개를 작성함

1가이드 댓글

Great repair. If the cabke is broken I have a video on resolving that issue. https://youtu.be/E8CiX4cnc-U

DIM Tips - 답글 공유

댓글 쓰기

조회 통계:

지난 24시간: 4

지난 7일: 38

지난 30일: 196

전체 시간: 28,539