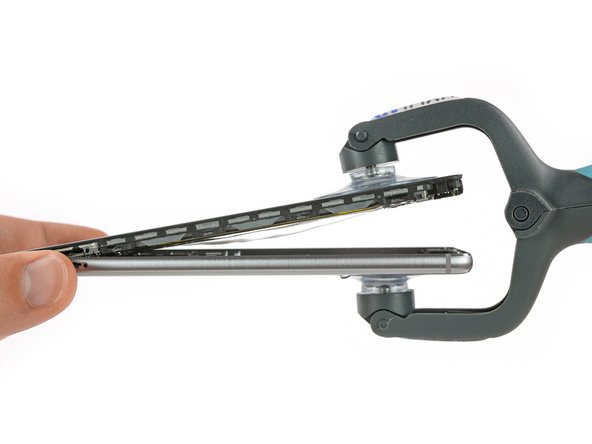
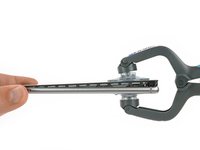
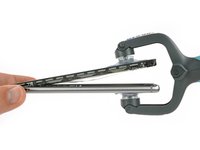
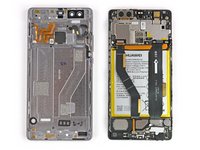
주요 콘텐츠로 건너뛰기

Huawei P9 Plus Display with Frame Replacement

필요한 것

  1. Huawei P9 Plus Display with Frame Replacement, Rear Case: 1 단계, 이미지 1/2 Huawei P9 Plus Display with Frame Replacement, Rear Case: 1 단계, 이미지 2/2
    • First switch off your phone.

    • Remove the SD and SIM card tray.

  2. Huawei P9 Plus Display with Frame Replacement: 2 단계, 이미지 1/1
    • Remove the two P2 Pentalobe screws on either side of the USB C port.

  3. Huawei P9 Plus Display with Frame Replacement: 3 단계, 이미지 1/2 Huawei P9 Plus Display with Frame Replacement: 3 단계, 이미지 2/2
    • Use an iSclack or a suction handle to separate the display unit from the rear case.

    • Do not fully separate the pieces as they are still connected by the fingerprint sensor cable.

  4. Huawei P9 Plus Display with Frame Replacement: 4 단계, 이미지 1/3 Huawei P9 Plus Display with Frame Replacement: 4 단계, 이미지 2/3 Huawei P9 Plus Display with Frame Replacement: 4 단계, 이미지 3/3
    • After separating the rear case flip the other half open to get to the flex connectors.

    • With a spudger unplug the flex connector of the fingerprint sensor and the one of the side buttons.

    • Remove the rear case.

  5. Huawei P9 Plus Display with Frame Replacement, Battery: 5 단계, 이미지 1/2 Huawei P9 Plus Display with Frame Replacement, Battery: 5 단계, 이미지 2/2
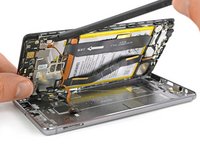
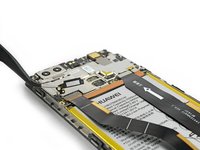
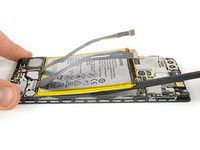
    • Remove the sticker that sits on top of the left screw above the battery.

    • Remove the three Phillips #00 screws that hold the metal plates in place.

  6. Huawei P9 Plus Display with Frame Replacement: 6 단계, 이미지 1/2 Huawei P9 Plus Display with Frame Replacement: 6 단계, 이미지 2/2
    • Both metal plates have little hooks. Use a tweezer to free them and unhinge the plates by carefully moving them upwards.

  7. Huawei P9 Plus Display with Frame Replacement: 7 단계, 이미지 1/3 Huawei P9 Plus Display with Frame Replacement: 7 단계, 이미지 2/3 Huawei P9 Plus Display with Frame Replacement: 7 단계, 이미지 3/3
    • Use a spudger to unplug the screen flex cable.

    • Unplug the motherboard flex cable and the battery flex cable afterwards.

  8. Huawei P9 Plus Display with Frame Replacement: 8 단계, 이미지 1/2 Huawei P9 Plus Display with Frame Replacement: 8 단계, 이미지 2/2
    • The adhesive strips at the top of the battery are less likely to rip if you pull them horizontally in a straight line and not upwards or in any other direction.

    • Use a set of tweezers to unfold the black tab enough to grab with your fingers.

    • Pull the first adhesive strip in a slow and constant movement.

    • Jerking or slackening your grip can cause the adhesive to bunch up and rip.

  9. Huawei P9 Plus Display with Frame Replacement: 9 단계, 이미지 1/2 Huawei P9 Plus Display with Frame Replacement: 9 단계, 이미지 2/2
    • Loosen the end of the other adhesive strip with a tweezer and pull it out. If needed use the iOpener again to soften the glue a little.

  10. Huawei P9 Plus Display with Frame Replacement: 10 단계, 이미지 1/3 Huawei P9 Plus Display with Frame Replacement: 10 단계, 이미지 2/3 Huawei P9 Plus Display with Frame Replacement: 10 단계, 이미지 3/3
    이 단계에 사용된 도구:
    Tesa 61395 Tape
    $5.99
    구매
    • Use a spudger to slide under the battery.

    • If you managed to pull out the adhesive strips you can easily lift out the battery. Otherwise use the iOpener once more to soften any adhesive leftovers. There are no cables under the battery that can be harmed.

    • Remove the battery.

    • When reassembling your phone, replace old adhesive with stretch release adhesive strips, double-sided tape, or pre-cut adhesive strips.

  11. Huawei P9 Plus Display with Frame Replacement, Display: 11 단계, 이미지 1/3 Huawei P9 Plus Display with Frame Replacement, Display: 11 단계, 이미지 2/3 Huawei P9 Plus Display with Frame Replacement, Display: 11 단계, 이미지 3/3
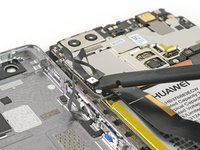
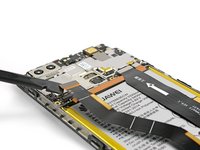
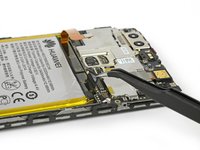
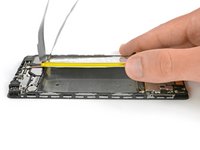
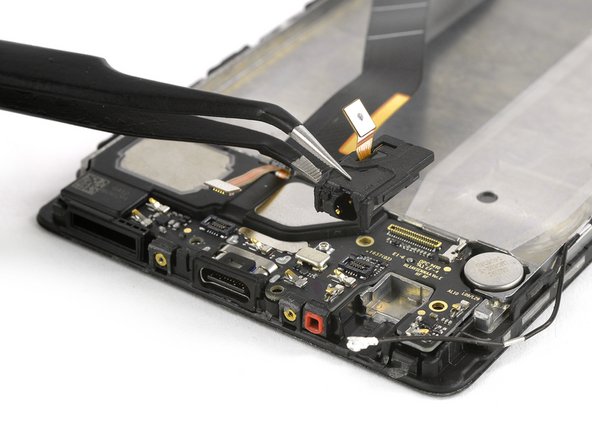
    • Use a tweezer to remove the sticker that sits on top of the screw next to the antenna cable.

    • Unplug the antenna cable and release it from the bracket on the metal plate covering the main flex cable.

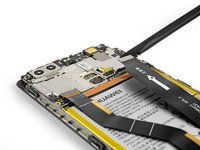
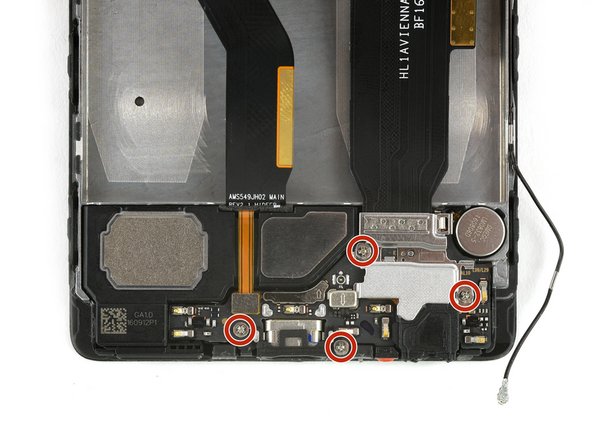
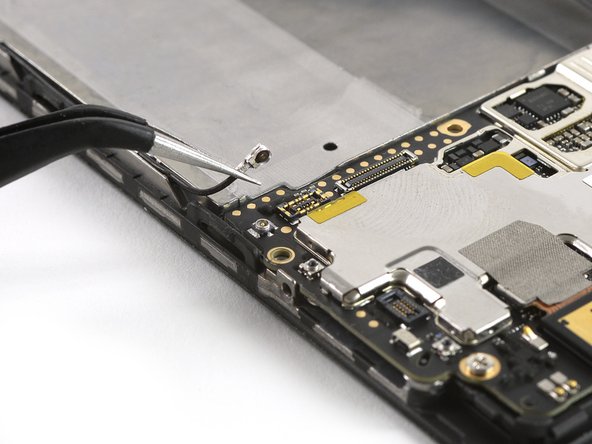
    • Remove the four Phillips #00 screws.

  12. Huawei P9 Plus Display with Frame Replacement: 12 단계, 이미지 1/3 Huawei P9 Plus Display with Frame Replacement: 12 단계, 이미지 2/3 Huawei P9 Plus Display with Frame Replacement: 12 단계, 이미지 3/3
    • The plate, which is covering the motherboard flex cable, has little hooks on each side. Use a tweezer to free them and unhinge the plate by carefully moving it upwards.

    • Use a spudger to unplug the motherboard flex cable and remove it.

    • Unplug the flex connector of the loudspeaker.

  13. Huawei P9 Plus Display with Frame Replacement: 13 단계, 이미지 1/2 Huawei P9 Plus Display with Frame Replacement: 13 단계, 이미지 2/2
    • Use a spudger to unplug the flex connector of the headphone jack.

    • Remove the headphone jack.

    • Be careful with the contacts inside and in the bottom area of the headphone jack. They can be damaged easily.

  14. Huawei P9 Plus Display with Frame Replacement: 14 단계, 이미지 1/2 Huawei P9 Plus Display with Frame Replacement: 14 단계, 이미지 2/2
    • Use a spudger to lift out the daughter board.

    • Lift the loudspeaker out of the mid frame. There is some adhesive underneath, so it can be a little bit sticky.

  15. Huawei P9 Plus Display with Frame Replacement, Display with Frame: 15 단계, 이미지 1/3 Huawei P9 Plus Display with Frame Replacement, Display with Frame: 15 단계, 이미지 2/3 Huawei P9 Plus Display with Frame Replacement, Display with Frame: 15 단계, 이미지 3/3
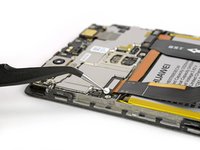
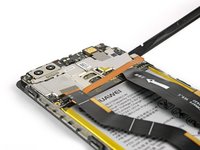
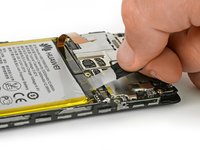
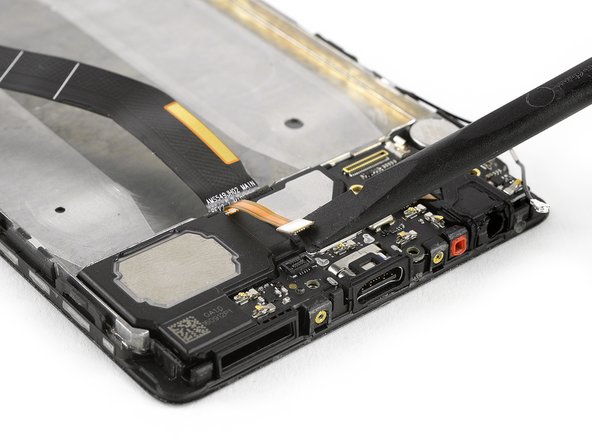
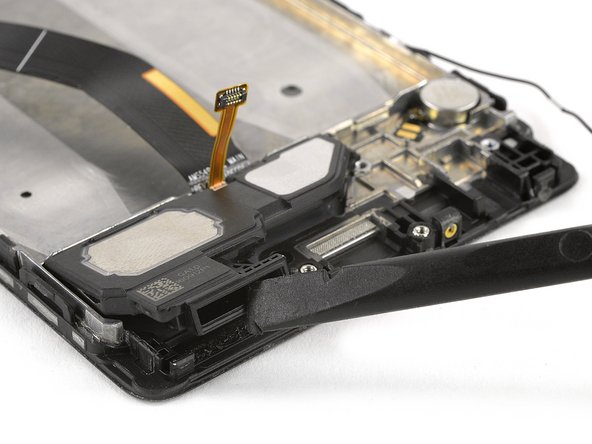
    • Use a tweezer to loosen the vibration motor flex cable. Be careful since it is a little bit sticky.

    • Remove the vibration motor.

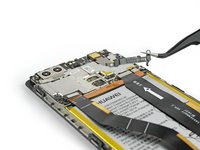
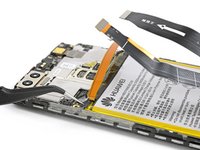
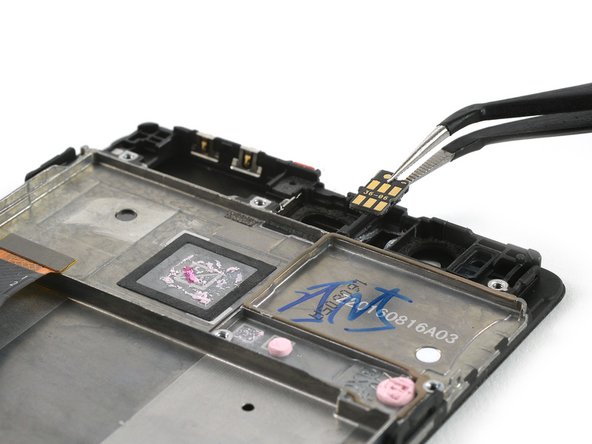
    • Use a tweezer to unplug the antenna cable and remove it.

  16. Huawei P9 Plus Display with Frame Replacement: 16 단계, 이미지 1/3 Huawei P9 Plus Display with Frame Replacement: 16 단계, 이미지 2/3 Huawei P9 Plus Display with Frame Replacement: 16 단계, 이미지 3/3
    • Remove the three Phillips #00 screws.

    • Use a spudger to lift and remove the motherboard assembly, being mindful of the cameras.

    • On the back of the motherboard are thermal pads (pink rubber-like gobs) for heat dissipation. If theses thermal pads broke, are too dried out or stick to the old display assembly, you need to apply new thermal pads on the new display assembly or the motherboard.

  17. Huawei P9 Plus Display with Frame Replacement: 17 단계, 이미지 1/2 Huawei P9 Plus Display with Frame Replacement: 17 단계, 이미지 2/2
    • Remove the earpiece speaker with a tweezer.

    • Take care of the metal connectors to not bend them.

    • Carefully remove the proximity sensor from its recess.

  18. Huawei P9 Plus Display with Frame Replacement: 18 단계, 이미지 1/3 Huawei P9 Plus Display with Frame Replacement: 18 단계, 이미지 2/3 Huawei P9 Plus Display with Frame Replacement: 18 단계, 이미지 3/3
    이 단계에 사용된 도구:
    Tesa 61395 Tape
    $5.99
    구매
    • Carefully remove the spring contacts from the display assembly without bending them.

    • Remove the rubber microphone gasket.

    • Before reassembly check your new part for any components that might need to be transferred from the old one (e.g. plastic inlay for the proximity sensor). Also check if the thermal pads (pink rubber-like gobs) need to be replaced.

    • When reassembling your phone replace old adhesive with double-sided tape or pre-cut adhesive strips.

결론

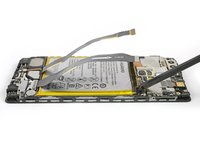
To reassemble your device, follow these instructions in reverse order. Reapply adhesive where necessary after removing any residue.

다른 7명이 해당 안내서를 완성하였습니다.

Dominik Schnabelrauch

회원 가입일: 11/23/16

203,160 평판

안내서 682개 작성하였습니다

iFixit iFixit 회원

Staff

135 회원들

안내서 16,767개 작성하였습니다

댓글 6개

should camera work before putting into rear case?

maclaw - 답글

Can you do with the Camera replacement and where to buy it? Thank you in Advance.

Juan Carlos Núñez Duarte - 답글

do you sell huawei p9 32gb mainboard?

chiang paul - 답글

Hat super geklappt, aber ein kleines Plastikteil war nicht mit in der Anleitung: https://imgur.com/a/SFYVXnE

Worked perfectly, but a small piece of plastic was missing in the instructions: https://imgur.com/a/SFYVXnE

Sv443 - 답글

Thanks for the note. Added it as an example for the check old and new part for missing components)

Tobias Isakeit -

댓글 쓰기

조회 통계:

24 시간 전: 2

7일 전: 6

30일 전: 28

전체 시간: 6,914