
Microsoft Zune 30 GB Battery and Hard Drive Replacement

This is a relative easy way to change your battery and hard drive on a Zune 30gb


-
-
Tools that are needed to replace the battery and the hard drive
-
small Phillips screwdriver
-
small jewelers flat head screwdriver
-
case opening tool, I use my trusty Ipod opener :)
-
definitely glasses if you are supposed to have them. Some of this stuff is really small.
-
-
-
-
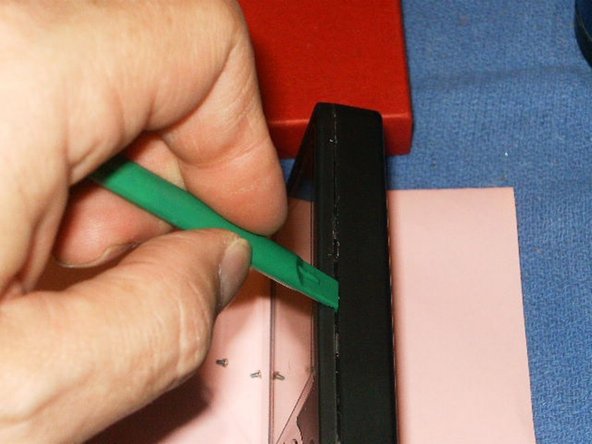
Now it is time to open the case. I used my trusty Ipod opening tools and started on the longer side of the Zune. Just like the Ipod, take your time and carefully open the case. Sometimes it works better if you use two tools. Once it opens, be CAREFUL around the headphone jack when you lift up the case. Lift it slwoly at the port end and then the headphone end. The headphone seems to extend a little into the case and you DO NOT want to break it of the board....
-
-
-
With the battery and the four screws for for the hard drive caddy removed, lift the caddy up and flip it toward the headphone end of the Zune. Remove the hard drive cable clip by opening the black clip on the connector. Use your fingernails or the iPod tool to move the clip carefully to the open position. Take off the sticky tape to reveal the hard drive bumpers. Remove them to free the hard drive. Now replace the hard drive and reassemble the Zune.
-


To reassemble your device, follow these instructions in reverse order.
To reassemble your device, follow these instructions in reverse order.
다른 8명이 해당 안내서를 완성하였습니다.

팀

댓글 2개
My battery won’t charge but powers up with the cable.😀
However I’d really like to access the software since Microsoft doesn’t support anymore and retrieve my playlist and songs. Any thoughts!
IF it is just the battery, you can always replace it. Otherwise you can get a Zif to USB Adapter and try to transfer your files to your computer.