이 안내서에는 최근 변경 사항이 있습니다. 최신 확인되지 않은 버전 으로 전환하세요.

Microsoft Zune HD Inner Chassis Replacement

Remove the inner chassis to access the OLED display panel.


-
-
Remove the four Tri-Wing screws securing the upper rear panel to the inner chassis.
-
-
-
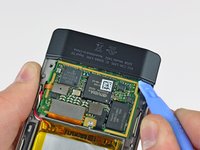
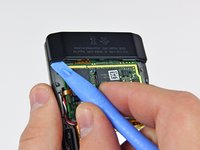
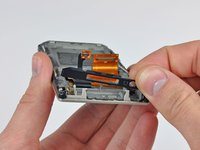
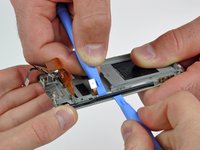
Insert a small Zune opening tool into the gap between the logic board and one side of the black plastic lower rear panel.
-
Carefully twist the Zune opening tool to pop the lower rear panel off the clips attaching it to the Zune.
-
-
-
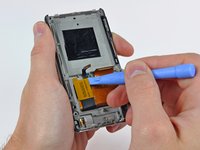
Use a Zune opening tool to pry the digitizer ribbon cable connector up off the logic board.
-
-
-
-
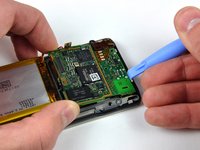
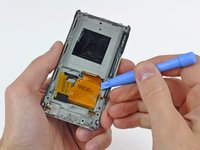
Use a Zune opening tool to push the small plastic clip securing the logic board near its lower left edge toward the headphone jack while gently lifting the upper edge of the logic board.
-
Use a Zune opening tool to pull the plastic clip away from the logic board while gently pulling the board away from the bottom edge of the Zune.
-
-
-
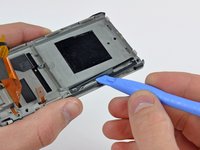
Insert the edge of a Zune opening tool between the black lower bezel and the front case.
-
Pry the lower bezel up off the front case and set it aside.
-
-
-
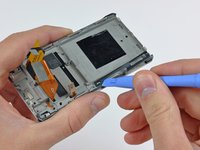
Use a Zune opening tool to gently pry the inner chassis off the front case while simultaneously using another Zune opening tool to push the plastic clip near the control cable connector toward the inside of the Zune.
-
Work your way along the media button side of the Zune to separate both clips securing the front case to the inner chassis.
-
-
-
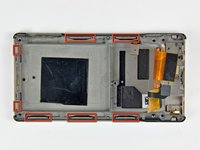
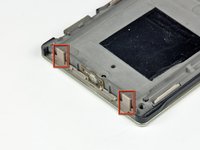
Use a Zune opening tool to very carefully bend both plastic clips along the top edge of the Zune away from the inner chassis while simultaneously prying the respective side of the inner chassis up off the front case.
-
Once the top edge of the inner chassis has been released from the front case, separate the clips along the right edge of the Zune.
-
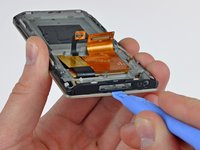
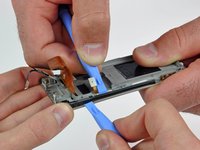
Lift the inner chassis off the front case, minding the digitizer and display ribbon cables routed through a slot near its center.
-


To reassemble your device, follow these instructions in reverse order.
To reassemble your device, follow these instructions in reverse order.
다른 3명이 해당 안내서를 완성하였습니다.
