주요 콘텐츠로 건너뛰기
Nexus 5 Midframe Replacement

Nexus 5 Midframe Replacement

Gaetan

Gaetan8 다른 기여자

최종 수정일 March 5, 2023

10 분
조정
커뮤니티-기여 안내서

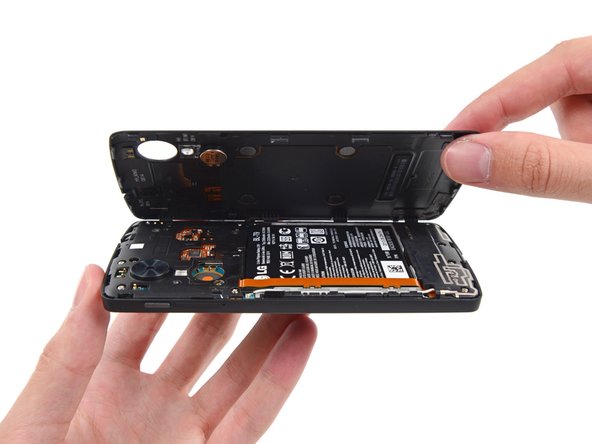
Use this guide to replace the backplate that secures the motherboard of your Nexus 5.

필요한 것

부품

도구

더보기...

iFixit은 귀하가 이 링크를 통해 구매할 때 커미션을 받습니다.
  1. Nexus 5 Midframe Replacement, Back Cover: 1 단계, 이미지 3개 중 1개 Nexus 5 Midframe Replacement, Back Cover: 1 단계, 이미지 3개 중 2개 Nexus 5 Midframe Replacement, Back Cover: 1 단계, 이미지 3개 중 3개
    • Use a plastic opening tool to free the clips on the top and each side of the back cover.

    • The bottom is secured with some adhesive foam. You should be able to finally free the back cover using an opening pick. The "snaps" at the bottom edge are more like hinges, so release all others then swing the back cover off outward from the top, and these fasteners will release without breaking.

    • It's best to avoid prying around the SIM card slot and volume controls, as the plastic in these areas is very thin and likely to break from prying.

    • When you replace the cover, there is a snap about even with the flash window that must also be attached (one of three that secure the back cover to the midframe). Qi (wireless) charging may not work if this isn't secure. Apply gentle but firm pressure over the "S" in "Nexus" and slide your thumb up towards the top, and the snap will engage.

  2. Nexus 5 Midframe Replacement, Midframe: 2 단계, 이미지 1개 중 1개
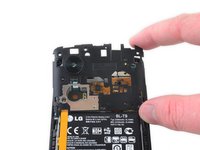
    • Remove the six 4.0 mm Phillips #00 screws that secure the midframe to the phone.

    • Ensure you retain all six of the 4.0mm screws! These hold the midframe securely and closely to the motherboard. The three small snaps on the back cover that attach to the midframe ensure the NFC antenna and wireless charging coil connectors contact securely with the motherboard, and work reliably.

    • To replace the LCD screen and digitizer, remove the additional four 4.0mm daughterboard cover screws with the same screwdriver. You may have to pierce through clear adhesive material to remove them.

  3. Nexus 5 Midframe Replacement: 3 단계, 이미지 2개 중 1개 Nexus 5 Midframe Replacement: 3 단계, 이미지 2개 중 2개
    • Remove the midframe from the phone.

    • Examine the midframe and the back cover and you'll find three very small snap attachment points for the back to the midframe. These ensure that the NFC and wireless charging antenna contacts connect with the corresponding spring connectors on the motherboard. Ensure the snaps are in good condition.

결론

To reassemble your device, follow these instructions in reverse order.

다른 18명이 해당 안내서를 완성하였습니다.

작성자

8다른 기여자 명과 함께

Gaetan

회원 가입일: 12/26/12

9,586 평판

안내서 18개를 작성함

댓글 2개

Bonjour est ce que le remplacement de la vitre de la caméra uniquement est possible? Comment est ce fixé sur le midframe ?

Merci

Multinet - 답글

Excellent guide. One caution not noted here, I accidentally turned the phone back on while working on getting the midframe out. Be careful to not touch the on/off switch on the side.

gantgrg - 답글

댓글 쓰기

조회 통계:

지난 24시간: 0

지난 7일: 4

지난 30일: 35

전체 시간: 20,193