소개
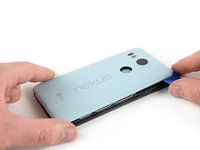
Use this guide to replace the screen assembly for your Nexus 5X. The assembly comes with the screen mounted onto the frame.
You will need to transfer all the parts from your old frame that weren’t included on your replacement part.
In case your display is cracked—to protect your eyes from glass shreds and to get a better grip to open the phone, tape over the screen.
Before disassembling your phone, discharge the battery below 25%. If your battery is swollen, do not heat your phone. Swollen batteries can be very dangerous, so wear eye protection and exercise due caution, or take it to a professional if you're not sure how to proceed.
You’ll need replacement adhesive to reattach components when reassembling the device.
필요한 것
-
-
Insert a SIM card ejection tool into the hole on the SIM card tray, located on the left edge of the phone.
-
Press in to eject the SIM card tray.
-
Remove the SIM card tray.
-
-
-
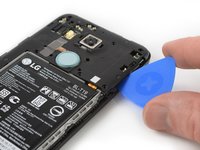
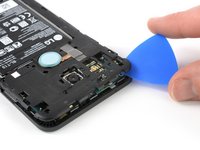
Place an opening pick in the opening of the SIM card tray slot and twist it sideways to release the first plastic clip that holds the rear panel in its place.
-
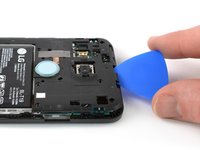
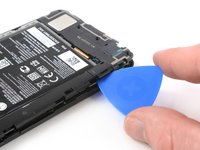
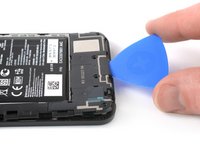
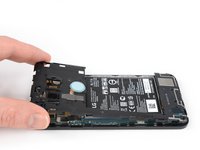
Slide the opening pick around the top edge of the phone to release the plastic clips that secure the rear panel.
-
-
-
-
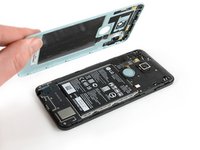
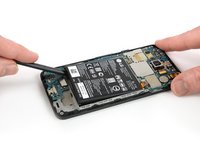
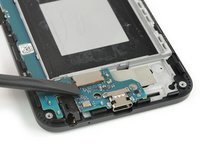
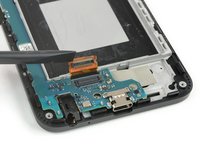
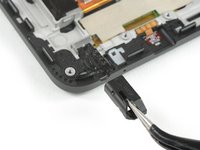
Use the edge of a spudger to pry up and disconnect the battery flex cable located at the bottom right of the motherboard.
-
-
-
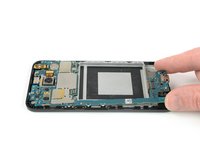
Use an iOpener to loosen the adhesive beneath the battery. Apply the iOpener on the back of the phone for at least two minutes.
-
-
-
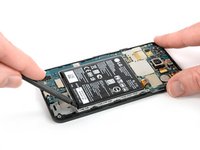
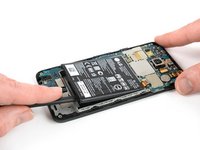
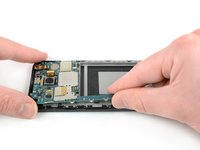
Insert the flat end of a spudger under the bottom left corner of the battery and gently pry upwards.
-
If you are having trouble prying up the battery, the adhesive may not be loose enough. You can apply some isopropyl alcohol under each corner of the battery and allow it to penetrate for several minutes to help weaken the adhesive.
-
-
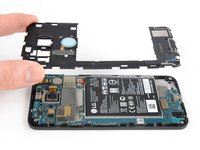
15 단계 Motherboard Assembly
주의: 15-18 단계들은 진행 중으로 표시된 안내서에서 제공되었습니다.
-
Use an iOpener to loosen the adhesive beneath the rear facing camera. Place the iOpener across the top part of the phone for about 30 seconds.
-
-
이 단계에 사용된 도구:Tweezers$4.99
-
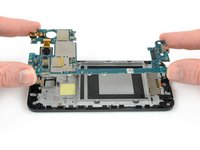
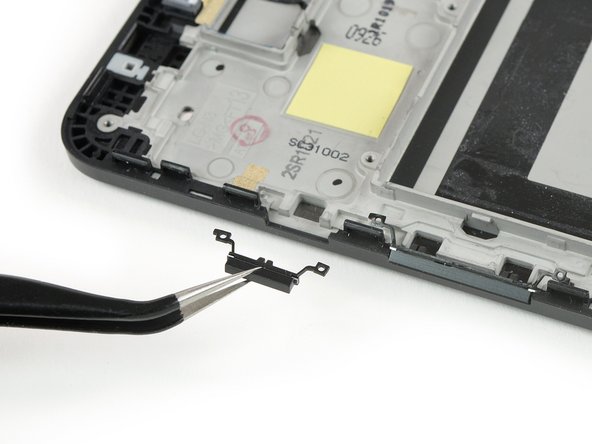
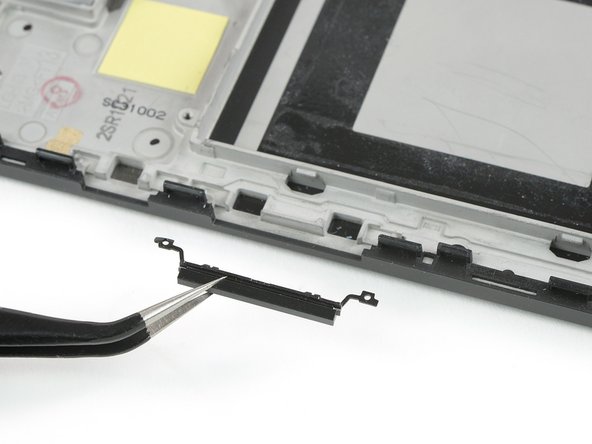
Use a pair of tweezers to free the rubber feet and lift the power button upwards.
-
Remove the power button.
-
-
-
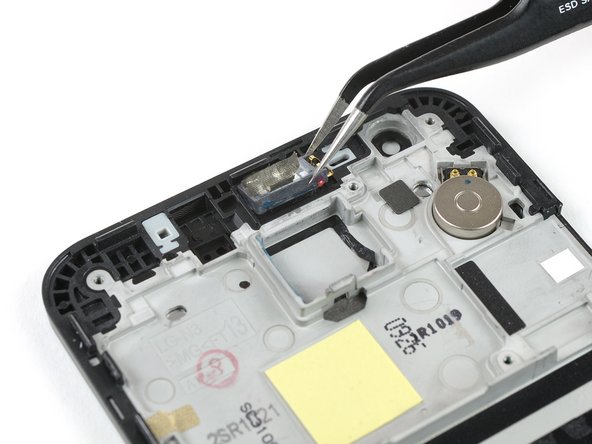
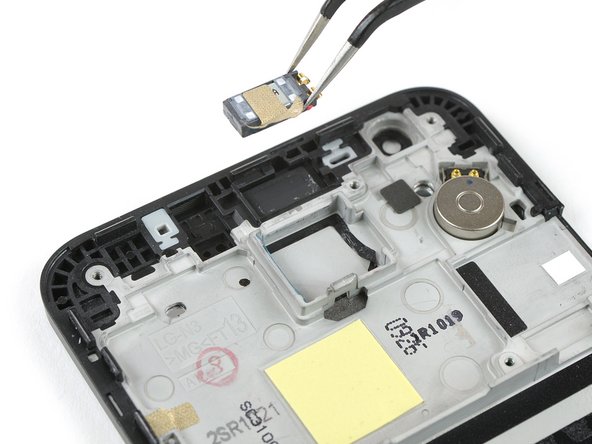
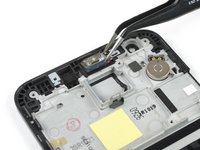
The adhesive underneath the vibration motor is strong. Use an iOpener on the top part of the screen for about 30 seconds to loosen it.
-
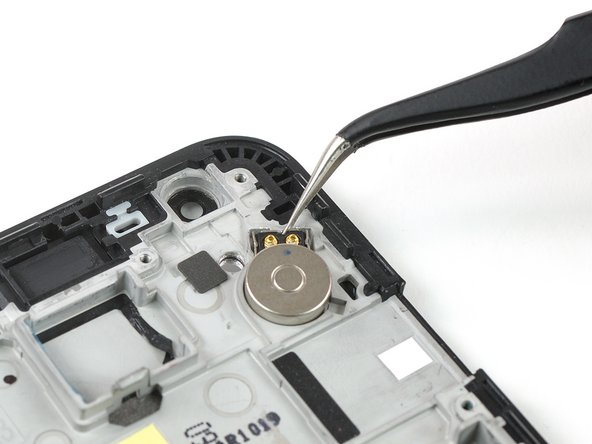
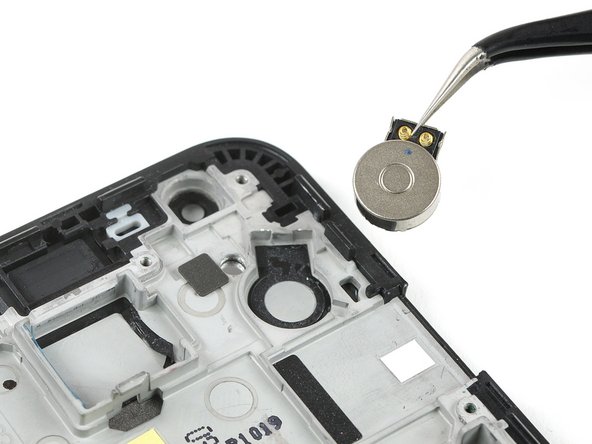
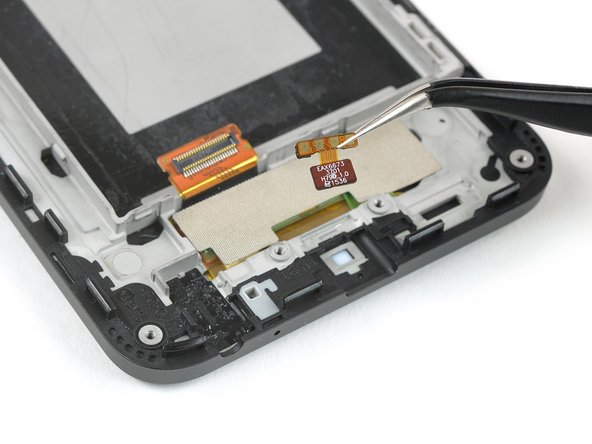
Use a pair of tweezers to pry up and remove the vibration motor.
-


To reassemble your device, follow these instructions in reverse order.
Take your e-waste to an R2 or e-Stewards certified recycler.
Repair didn’t go as planned? Check out our Nexus 5X Answers community for troubleshooting help.

