주요 콘텐츠로 건너뛰기
PowerBook G4 Aluminum 17" 1.67 GHz (High-Res) RAM Replacement

PowerBook G4 Aluminum 17" 1.67 GHz (High-Res) RAM Replacement

Walter Galan

Walter Galan7 다른 기여자

최종 수정일 March 5, 2018

5 - 10 분
쉬움
추천 가이드

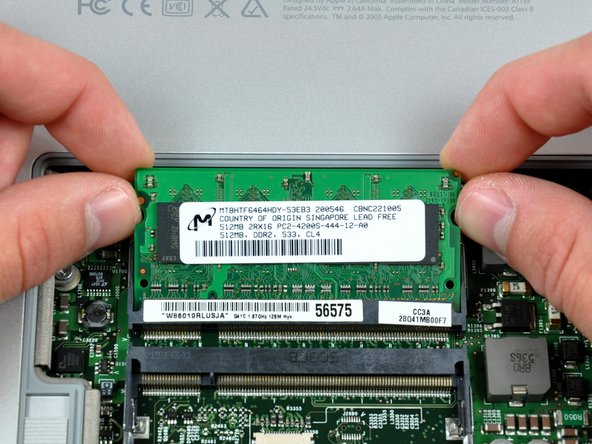
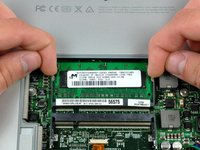
Upgrade your RAM for an instant increase in speed.

필요한 것

iFixit은 귀하가 이 링크를 통해 구매할 때 커미션을 받습니다.
  1. PowerBook G4 Aluminum 17" 1.67 GHz (High-Res) RAM Replacement, Battery: 1 단계, 이미지 2개 중 1개 PowerBook G4 Aluminum 17" 1.67 GHz (High-Res) RAM Replacement, Battery: 1 단계, 이미지 2개 중 2개
    • Use your thumbs to push the two battery retaining tabs away from the battery.

    • The battery should pop up enough to rotate it toward yourself and lift it out of the lower case.

  2. PowerBook G4 Aluminum 17" 1.67 GHz (High-Res) RAM Replacement, Memory Door: 2 단계, 이미지 1개 중 1개
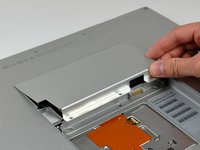
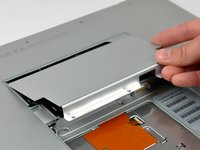
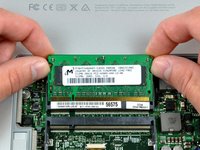
    • Remove the three 2.3 mm Phillips screws securing the memory cover to the lower case.

  3. PowerBook G4 Aluminum 17" 1.67 GHz (High-Res) RAM Replacement: 3 단계, 이미지 2개 중 1개 PowerBook G4 Aluminum 17" 1.67 GHz (High-Res) RAM Replacement: 3 단계, 이미지 2개 중 2개
    • Lift the memory cover slightly and pull it toward yourself to remove it from the lower case.

  4. PowerBook G4 Aluminum 17" 1.67 GHz (High-Res) RAM Replacement, RAM: 4 단계, 이미지 3개 중 1개 PowerBook G4 Aluminum 17" 1.67 GHz (High-Res) RAM Replacement, RAM: 4 단계, 이미지 3개 중 2개 PowerBook G4 Aluminum 17" 1.67 GHz (High-Res) RAM Replacement, RAM: 4 단계, 이미지 3개 중 3개
    • Use your fingertips to pull the two RAM arms away from the sides of the RAM chip. The chip should pop up slightly.

    • Pull the RAM chip away from its socket and remove it from the logic board.

    • Repeat this process for the other RAM chip, if present.

결론

To reassemble your device, follow these instructions in reverse order.

다른 24명이 해당 안내서를 완성하였습니다.

첨부 문서

작성자

7다른 기여자 명과 함께

Walter Galan

701,237 평판

안내서 1,203개를 작성함

댓글 한 개

What is the maximum ram that I can bump up this system to?

Legendary Ocelot - 답글

댓글 쓰기

조회 통계:

지난 24시간: 0

지난 7일: 10

지난 30일: 11

전체 시간: 8,414