주요 콘텐츠로 건너뛰기

X-Street STR Viper Motherboard Replacement

필요한 것

  1. X-Street STR Viper Motherboard Replacement, X-Street STR Viper: 1 단계, 이미지 1/1
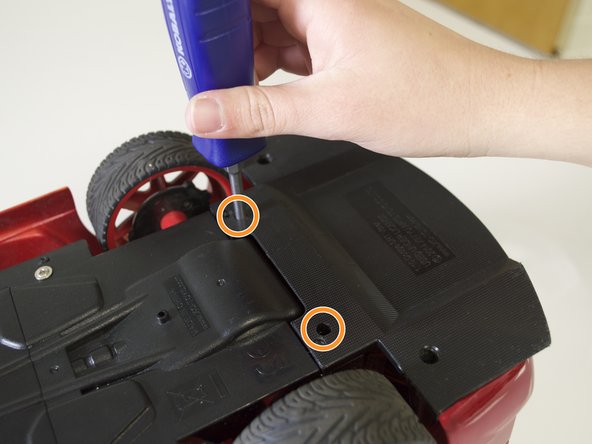
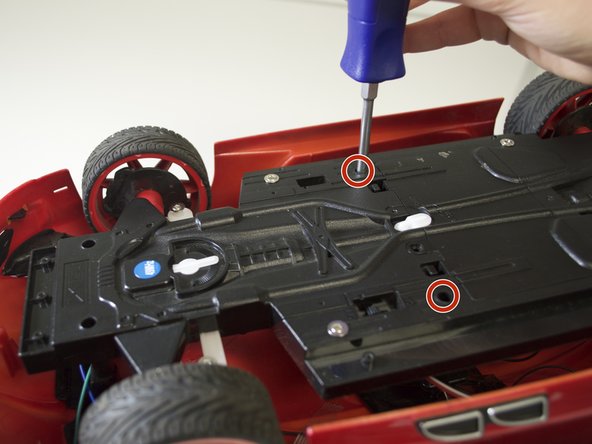
    • Remove the four 3 mm screws from the bottom panel using a 3 mm Philips #1 screwdriver.

  2. X-Street STR Viper Motherboard Replacement: 2 단계, 이미지 1/1
    • Use the 3 mm Philips #1 screwdriver to remove the three 3 mm screws that connect the front panel with the main underside panel. Also remove the 6 mm front panel screw.

    • Remove the bottom panel by pulling the plastic tabs from either side of the car.

  3. X-Street STR Viper Motherboard Replacement: 3 단계, 이미지 1/2 X-Street STR Viper Motherboard Replacement: 3 단계, 이미지 2/2
    • Remove the two 6 mm screws and the two 3 mm screws that connect the back panel to the main underside panel.

    • Remove the two 6 mm screws that connect the rear panel to the body of the car.

  4. X-Street STR Viper Motherboard Replacement: 4 단계, 이미지 1/3 X-Street STR Viper Motherboard Replacement: 4 단계, 이미지 2/3 X-Street STR Viper Motherboard Replacement: 4 단계, 이미지 3/3
    • Remove the two front 6 mm screws and the two middle 6 mm screws.

    • Remove the main underside panel carefully. Excessive force could damage or disconnect the fragile wires attached to this piece.

    • Remove the car shell and place it on the left side of the car.

  5. X-Street STR Viper Motherboard Replacement, Motherboard: 5 단계, 이미지 1/1
    • Make sure the car is turned off before proceeding to any other steps.

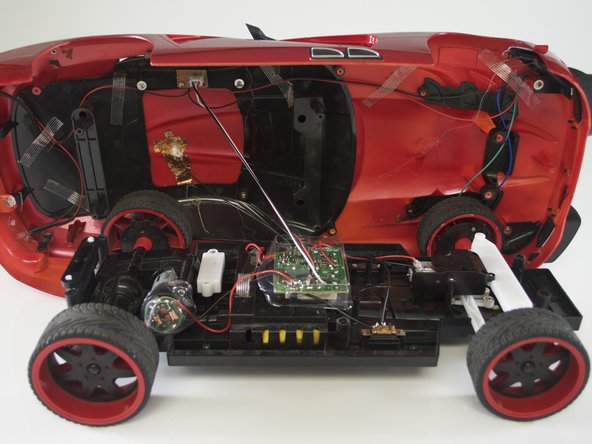
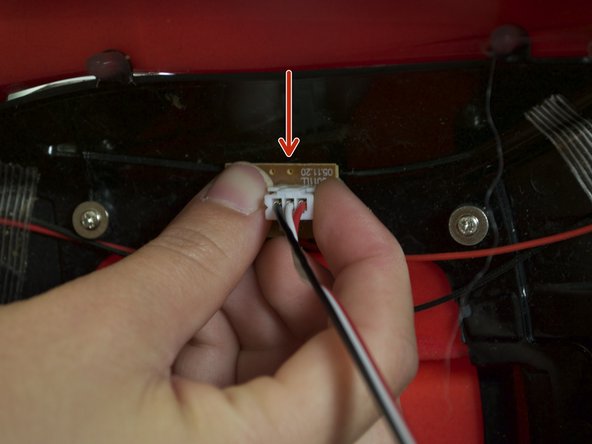
    • Remove the top body of the car from the bottom. Unplug the light connector. Be careful not to pull any of the wires too hard.

  6. X-Street STR Viper Motherboard Replacement: 6 단계, 이미지 1/1
    • Remove the electrical tape. It is connected to the top part of car. This allows you to fully take the car apart.

  7. X-Street STR Viper Motherboard Replacement: 7 단계, 이미지 1/1
    • Unscrew water shield. Remove the 6mm Phillips #2 screw that is holding the water shield in place.

  8. X-Street STR Viper Motherboard Replacement: 8 단계, 이미지 1/1
    • Remove the plastic water shield. Carefully remove the water shield on the motherboard and unscrew the last 3mm Phillips #2 screw on the motherboard.

  9. X-Street STR Viper Motherboard Replacement: 9 단계, 이미지 1/1
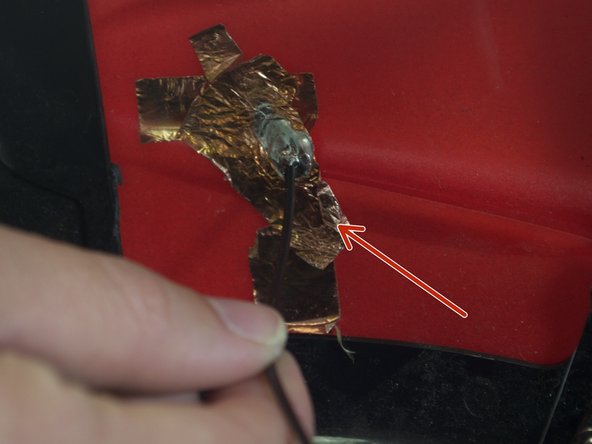
    • Desolder. Use a solder kit to desolder the wires. Make sure to desolder the wires as close to the motherboard as possible. There are ten wires total to desolder.

    • Refer to the how to solder/desolder guide for tips.

    • Pay attention to what wires you desolder. Make sure to not desolder any wires that should not be desoldered.

  10. X-Street STR Viper Motherboard Replacement: 10 단계, 이미지 1/1
    • Replace motherboard. Place the new motherboard in the same position of old motherboard and replace the 3mm Phillips #2 screws.

  11. X-Street STR Viper Motherboard Replacement: 11 단계, 이미지 1/1
    • Solder the existing wires. Solder the new wires from the new motherboard to the preexisting wires that you cut before.

    • Make sure the colors match, red goes with red wire and so on. Also make sure you solder the wires to correct preexisting wires, none of the wires should cross one another

  12. X-Street STR Viper Motherboard Replacement: 12 단계, 이미지 1/2 X-Street STR Viper Motherboard Replacement: 12 단계, 이미지 2/2
    • Put the car back together. Plug the light connector back into its correct position. Put electrical tape back on the wire you took off in step two. Follow the prerequisite steps in reverse order to fully put your car back together.

결승점

다른 한 분이 해당 안내서를 완성하였습니다.

Jolie Higgins

회원 가입일: 04/01/15

208 평판

안내서 1개 작성함

Cal Poly, Team 12-6, Lancaster Spring 2015 Cal Poly, Team 12-6, Lancaster Spring 2015 회원

CPSU-LANCASTER-S15S12G6

4 회원들

안내서 6개 작성하였습니다

댓글 한 개

How can I got new motherboard and. New controller becuse I lost my controller

germane hernandez - 답글

댓글 쓰기

조회 통계:

24 시간 전: 1

7일 전: 2

30일 전: 5

전체 시간: 405